Tamiya Sea Harrier detail question
Discussion
I've got a Tamiya 1:48 Sea Harrier - it's an old kit which in general lacks detail and has some shape problems, but the one that's bothering me the most is the intakes, which taper too much and the openings are far too small. They are also missing the auxilliary doors even as closed outlines.
I've been looking for aftermarket intakes for this kit but it seems that all the suppliers who used to make these have stopped or vanished, so looking for help here. I see a Flightpath kit available for this model which has a lot of bits and pieces, but doesn't list the intakes specifically and the pictures I can find are not conclusive. It costs about twice as much as the model itself so I don't want to spend all that much and get a bunch of nice bits but no intakes!
Does anyone know any good sources I can check, either for replacement intakes or to see what the flightpath kit has? I've failed on Google....
Finally managed to find someone who's built one using the Flightpath set. Sounds like it includes the missing doors but as you say doesn't actually replace the intakes themselves. They didn't look too bad with the doors added, I must say. I think the missing doors exaggerate any shape problems they have perhaps.
You’d be better off looking for a different kit the Tamiya one is awful.
Raised panel lines?
ETA by the time you’ve paid for all the aftermarket shenanigans you may as well buy something like this
https://www.hannants.co.uk/product/K48035
Raised panel lines?
ETA by the time you’ve paid for all the aftermarket shenanigans you may as well buy something like this
https://www.hannants.co.uk/product/K48035
Edited by robemcdonald on Saturday 31st August 21:40
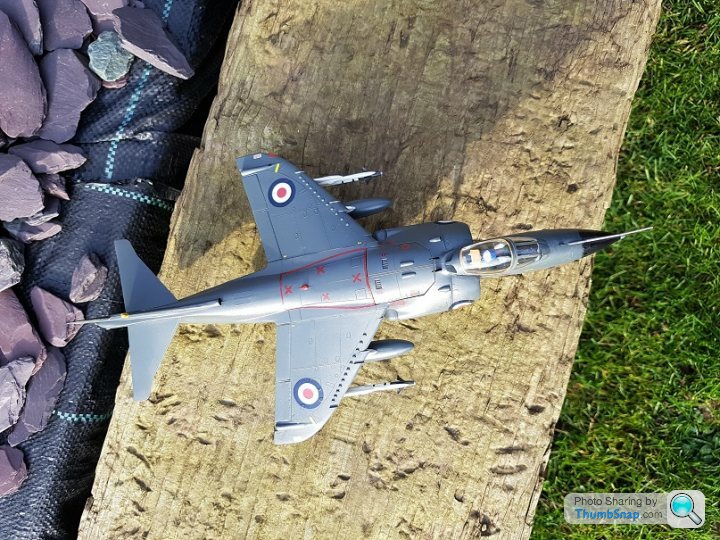
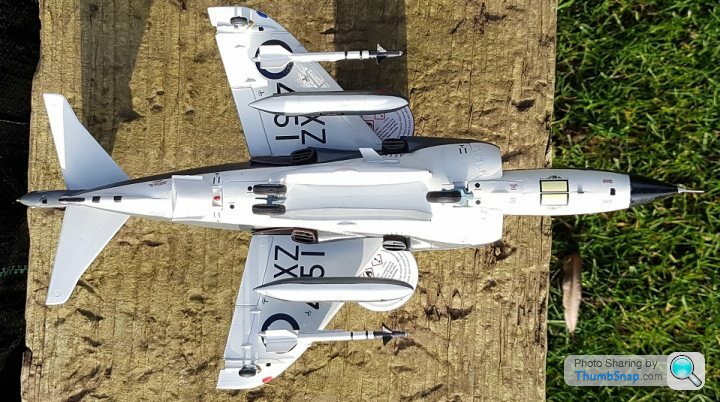
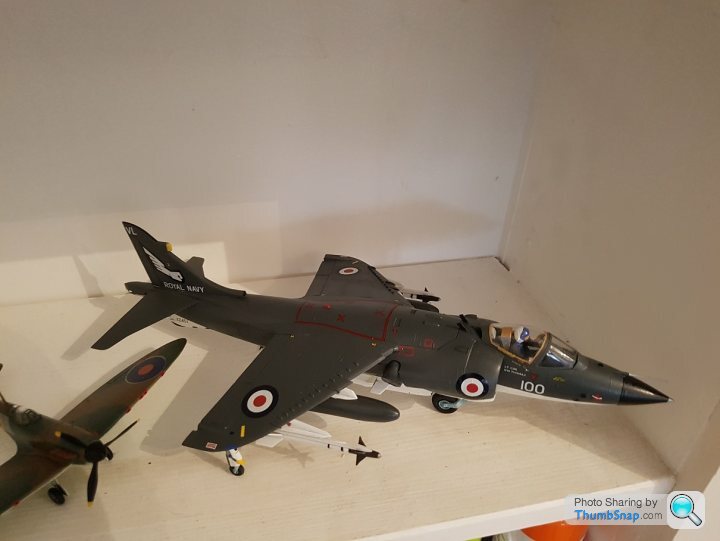
Just thought I'd finish off this old thread by sharing a few photos of the finished model now it's done.
Don't have the skills nor patience to meet the standards that are the norm here on PH, so I will admit I do set my bar much lower and will tolerate flaws and inaccuracies that would have most of you binning the model, but the end result is good enough for me to look at and enjoy, and as I get back into the hobby each model is getting better finished than the last one. I haven't built scale models since I was a teenager - a long time ago - and I wanted to do a small collection of 1/20 Formula 1 cars, but I started with aircraft to get used to airbrushing and get back into building and get my skills up before I let loose on the cars, which I want to be really nice.
The Sea Harrier didn't go together too badly on the whole, needed a fair bit of filler and sanding - and could have used more around the wing roots at least. I had terrible trouble with the decals. I split two roundels trying to get them in place, and the big red box on the back just broke into bits when I tried to move it off the backing paper. It was unusable and I ended up having to paint that box and the Xs on.
It's built OOB. In the end, I got no extra bits for it. Paints are Humbrol enamels. Gloss white on the bottom, matt blue grey (no. 79 I think) on the top. Don't ask me for logic behind that mix. There is none. Finished in Humbrol satin varnish which did cloud over and leave white residue so there's a coat of gloss on top of that too. Airbrushed on to try to keep it from getting too shiny. The pictures in sunlight make the grey look lighter than it really is so there's one photo inside as well to give the colour a better representation.


Thanks for the generous feedback 
I purposefully didn't take photos which get too close to the detail, because it's nice from far but far from nice if you look closely. It had its problems and was a good learning curve.. the nozzles are two piece and they don't join well in the middle. Tried filling them in to hide the join but wasn't successful. They got a bit better but the seam is still obvious. Also the engine display cover isn't a great fit because I wanted it to remain removable, but while the engine looks OK if a little lacking in detail, the interior of the fuselage definitely isn't built for display and looks terrible around the engine.
I didn't notice until the pictures that the main wheels aren't quite aligned properly.
I got glue on the canopy glass and couldn't quite tidy that up.
List goes on, but I'm happy enough with it.
Gassing Station | Scale Models | Top of Page | What's New | My Stuff


