Applying decals
Discussion
I’m what you might call an occasional modeller, been trying to get better at some things. I always struggled with the decals, just using water. They always seemed to look stuck on.
On my current build I’m trying Decalfix, which helps the decal look more like part of the model but it leaves a shiny residue behind and seems to soften some paints ruining a Matt finish.
So, what are the top tips for applying decals well?
On my current build I’m trying Decalfix, which helps the decal look more like part of the model but it leaves a shiny residue behind and seems to soften some paints ruining a Matt finish.
So, what are the top tips for applying decals well?
I use microsol aswell. Have to be careful sometimes as it makes the decal very soft.
When I do my decals, I always clear lacquer them after, both gloss & matt. I make some of my own decals & they are printed gloss & go onto matt painted cars so have to clear lacquer them else it would look odd.
You can see all my builds here: https://www.flickr.com/photos/130735614@N06/albums
When I do my decals, I always clear lacquer them after, both gloss & matt. I make some of my own decals & they are printed gloss & go onto matt painted cars so have to clear lacquer them else it would look odd.
You can see all my builds here: https://www.flickr.com/photos/130735614@N06/albums
Always apply to a gloss coat, brush microsol first onto the area you want the decal, then apply decal, roll with cotton wool bud to make sure there is no moisture trapped underneath the carrier film, then a coat of microset and let it do it's thing, apply a few more coats if required. Let dry for 24 hours then apply another coat of clear over the top of everything (matt or gloss depending on what you want)
So even if you are building a matt finished model, I will apply a gloss coat before the decals, that way you can clean up any residue without it bleeding into the paint and then put your final matt coat over the top.
So even if you are building a matt finished model, I will apply a gloss coat before the decals, that way you can clean up any residue without it bleeding into the paint and then put your final matt coat over the top.
Gary29 said:
Always apply to a gloss coat, brush microsol first onto the area you want the decal, then apply decal, roll with cotton wool bud to make sure there is no moisture trapped underneath the carrier film, then a coat of microset and let it do it's thing.
You don’t apply MicroSol first, otherwise you risk the decal grabbing, and not being able to adjust position. In theory you put MicroSet first, then the decal, then MicroSol on top. In practice I use Klear instead of MicroSet, and also wick a bit of MicroSol under the decal once in position.
You don’t need a high gloss finish for decals, just enough to seal the matt paint from staining. So long as there’s some kind of setting solution under them to eliminate slivering (in my case Klear, you can’t go far wrong.
blueST said:
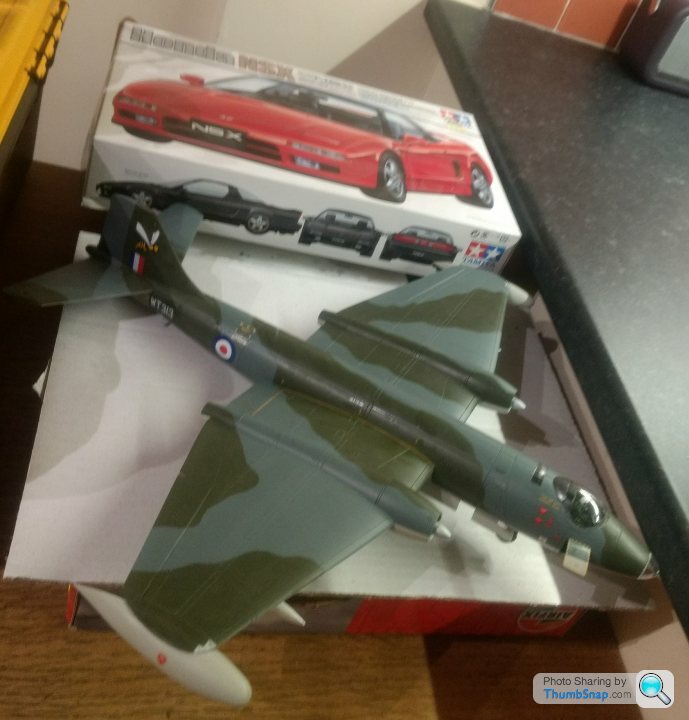
Current one is 1:48 EE Canberra, I’ve ended up spoiling the camo pattern where the decalfix has touched the acrylic dark green. I’ve got a 1:24 Honda NSX lined up to do over the Christmas hols. It’s my favourite car so I really want to make a good fist of it.
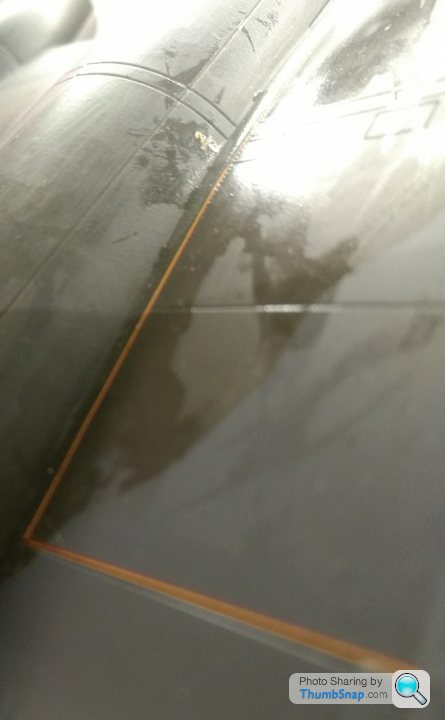
Can you post some pics of the Canberra, and what the NSX looks like?Sorry the lens on my phone camera is goosed, so it takes shocking pics. The worst bit is the dark green camo on the wing root nearest. There are thin yellow stripe decals to be applied along panel line. I’ve done the first two but where the decal fix has dried it has eaten to acrylic dark green, spoiled the finish and left a sheen everywhere I’ve applied it.
Hang on, I’ll try and get a better pic....
Hang on, I’ll try and get a better pic....
blueST said:
If that was mine I’d try to recover it by applying a thin coat of Johnson’s Klear over the whole model to normalise everything to gloss. When dry, apply the rest of the decals (with MicroSol as per my method in a previous post), then after they’re set overnight, apply another coat of Klear to seal the decals. When cured, apply a matt coat. Matt coats can be very problematic, but so far I’ve had no issues with Windsor & Newton Galeria.If the paint is physically damaged (can’t see if it is), it’ll be very tricky to correct whatever you do. As things stand, you’ve got little to lose by trying the Klear method. If you decide to give it a go, don’t forget to mask the canopy and any other transparent parts!
You mentioned a finish that had to be gloss and matt, which would require masking, where is that?
dr_gn said:
You don’t apply MicroSol first, otherwise you risk the decal grabbing, and not being able to adjust position.
In theory you put MicroSet first, then the decal, then MicroSol on top. In practice I use Klear instead of MicroSet, and also wick a bit of MicroSol under the decal once in position.
You don’t need a high gloss finish for decals, just enough to seal the matt paint from staining. So long as there’s some kind of setting solution under them to eliminate slivering (in my case Klear, you can’t go far wrong.
Sorry, I always get them confused, I use the BLUE bottle first, then the REDIn theory you put MicroSet first, then the decal, then MicroSol on top. In practice I use Klear instead of MicroSet, and also wick a bit of MicroSol under the decal once in position.
You don’t need a high gloss finish for decals, just enough to seal the matt paint from staining. So long as there’s some kind of setting solution under them to eliminate slivering (in my case Klear, you can’t go far wrong.
I use Klear as well, there are many ways to skin a cat I suppose.
Gary29 said:
dr_gn said:
You don’t apply MicroSol first, otherwise you risk the decal grabbing, and not being able to adjust position.
In theory you put MicroSet first, then the decal, then MicroSol on top. In practice I use Klear instead of MicroSet, and also wick a bit of MicroSol under the decal once in position.
You don’t need a high gloss finish for decals, just enough to seal the matt paint from staining. So long as there’s some kind of setting solution under them to eliminate slivering (in my case Klear, you can’t go far wrong.
Sorry, I always get them confused, I use the BLUE bottle first, then the REDIn theory you put MicroSet first, then the decal, then MicroSol on top. In practice I use Klear instead of MicroSet, and also wick a bit of MicroSol under the decal once in position.
You don’t need a high gloss finish for decals, just enough to seal the matt paint from staining. So long as there’s some kind of setting solution under them to eliminate slivering (in my case Klear, you can’t go far wrong.
I use Klear as well, there are many ways to skin a cat I suppose.
I tend to use just Microsol. I brush a little on before applying the decal, and a bit more afterwards. Where the decal is reluctant to follow the shape of the surface, I use a bit of soft sponge to press it down. A hair dryer helps here as well - brush a bit of Microsol on, then heat it. It's quite critical; get the decal too wet and it can move when you press it, too dry and it can stick to the sponge and be pulled off.
As others have said, use a coat of gloss clear before and after decalling, followed by matt clear if it's needed.
Most important, do NOT trim the clear surround off the decal. If you've applied it properly, the surround will be rendered invisible.
As others have said, use a coat of gloss clear before and after decalling, followed by matt clear if it's needed.
Most important, do NOT trim the clear surround off the decal. If you've applied it properly, the surround will be rendered invisible.
Gassing Station | Scale Models | Top of Page | What's New | My Stuff


