UGears Locomotive
Discussion
Good afternoon all,
This Christmas I received a rather lovely wooden model kit from my brother from a Ukrainian company called UGears. They are a small Kickstarter funded company that supply all sorts of models that have intricate gear mechanisms allowing them to perform all sorts of actions. They come supplies in the form of semi-cut out pieces (similar to most models I guess) and are all made entirely of 3-ply pine.
They have designs for a faux Ford Model A truck with a variety of optional add-ons, a safe with programmable combination lock, a merry-go-round and a locomotive - amongst several others. Every model features some form of motion powered by elastic bands. Some, like the Model A and locomotive, also have gear boxes of sorts for forward and reverse motion, as well as neutral.
I opted for the locomotive:

As you can, see are supplied with the semi-cut out boards, elastic bands and tooth picks:

First off, the middle bit!

Nice and easy. Next was a larger pile of bits. I must add that this is my first go at model making, aside from Supermarine Spitfire, Messerschmitt BF109 and R.M.S Titanic (a personal interest of mine) Airfix models I made when I was a lad. I'm hoping I don't break anything as the model looks like it should be quite nice to look at:

This yielded the following:


Various parts in friction with one another needed to be lubricated using candle wax. This was tedious as candle wax is not given to spreading easily. Once the pieces had attained a varnish-like sheen I figured that'll probably do. No broken pieces so far! Only a sore thumb as many of the pieces needed to be pressed together and have an interference fit.
Next up, these fiddly little buggers. These were very fragile and not taken to fitting very easily:

You'll notice from here on in I'm using a bit of off-cut I had lurking around due to the miriad of small dents that had somehow appeared in the kitchen table that were in no way connected to my pressing down of parts:


And so I am brought up to here:


Looking quite nice I think, although a way off from the pictures on the box.
Apologies for the brevity, I am both in a hurry and typing on my phone which is a bind at the best of times. I hope this appeals to someone as I think these models are pretty decent, if not up to the mark of some found on this forum. I've not seen any UGear related threads and I'd like to spread the good work of this small start-up in Ukraine. If people are interested I will continue to post brief updates of my progress.
There should be several hours worth yet to complete!
Thanks for reading.
This Christmas I received a rather lovely wooden model kit from my brother from a Ukrainian company called UGears. They are a small Kickstarter funded company that supply all sorts of models that have intricate gear mechanisms allowing them to perform all sorts of actions. They come supplies in the form of semi-cut out pieces (similar to most models I guess) and are all made entirely of 3-ply pine.
They have designs for a faux Ford Model A truck with a variety of optional add-ons, a safe with programmable combination lock, a merry-go-round and a locomotive - amongst several others. Every model features some form of motion powered by elastic bands. Some, like the Model A and locomotive, also have gear boxes of sorts for forward and reverse motion, as well as neutral.
I opted for the locomotive:

As you can, see are supplied with the semi-cut out boards, elastic bands and tooth picks:

First off, the middle bit!

Nice and easy. Next was a larger pile of bits. I must add that this is my first go at model making, aside from Supermarine Spitfire, Messerschmitt BF109 and R.M.S Titanic (a personal interest of mine) Airfix models I made when I was a lad. I'm hoping I don't break anything as the model looks like it should be quite nice to look at:

This yielded the following:


Various parts in friction with one another needed to be lubricated using candle wax. This was tedious as candle wax is not given to spreading easily. Once the pieces had attained a varnish-like sheen I figured that'll probably do. No broken pieces so far! Only a sore thumb as many of the pieces needed to be pressed together and have an interference fit.
Next up, these fiddly little buggers. These were very fragile and not taken to fitting very easily:

You'll notice from here on in I'm using a bit of off-cut I had lurking around due to the miriad of small dents that had somehow appeared in the kitchen table that were in no way connected to my pressing down of parts:


And so I am brought up to here:


Looking quite nice I think, although a way off from the pictures on the box.
Apologies for the brevity, I am both in a hurry and typing on my phone which is a bind at the best of times. I hope this appeals to someone as I think these models are pretty decent, if not up to the mark of some found on this forum. I've not seen any UGear related threads and I'd like to spread the good work of this small start-up in Ukraine. If people are interested I will continue to post brief updates of my progress.
There should be several hours worth yet to complete!
Thanks for reading.
I made a small amount of progress yesterday, putting together the front bogey, pistons and making a start on the main body of the locomotive.
The constituent parts of the front bogey:

It was a pain in the arse getting the toothpicks through the wheels to A. join them together and B. affix them to the bogey. Toothpicks are fragile and hateful things! Plus there's always the ever present fear of slipping and impaling myself. But I managed it and only snapped one toothpick!


And I completed the first entire board of pieces, hurrah!

The next pile of bits were to make up the pistons and cylinder blocks (sorry train people, I'm not terribly aux fais with the anatomy of a steam locomotive!):

These pieces had to be threaded down three toothpicks and as mentioned before, the figment is tight. My thumbs will never be same...:


These were then attached to the floor pan of what will be the main body of the train:

And so I have a small collection of semi-completed parts:

Loosely assembled for perspective:


Unbelievably this constitutes about 5 hours worth of effort. Cutting the pieces that refuse to pop out from the board and trimming the subsequent burrs can be painstaking but necessary to prevent breakages and to attain a better fit. Up next is the first of the complex mechanisms that make up the drivetrain and gearbox. I have a limited supply of elastic bands so let's hope I don't make a pigs ear of this!
The constituent parts of the front bogey:

It was a pain in the arse getting the toothpicks through the wheels to A. join them together and B. affix them to the bogey. Toothpicks are fragile and hateful things! Plus there's always the ever present fear of slipping and impaling myself. But I managed it and only snapped one toothpick!


And I completed the first entire board of pieces, hurrah!

The next pile of bits were to make up the pistons and cylinder blocks (sorry train people, I'm not terribly aux fais with the anatomy of a steam locomotive!):

These pieces had to be threaded down three toothpicks and as mentioned before, the figment is tight. My thumbs will never be same...:


These were then attached to the floor pan of what will be the main body of the train:

And so I have a small collection of semi-completed parts:

Loosely assembled for perspective:


Unbelievably this constitutes about 5 hours worth of effort. Cutting the pieces that refuse to pop out from the board and trimming the subsequent burrs can be painstaking but necessary to prevent breakages and to attain a better fit. Up next is the first of the complex mechanisms that make up the drivetrain and gearbox. I have a limited supply of elastic bands so let's hope I don't make a pigs ear of this!
Did you ever finish it...? 
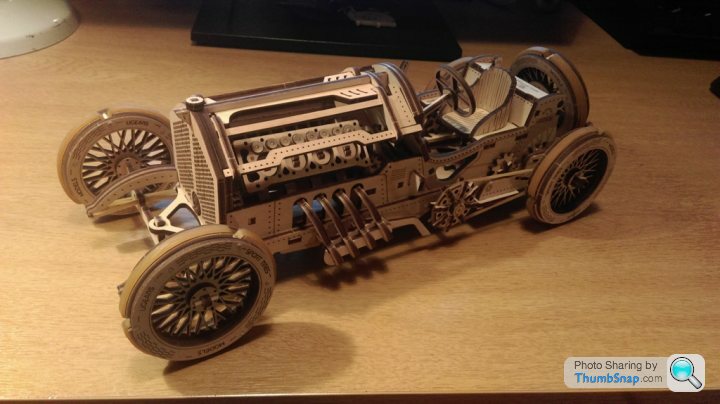
For Christmas I got myself the new U-9 Grand Prix car - and a very nice model it is too! Yes I have sore fingers now and managed to slide a split cocktail stick under my thumb nail while pressing in a stubborn one - such fun!

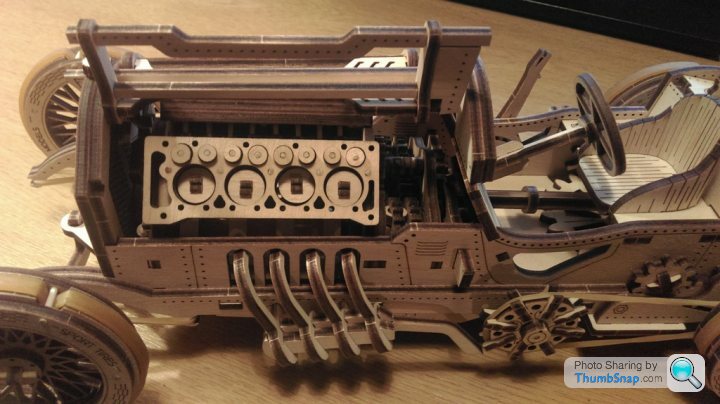
However I did enjoy building it, there are some nice touches and clever techniques employed. The finished model looks impressive and the operating V8 looks very cool
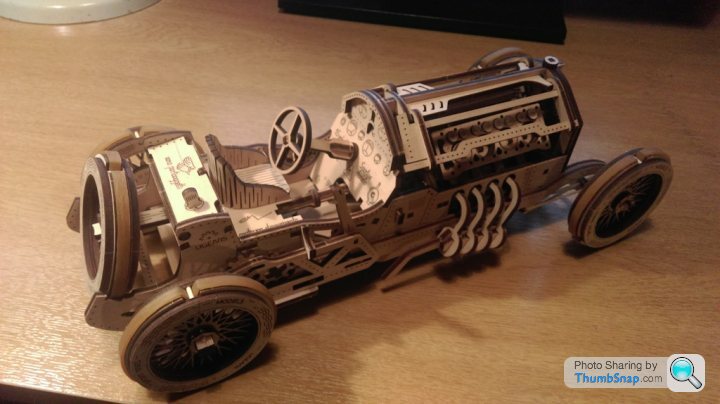
Sorry not build pics, but here's the finished article:

The rubber band 'chain drive' is just for show - the wheels are gear driven (Forward, neutral and reverse gear)


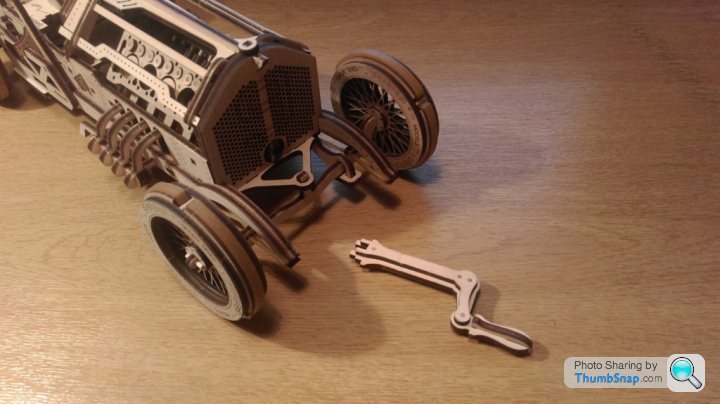
'Starting handle' to wind up the rubber band drive!

Well worth the £50 I'd say

For Christmas I got myself the new U-9 Grand Prix car - and a very nice model it is too! Yes I have sore fingers now and managed to slide a split cocktail stick under my thumb nail while pressing in a stubborn one - such fun!


However I did enjoy building it, there are some nice touches and clever techniques employed. The finished model looks impressive and the operating V8 looks very cool

Sorry not build pics, but here's the finished article:

The rubber band 'chain drive' is just for show - the wheels are gear driven (Forward, neutral and reverse gear)


'Starting handle' to wind up the rubber band drive!

Well worth the £50 I'd say

Some incomplete photos I dug up for those that are interested of the rest of the build and final product:


Some belated closure! Unfortunately doesn't work properly as I wasn't thorough enough with the deburring/lubricating. Mechanism works if moved by hand but not under rubber band power. Looks nice nonetheless!


Some belated closure! Unfortunately doesn't work properly as I wasn't thorough enough with the deburring/lubricating. Mechanism works if moved by hand but not under rubber band power. Looks nice nonetheless!
Gassing Station | Scale Models | Top of Page | What's New | My Stuff


