3D Printed 1/4 Scale Subaru EJ20 Boxer Engine
Discussion
I must first start this post with a thank you to "ericthepoolboy" who is the guy who has gone through great pain in 3D modelling the whole engine with a ruler & digital verns. This model was created from a real engine he had in his garage.
This thread will detail the build of this model from start to finish using my two 3D printers:
1. Stratasys 1200es - commercial grade FDM printer.
2. Formlabs Form2 - semi professional SLA printer.
I have taken delivery of the new Formlabs Form 2 printer this week and I am super impressed by the detail of this machine, especially considering it cost 1/10th the price of the Stratasy machine brand new! If you are looking at this machine or are in doubt, don't be, go ahead and buy it as it will simply blow you away, especially if you have experience with hobby grade FDM machines.
Ok so since starting my 3D printing business I haven't really made an effort to put together any impressive display pieces for people to see when visiting, tbh I hadn't really come across any good models or had the time to sit down and draw something. That is until I came across the Subaru engine model just after getting the new Formlabs printer. So let the thread begin.
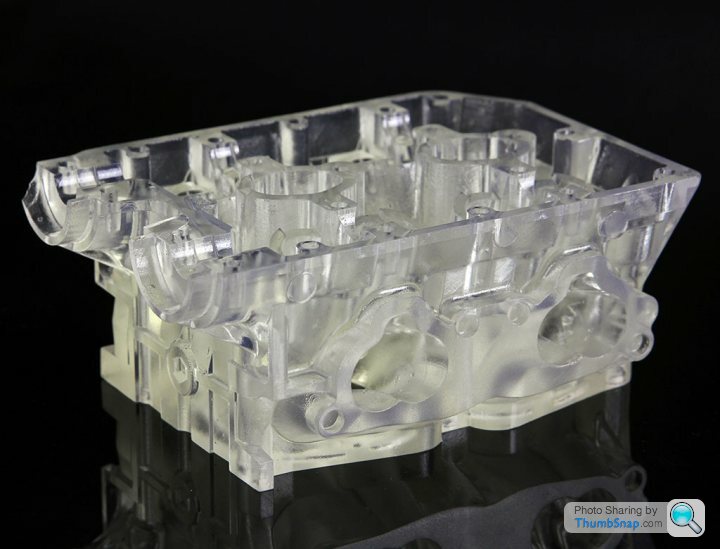
So far I have printed the cylinder head, it has been cleaned with alcohol and the support structured removed. It needs some internal supports removing with some delicate tweezers, my great big pliers are simply too cackhanded for this job, new tools are required I think.
Pictures to follow.
This threads first picture:
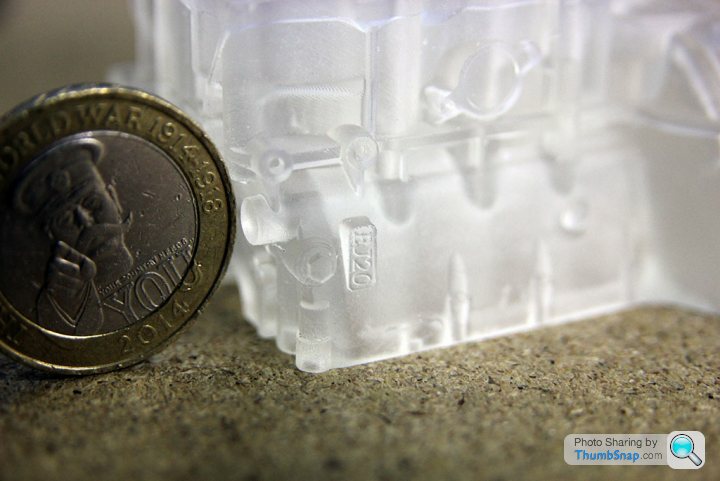
This is my third print, each one getting more complicated with each try to find the limits. This is one half of the Subaru engine block at 1/8 scale. This was printed at the machines lowest quality layer height: 0.1mm.

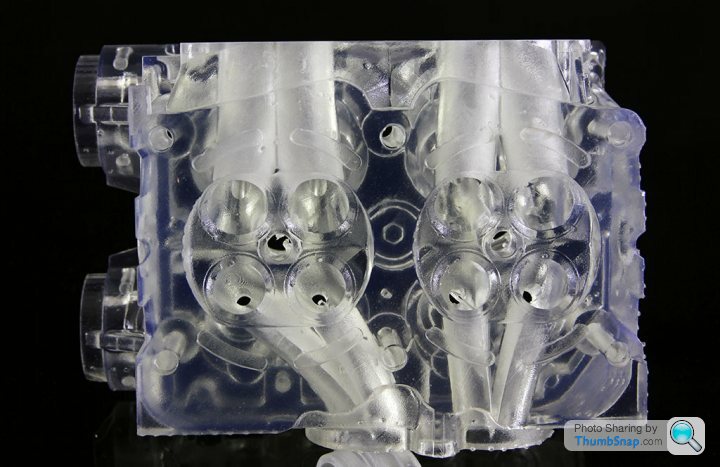
Yesterday I finished printing one of the cylinder heads at 1/4 scale, build time was 10 hours. The part is approximately 110 x 75 x 45mm so a fairly sizeable piece of the puzzle.
The block and heads will be printed in clear resin but they need various levels of finishing to bring an acceptable level of optical clarity. Unfortunately this will involve some glass, various grades of sandpaper, arms of steel and a finishing coat of 'Crystal Clear Acrylic' spray
This is my third print, each one getting more complicated with each try to find the limits. This is one half of the Subaru engine block at 1/8 scale. This was printed at the machines lowest quality layer height: 0.1mm.

Yesterday I finished printing one of the cylinder heads at 1/4 scale, build time was 10 hours. The part is approximately 110 x 75 x 45mm so a fairly sizeable piece of the puzzle.
The block and heads will be printed in clear resin but they need various levels of finishing to bring an acceptable level of optical clarity. Unfortunately this will involve some glass, various grades of sandpaper, arms of steel and a finishing coat of 'Crystal Clear Acrylic' spray
Edited by Mudgey on Friday 5th August 17:47
So hugely jealous of a printer that can do that sort of resolution 
I started work on the 3D design of a 1:48 VIIc U-boat and British Corvette (with interiors), and then I calculated how much it would cost, even just for the "twiddly" bits. So yeah, hoping to see those print prices drop in coming years!

I started work on the 3D design of a 1:48 VIIc U-boat and British Corvette (with interiors), and then I calculated how much it would cost, even just for the "twiddly" bits. So yeah, hoping to see those print prices drop in coming years!

Updates 
Hah yea, this new one is a huge jump up in detail over the other machine, however the build volume is much smaller & the materials not as strong, so swings n roundabouts...
I've been trying out a few different techniques to get a better optical clarity. It seems the best finish is to fully polish the machined mating surfaces on the head up to 5000 grit sand paper, along with acrylic spray over the rest of the model. The other surfaces almost look like a cast finish much like the original head. On the next sample i'll cover the inlet/exhaust ports so they retain their cloudy appearing which will make it a little easier to make out when viewing through the clear sides of the head.
In all honesty it looks far better in real life than what the camera shows!
Part of the cylinder head will be next. Unfortunately I don't know how far I can go with this model, the designer of the CAD model had intended for this to be printed on FDM machines and has split up quite a few components that my machine could handle in one go, i'll see if I can get hold of the native CAD models to modify.


Edited by Mudgey on Wednesday 10th August 17:11
Gassing Station | Scale Models | Top of Page | What's New | My Stuff


