Technic Lego Tank build
Discussion
I thought it sensible to start a thread of it's own rather than fill the technic thread with lots of pictures of a build.
Took the Crane/Digger apart, bought a shed load of stuff from eBay, and now making a tank. It's really hard making it up as you go, with no instructions, but immensely satisfying, even though it's pretty anti-social lol
1 - Basic chassis. Things are so much harder when there are no instructions.
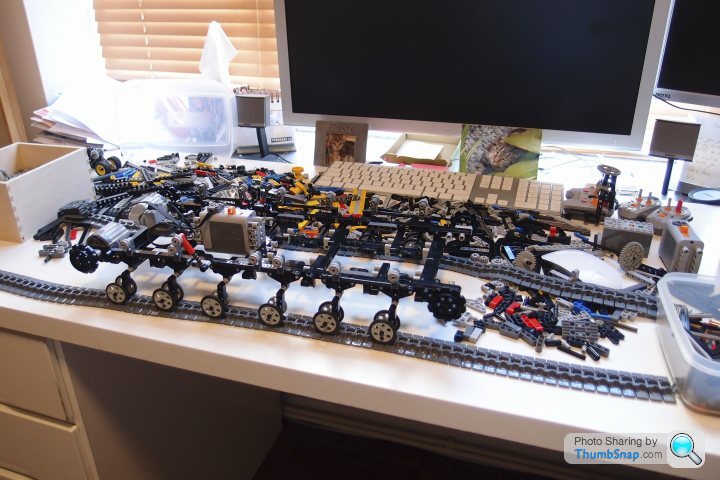
2 - Torsion bar suspension to allow the rollers (road wheels) to move over obstacles

3 - Temporary location for power supply for testing.
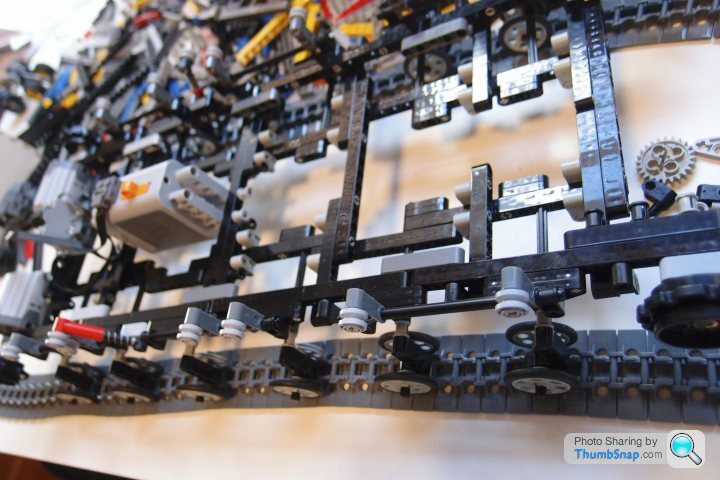
4 - With the tracks added, it now looks like a tank chassis :-)
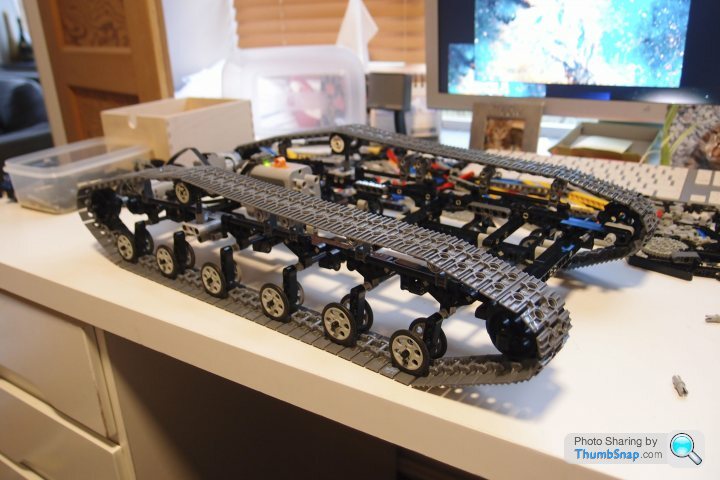
5 - Torsion beam suspension and spring tensioner to keep the tracks taught.
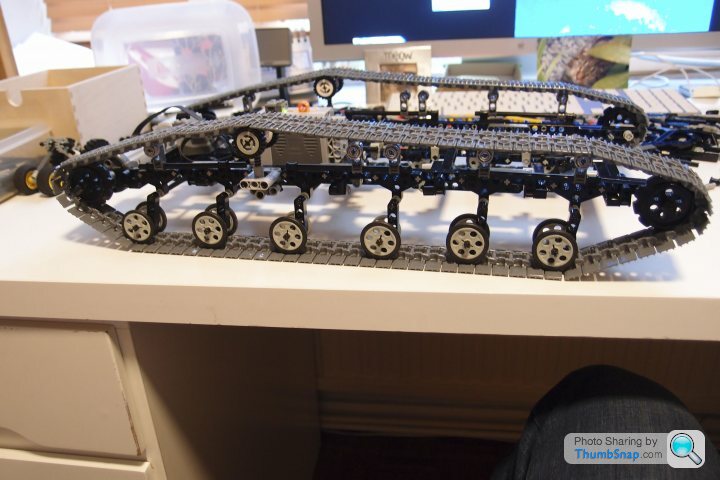
6 - Flimsy looking but should take a body and a turret.
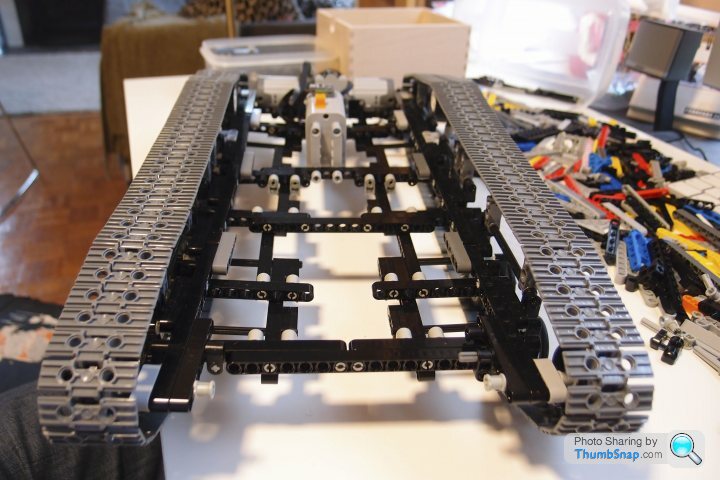
7 - Close up of the torsion suspension.
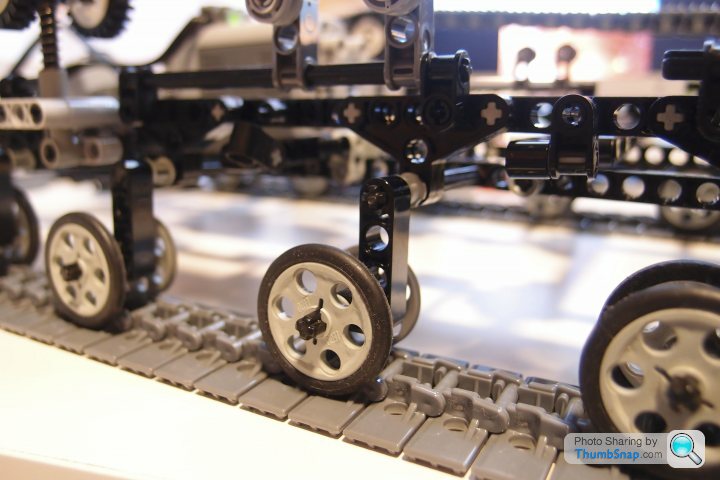
8 - Close up of the spring tensioner
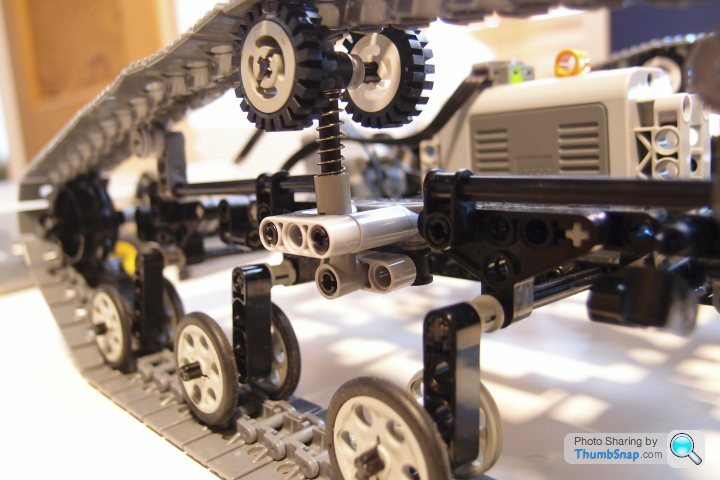
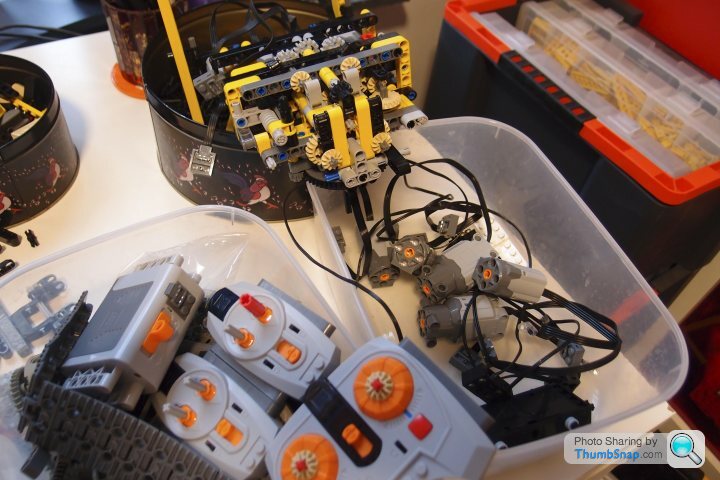
9 - Ebay for motors and controllers :-)
Update, taken apart bits of the Unimog and the Flatbed truck for the large flat panels. The suspension needed completely switching around as it was too tall and not working as it should, so the beams are now horizontal instead of vertical. This meant the spacing was all wrong. Several hours later...
10 - Prototype number 2. Lowered suspension and more wheels. No spring tensioner. Taking ages to get it how I want it to look.
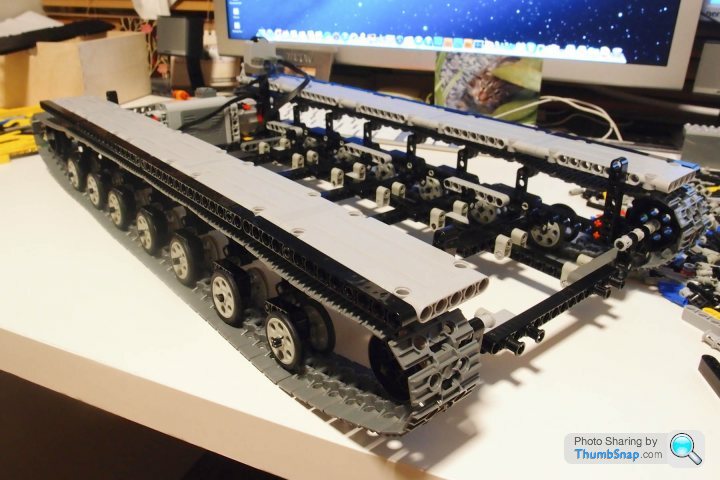
16. Lowered suspension
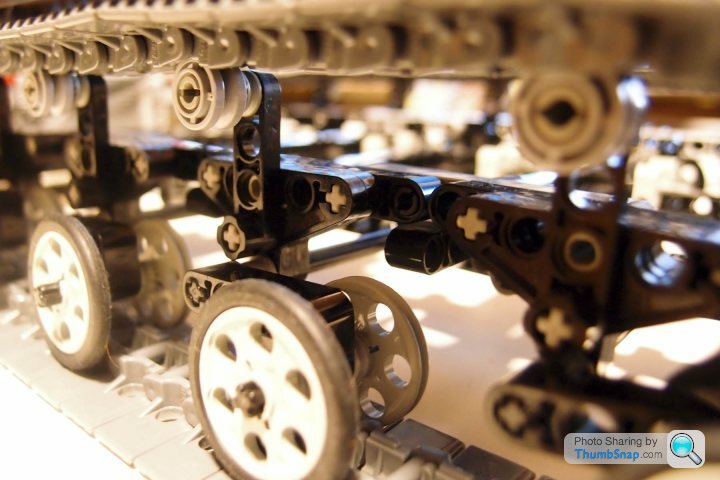
17. Suspension close up
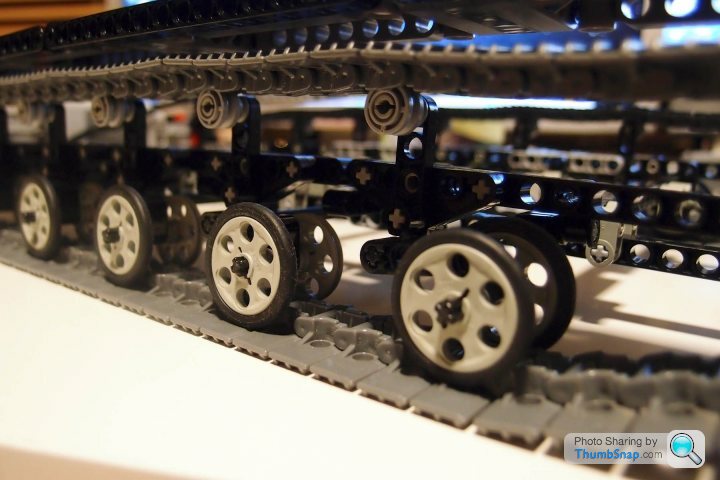
18. Re-geared
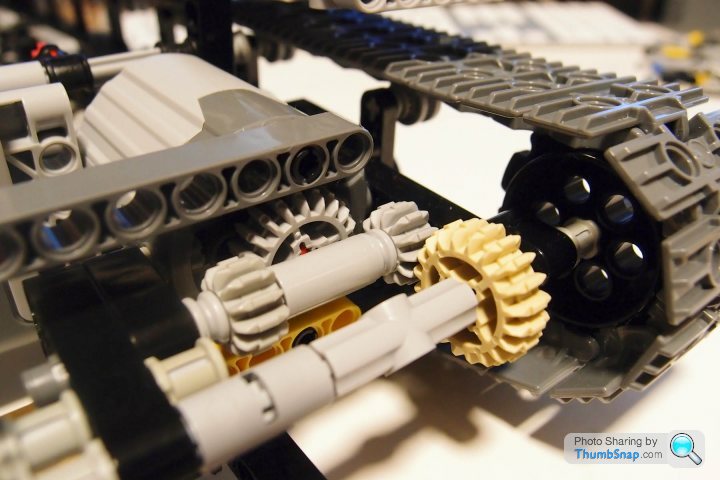
19. Quick release battery pack :-)
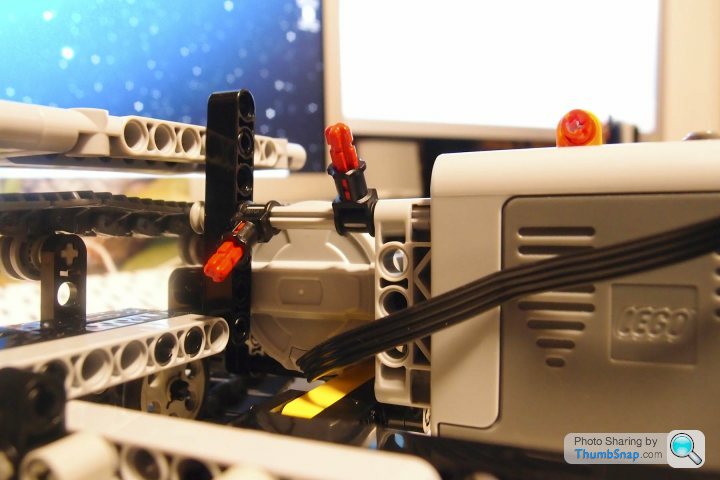
20. Close up of suspension...way too much turn already, considering it's just a chassis without its main weight.
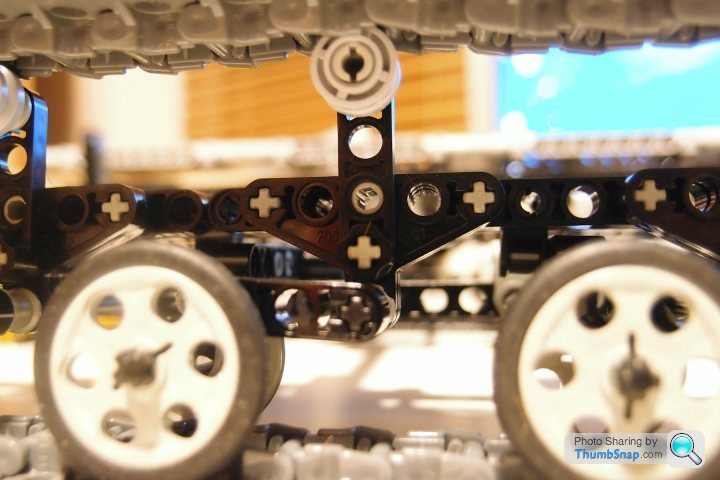
21. Turret turntable structure. Motor contained in the chassis with battery pack at front to counterbalance weight.
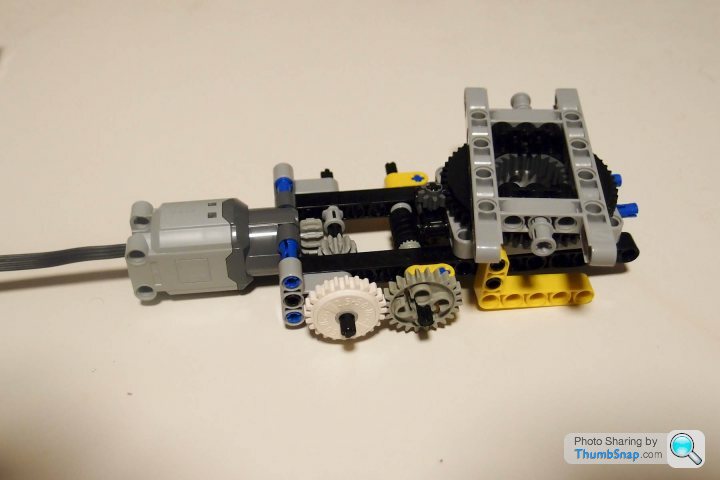
22. Turret turntable structure.
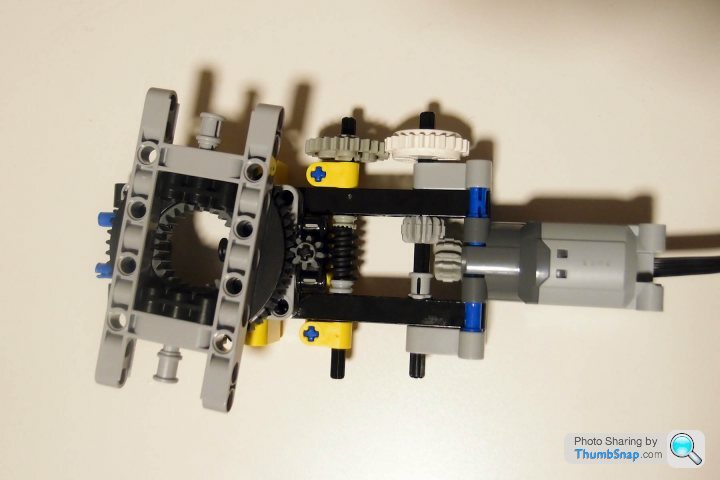
23 - Turntable motor mounted in the chassis, with temporary plates to check clearance.
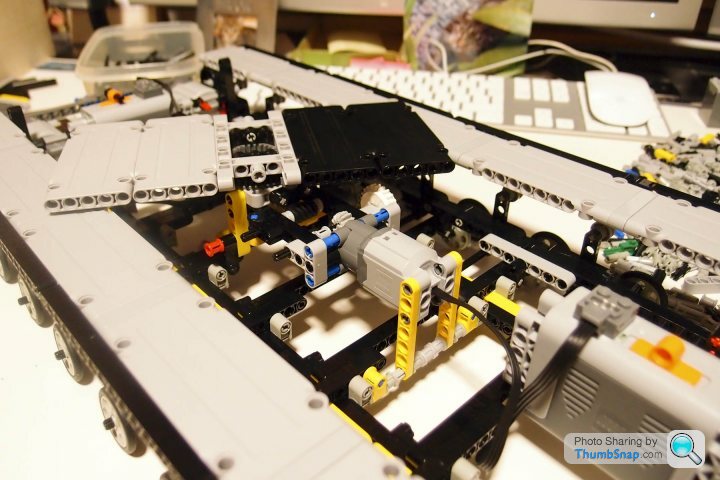
23a
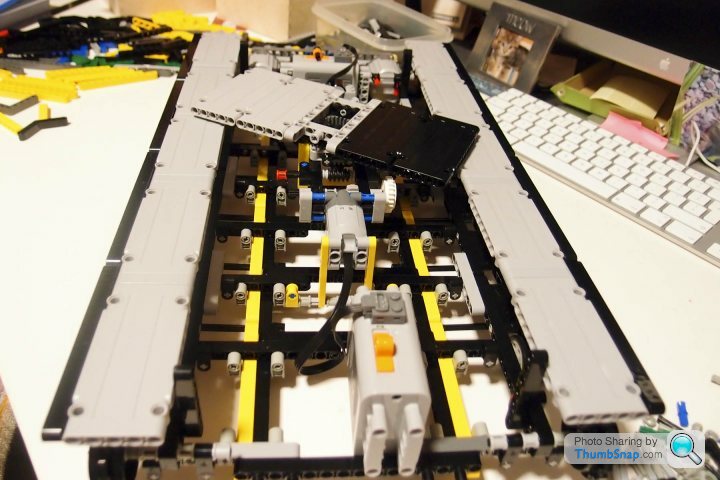
24 Turret motor mounted in the chassis.
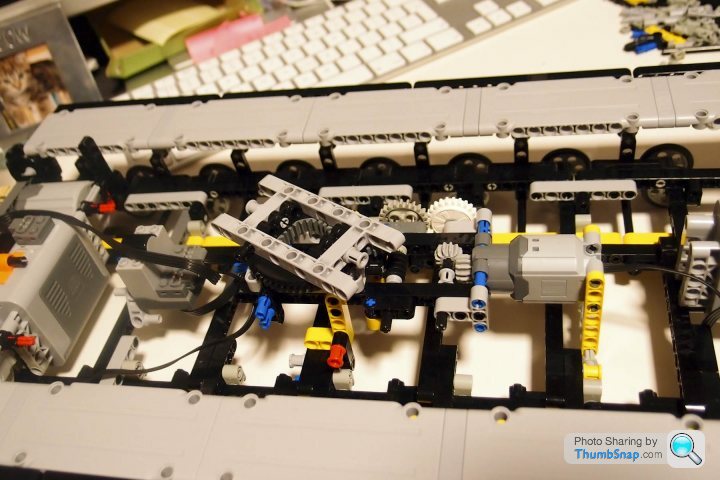
25 - Quick release for turret battery pack.
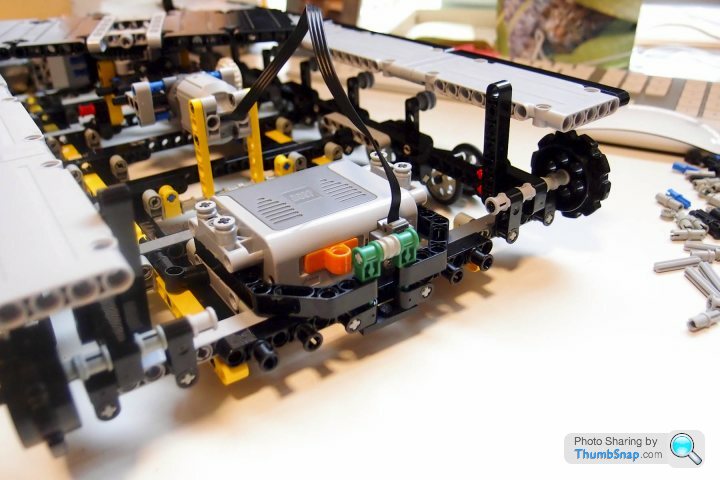
26 - Turret battery.
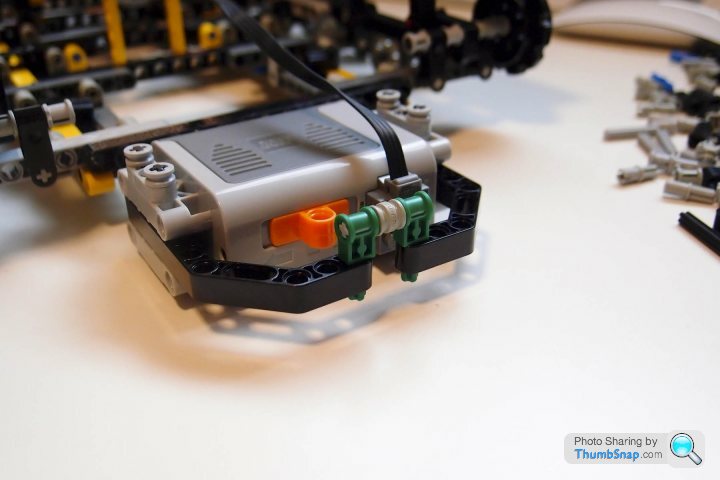
27 - Turret turntable dimensions.
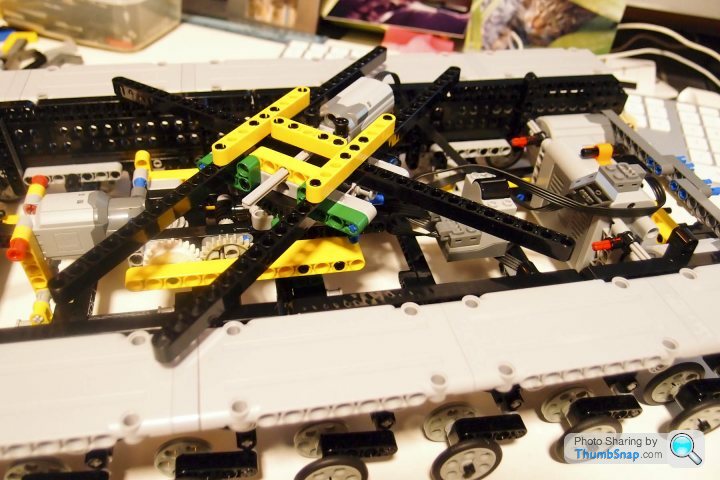
28 - Modern technic is too flexible in one direction and the chassis was sagging at either end with the battery packs, even before it has a body. Had to reinforce with old technic studded bricks. It's a botch job though, as I didn't want to take the base apart for a third time.
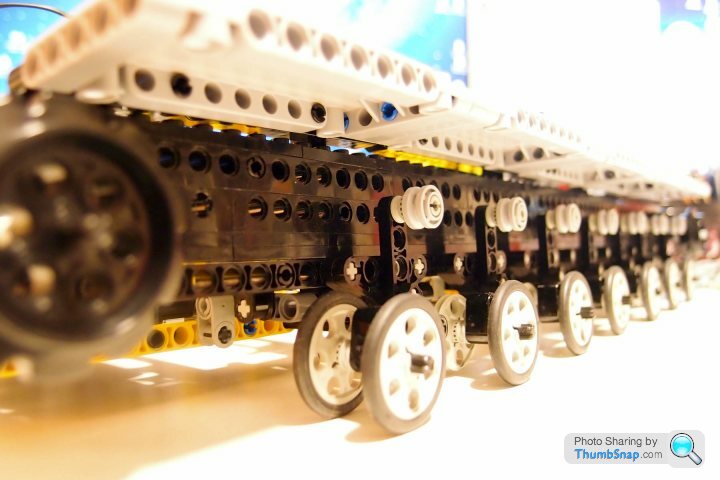
29
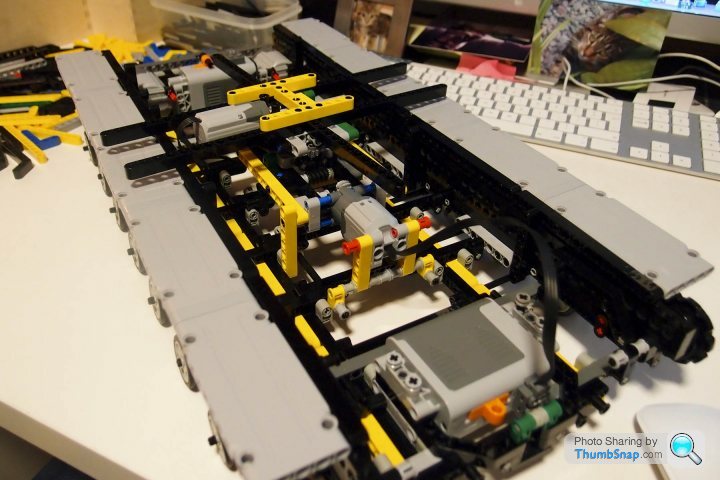
Took the Crane/Digger apart, bought a shed load of stuff from eBay, and now making a tank. It's really hard making it up as you go, with no instructions, but immensely satisfying, even though it's pretty anti-social lol
1 - Basic chassis. Things are so much harder when there are no instructions.

2 - Torsion bar suspension to allow the rollers (road wheels) to move over obstacles

3 - Temporary location for power supply for testing.

4 - With the tracks added, it now looks like a tank chassis :-)

5 - Torsion beam suspension and spring tensioner to keep the tracks taught.

6 - Flimsy looking but should take a body and a turret.

7 - Close up of the torsion suspension.

8 - Close up of the spring tensioner

9 - Ebay for motors and controllers :-)

Update, taken apart bits of the Unimog and the Flatbed truck for the large flat panels. The suspension needed completely switching around as it was too tall and not working as it should, so the beams are now horizontal instead of vertical. This meant the spacing was all wrong. Several hours later...
10 - Prototype number 2. Lowered suspension and more wheels. No spring tensioner. Taking ages to get it how I want it to look.

16. Lowered suspension

17. Suspension close up

18. Re-geared

19. Quick release battery pack :-)

20. Close up of suspension...way too much turn already, considering it's just a chassis without its main weight.

21. Turret turntable structure. Motor contained in the chassis with battery pack at front to counterbalance weight.

22. Turret turntable structure.

23 - Turntable motor mounted in the chassis, with temporary plates to check clearance.

23a

24 Turret motor mounted in the chassis.

25 - Quick release for turret battery pack.

26 - Turret battery.

27 - Turret turntable dimensions.

28 - Modern technic is too flexible in one direction and the chassis was sagging at either end with the battery packs, even before it has a body. Had to reinforce with old technic studded bricks. It's a botch job though, as I didn't want to take the base apart for a third time.

29

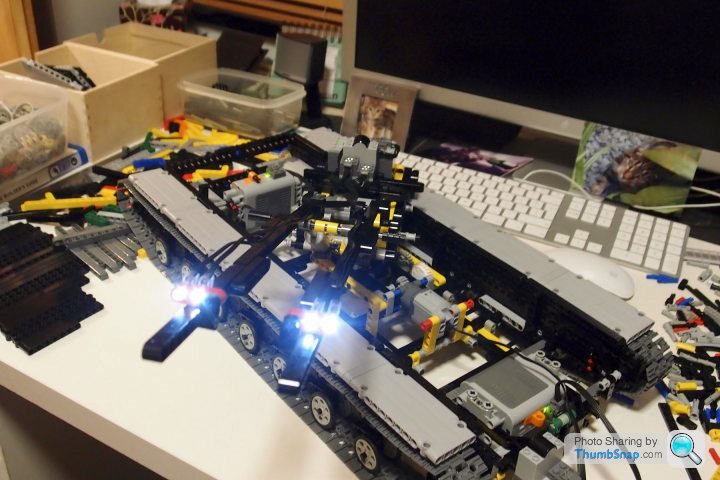
Today's progress, 360 degree rotating turret and elevating barrel. Pleased with the packaging of the battery pack with quick release connection. The infra red receiver is not in its final place though. Barrel elevation is pretty slow, but significant at the barrel tip. At the moment, it's not actual barrel looking  Added some lights at the end of the barrel just for fun.
Here are the pics...
50. - Linear actuators to lift the barrel on a pivot, making a slow but very high torque lifting arm....as I guess the barrel will be quite weighty when built.
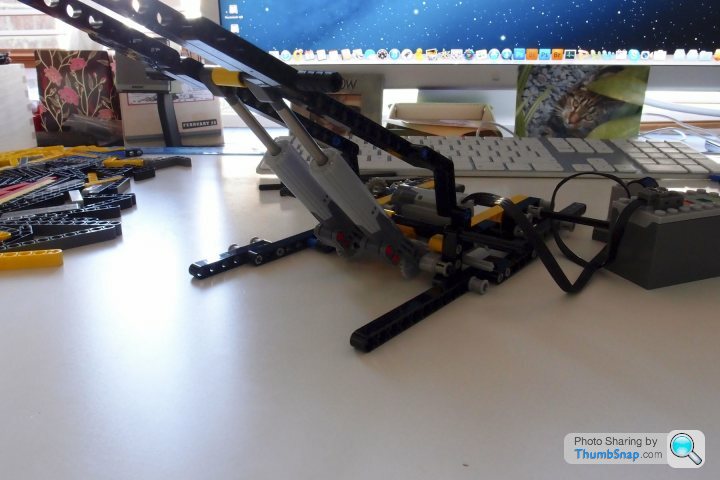
51. - Simple lifting mechanism with worm gear and clutch wheel. I need to add some stops so that it cannot over extend up or down.
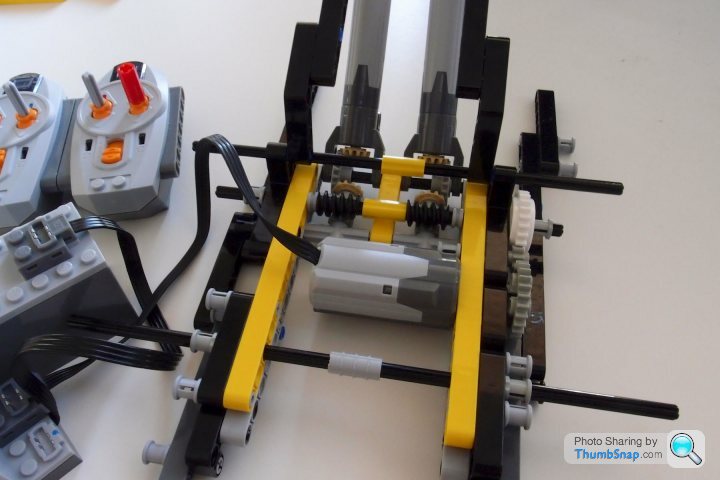
52. - Another angle.
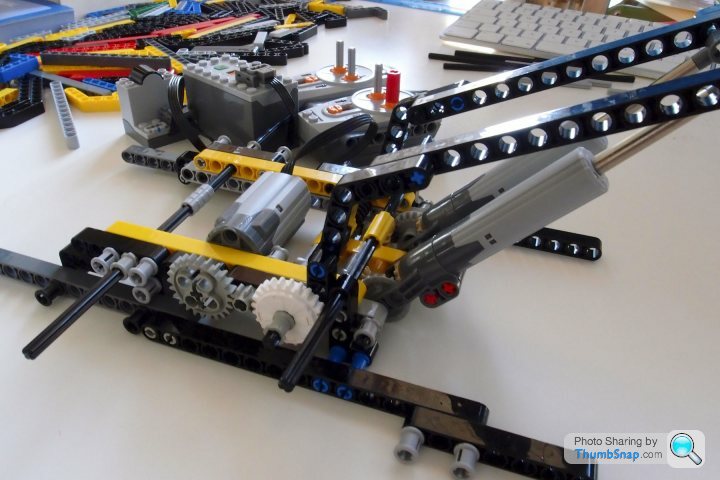
53. - and another
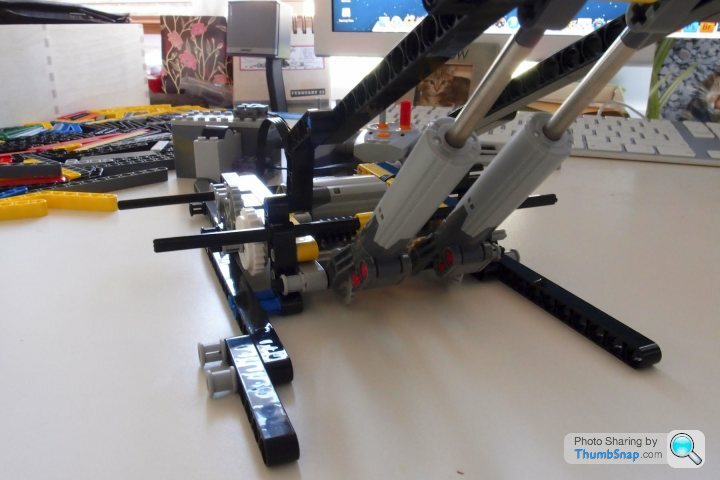
54. - Like the film Robocop, when they had the prosthetic arm...."Ok...attach it to his shoulder"
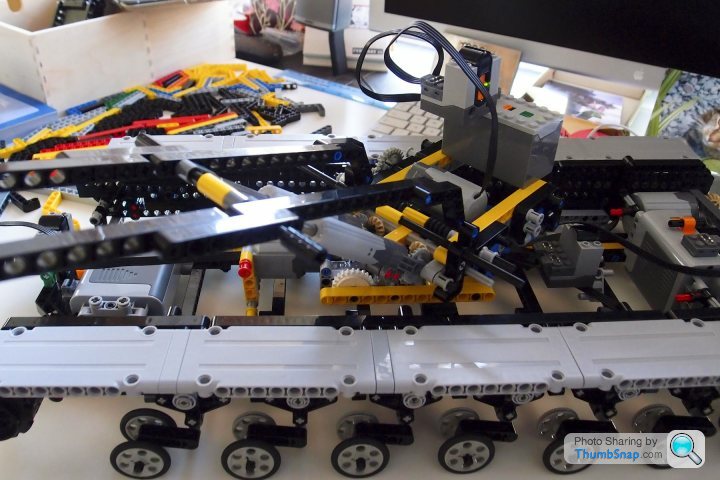
55. - Ignore the temporary fixings....they are just while I make very quick adjustments before the final bushes go in to place.
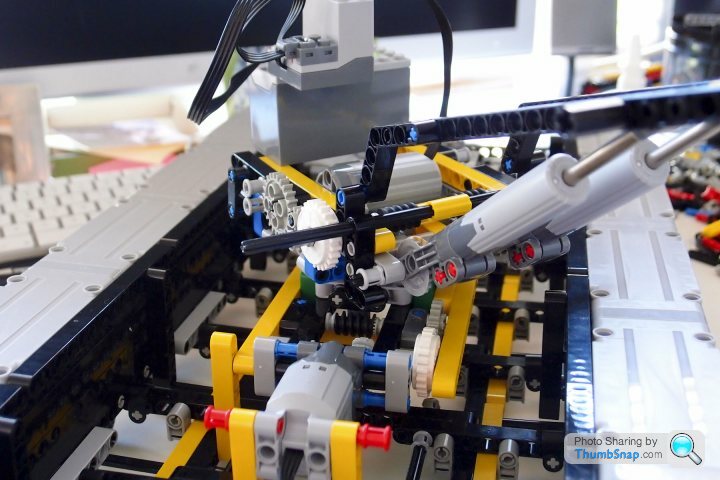
56. - Looking pretty cool. Need to research the correct barrel length once I've built the turret cover.
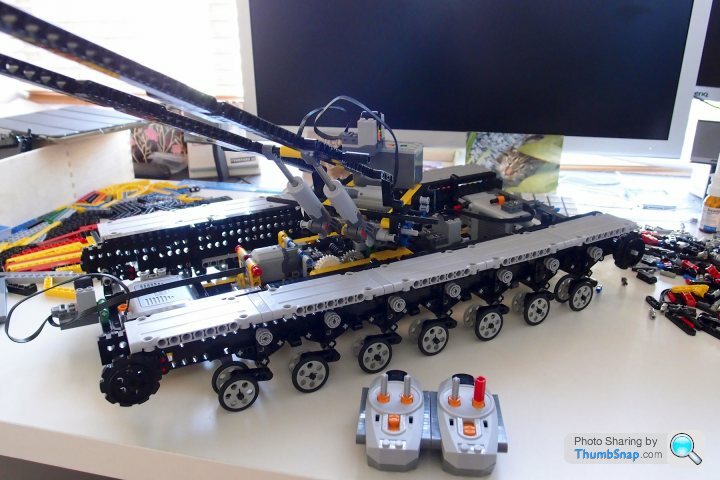
57. - The barrel motor and gear pivot vertically on its turntable to make a quick release mechanism.....very handy while adjustments are made.
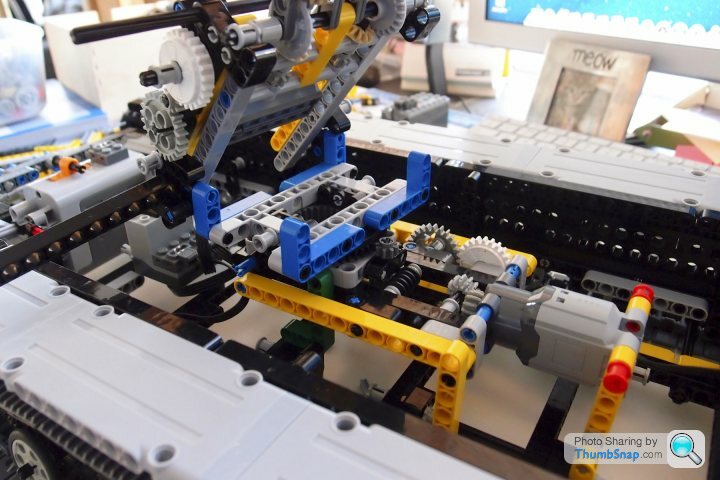
58. - The 'frame' that attaches to the turntable with two quick release pins.
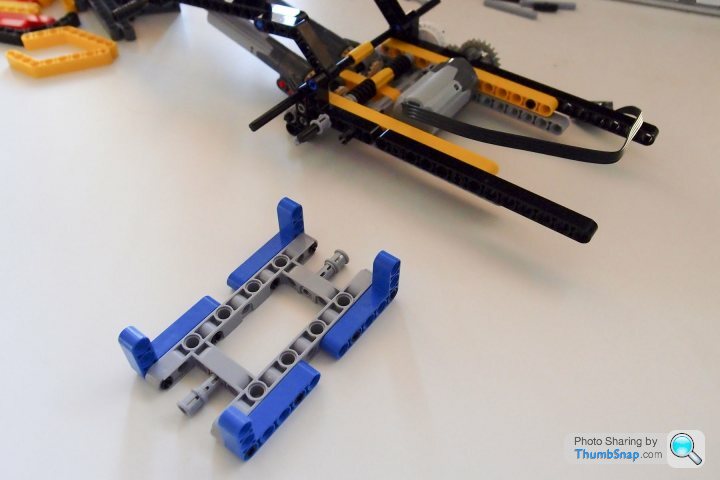
59. - It is also fixed to the main gear by just 2 fixings, and can be moved along the black rail while, so that the centre of gravity and balance can be finely tuned once the structure is complete so that it moves smoothly and unstressed.
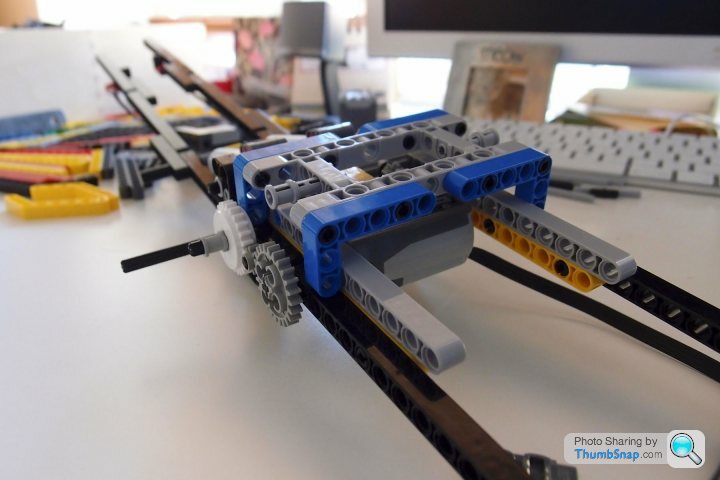
60. - Quite a neat bit of packaging. The battery box provides a little counter balance, but nowhere near enough once the barrel is built. On quick release fixings. The receiver will probably be moved once the rest of the turret is made.
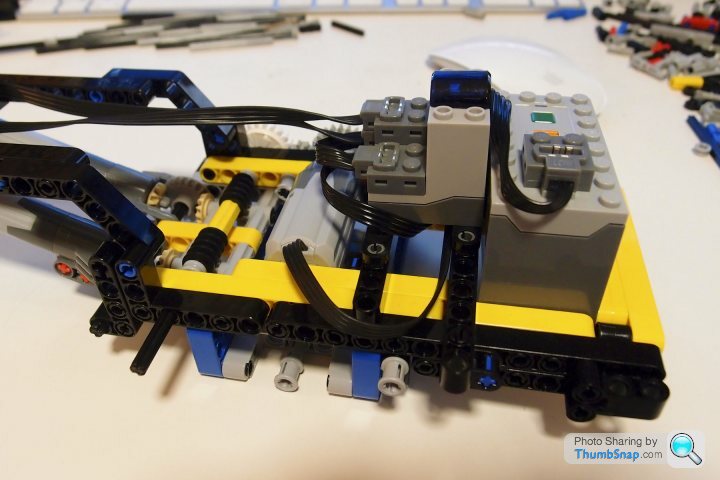
61. - Close up of the quick release mounting points for the battery box.
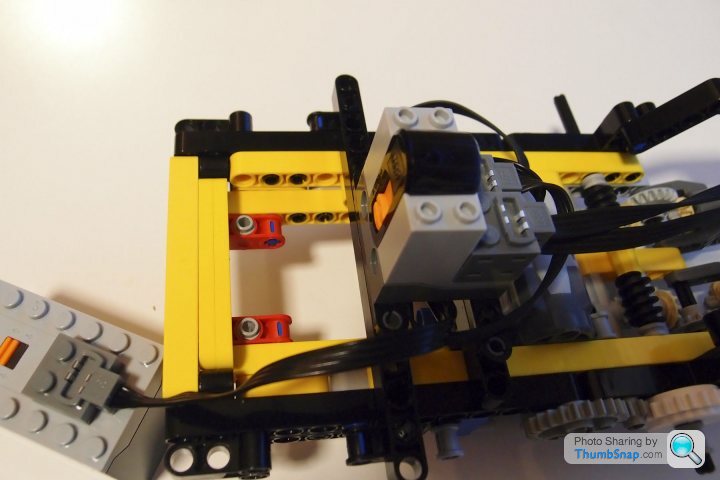
62. - And lights :-) - flash using the remote.
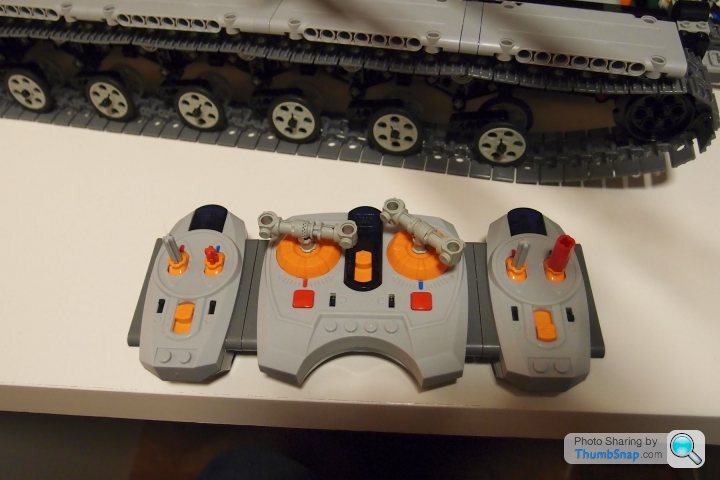
63. The remote From left to right: turret swivel / unused, left track / right track, Barrel elevate / Flash lights
 Added some lights at the end of the barrel just for fun.
Here are the pics...
50. - Linear actuators to lift the barrel on a pivot, making a slow but very high torque lifting arm....as I guess the barrel will be quite weighty when built.

51. - Simple lifting mechanism with worm gear and clutch wheel. I need to add some stops so that it cannot over extend up or down.

52. - Another angle.

53. - and another

54. - Like the film Robocop, when they had the prosthetic arm...."Ok...attach it to his shoulder"


55. - Ignore the temporary fixings....they are just while I make very quick adjustments before the final bushes go in to place.

56. - Looking pretty cool. Need to research the correct barrel length once I've built the turret cover.

57. - The barrel motor and gear pivot vertically on its turntable to make a quick release mechanism.....very handy while adjustments are made.

58. - The 'frame' that attaches to the turntable with two quick release pins.

59. - It is also fixed to the main gear by just 2 fixings, and can be moved along the black rail while, so that the centre of gravity and balance can be finely tuned once the structure is complete so that it moves smoothly and unstressed.

60. - Quite a neat bit of packaging. The battery box provides a little counter balance, but nowhere near enough once the barrel is built. On quick release fixings. The receiver will probably be moved once the rest of the turret is made.

61. - Close up of the quick release mounting points for the battery box.

62. - And lights :-) - flash using the remote.

63. The remote From left to right: turret swivel / unused, left track / right track, Barrel elevate / Flash lights

Taken all my thinking, but I now have a fully functional gun  . Really pleased with the tidy packaging. Lots of gearing allowed use of a compact motor, which I managed to slip into the barrel housing...looks pretty good. The firing mechanism uses springs (really strong ones from the Unimog suspension), pushed back with the use of cams, which when passed their maximum point allow the springs to push back, with a firing pin to hit the projectile. At the moment, I need gravity to push the projectile back against the firing pin, though vibration also helps. I need to figure out a method to do that automatically. Various quick access lids allow the loading of weaponry very quickly, and access to the firing pin which occasionally detaches from the spring piston due to the force.
The weapon when tilted to about 30 degrees fires about 5 metres. The motor keeps the cams turning and so the gun keeps firing. The reload lid might be modified to make a gravity fed auto-loader
Really pleased with it, just need to find a way to fix it to the turret now. Common sense would have said get the dimensions required first and build the gun....but hey ho
64. - The weapon is in the foreground with the yellow firing pin exposed by the hinged yellow access cover
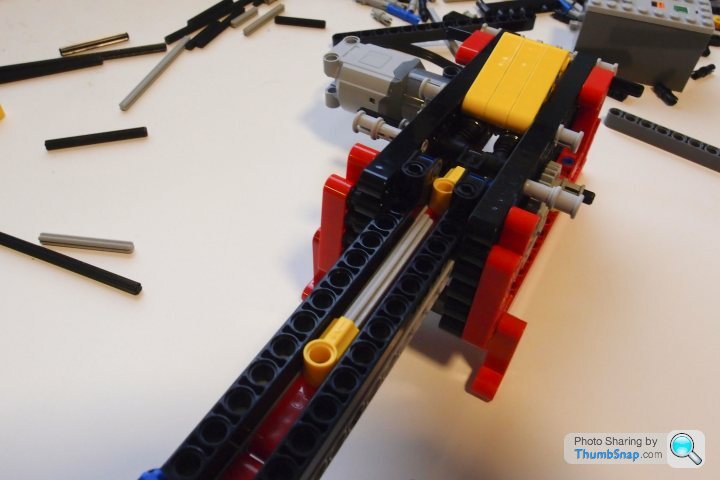
65. - Beginnings of the barrel
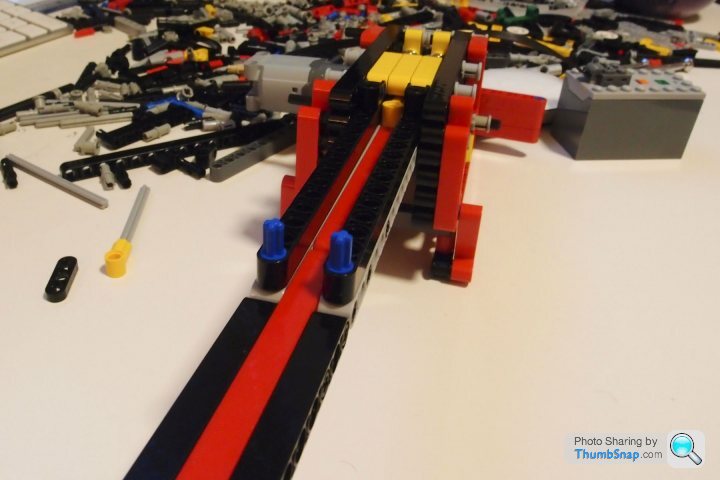
66 - the weapon
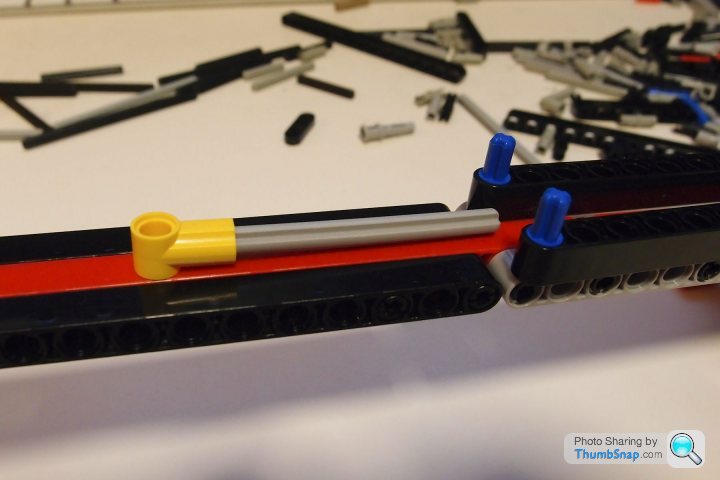
67 - From the barrel tip looking back towards the firing mechanism. Length might need adjusting once mounted.
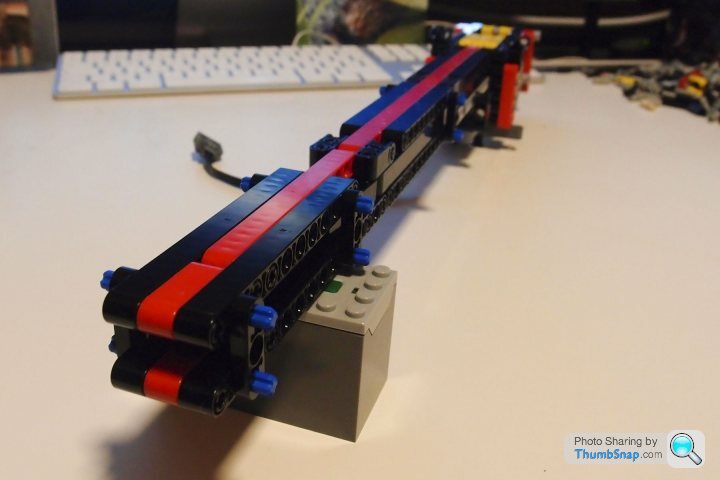
68 - neat packaging of the motor, and half of the gearing
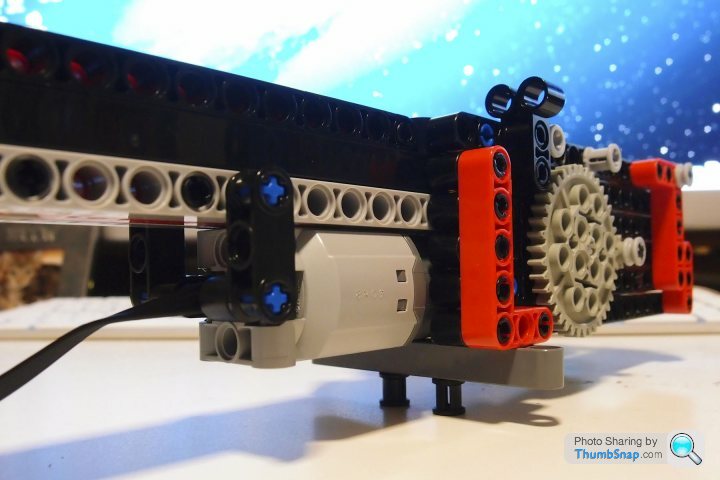
69 - Gearing down to increase torque to be able to push against 2 strong springs.
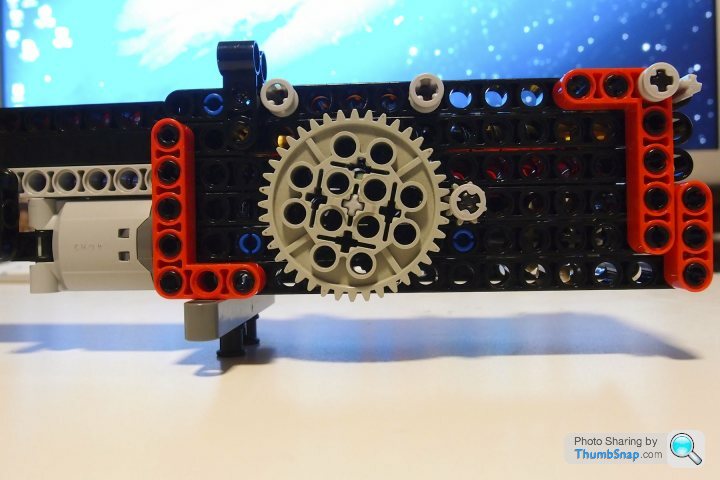
70 - Reverse side showing further gearing down. It makes for about a 5 second reload time.
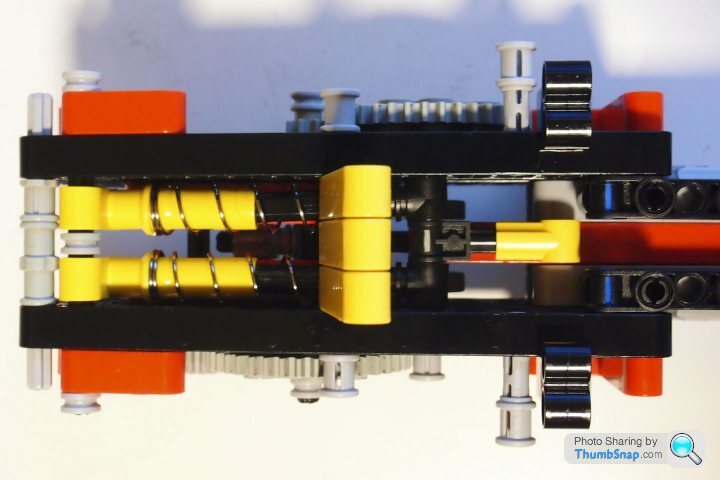
71 - overhead showing the springs and the firing pin
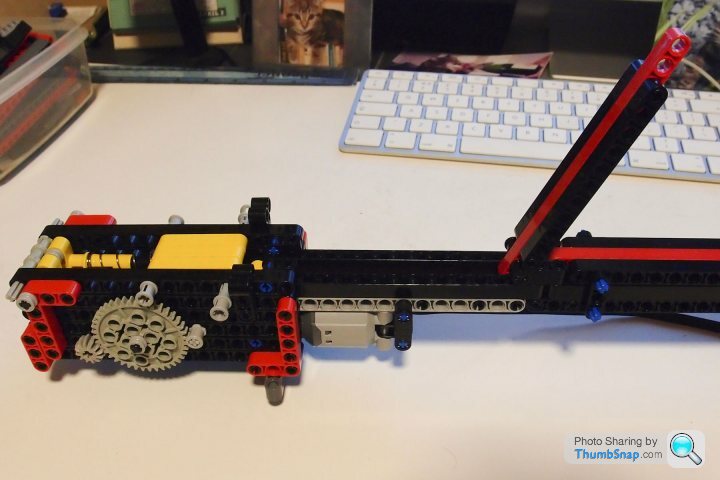
72 - Yellow hinged access panel in its closed position, while the reloading panel is up for re-loading.
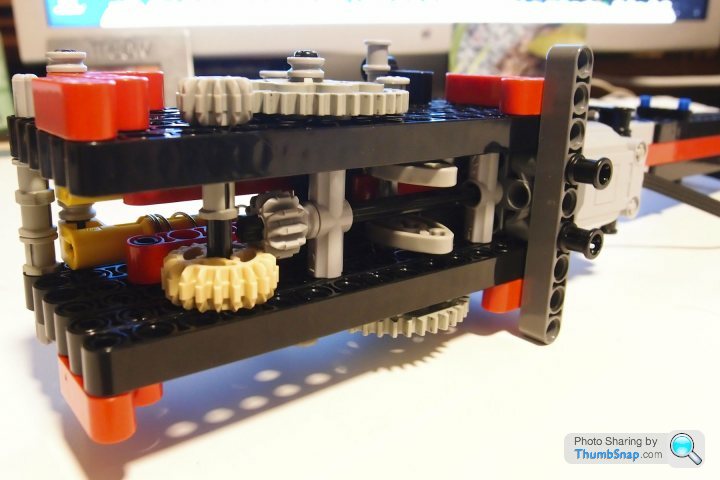
73 - underside showing the motor connection passing underneath the cams, then outside on both sides then back inside to turn the cams. My favourite bit as the packaging looks properly Lego standard
Short clip of the firing action and the cams....using a previous set of springs. Now uprated and much, much stronger
Lego gun firing mechanism
Edited to add...couldn't resist trying, so I've fixed it to the main turret turntable, with a bit of fiddling. Will change the colours tomorrow
You can see that the centre of gravity is way off now...so I'll need to ballast the rear and strengthen the turntable supports underneath. Looks pretty cool though
74 - Had to make the base of the gun wider, which is a shame as the packaging was so tidy. But I guess it makes sense anyway, as it tapers to the end.
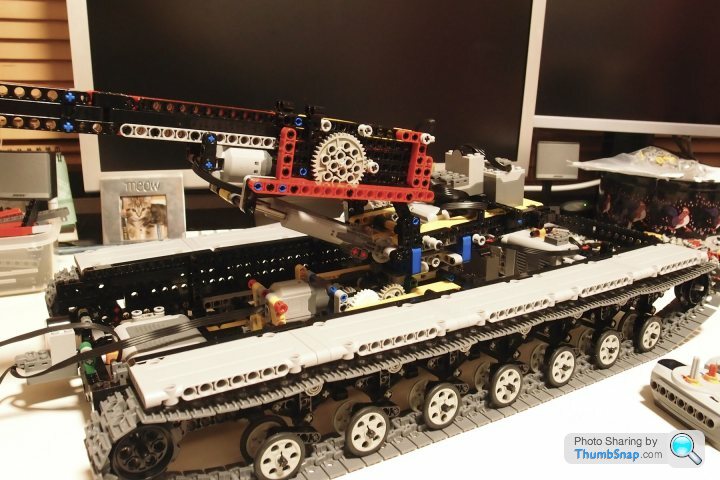
75 - The motor driving the linear actuating lifting arms can lift it no problem, but struggle when going down. Need to look into that.
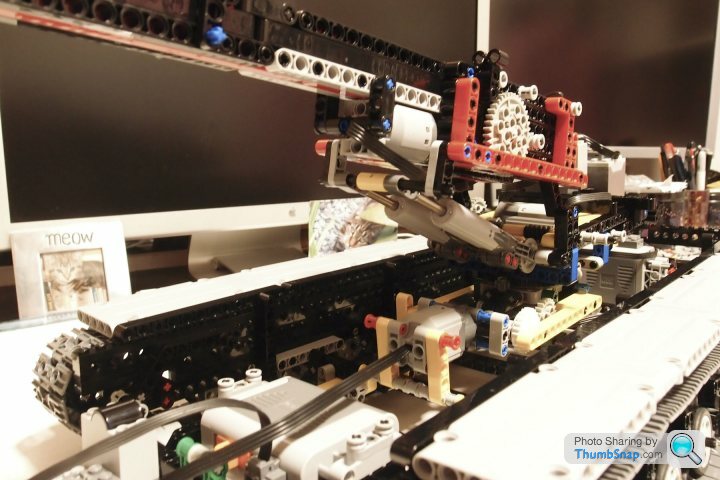
76 -
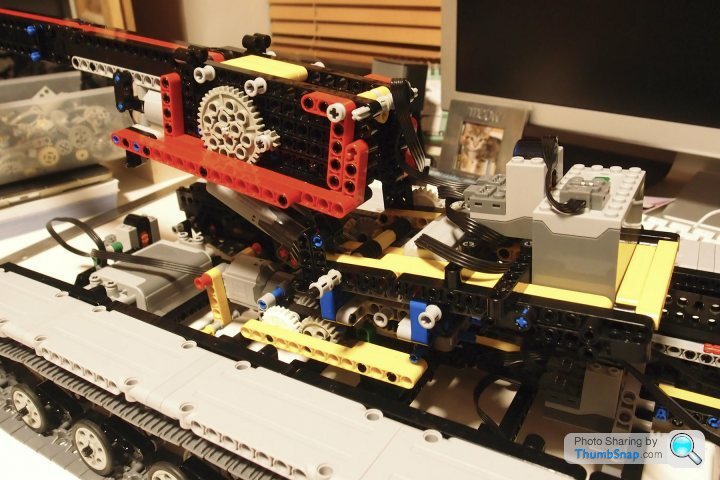
77 - Notice the complete lack of ballast to the right. Still turns around though
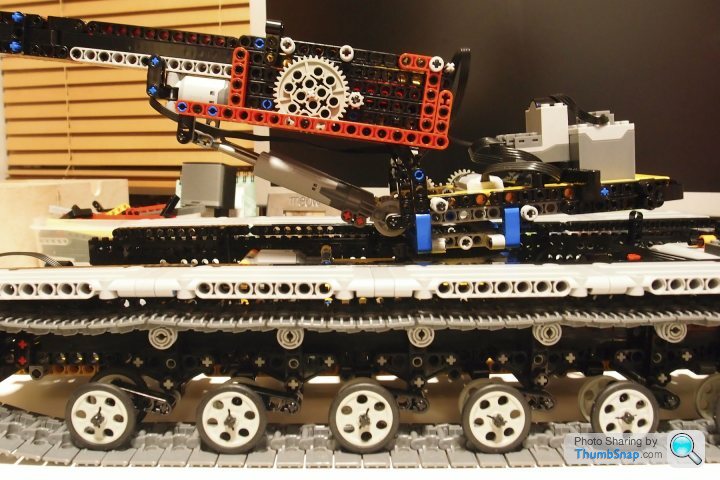
 . Really pleased with the tidy packaging. Lots of gearing allowed use of a compact motor, which I managed to slip into the barrel housing...looks pretty good. The firing mechanism uses springs (really strong ones from the Unimog suspension), pushed back with the use of cams, which when passed their maximum point allow the springs to push back, with a firing pin to hit the projectile. At the moment, I need gravity to push the projectile back against the firing pin, though vibration also helps. I need to figure out a method to do that automatically. Various quick access lids allow the loading of weaponry very quickly, and access to the firing pin which occasionally detaches from the spring piston due to the force.
The weapon when tilted to about 30 degrees fires about 5 metres. The motor keeps the cams turning and so the gun keeps firing. The reload lid might be modified to make a gravity fed auto-loader

Really pleased with it, just need to find a way to fix it to the turret now. Common sense would have said get the dimensions required first and build the gun....but hey ho

64. - The weapon is in the foreground with the yellow firing pin exposed by the hinged yellow access cover

65. - Beginnings of the barrel

66 - the weapon


67 - From the barrel tip looking back towards the firing mechanism. Length might need adjusting once mounted.

68 - neat packaging of the motor, and half of the gearing

69 - Gearing down to increase torque to be able to push against 2 strong springs.

70 - Reverse side showing further gearing down. It makes for about a 5 second reload time.

71 - overhead showing the springs and the firing pin

72 - Yellow hinged access panel in its closed position, while the reloading panel is up for re-loading.

73 - underside showing the motor connection passing underneath the cams, then outside on both sides then back inside to turn the cams. My favourite bit as the packaging looks properly Lego standard


Short clip of the firing action and the cams....using a previous set of springs. Now uprated and much, much stronger

Lego gun firing mechanism
Edited by Luca Brazzi on Wednesday 3rd April 23:44
Edited to add...couldn't resist trying, so I've fixed it to the main turret turntable, with a bit of fiddling. Will change the colours tomorrow

You can see that the centre of gravity is way off now...so I'll need to ballast the rear and strengthen the turntable supports underneath. Looks pretty cool though

74 - Had to make the base of the gun wider, which is a shame as the packaging was so tidy. But I guess it makes sense anyway, as it tapers to the end.

75 - The motor driving the linear actuating lifting arms can lift it no problem, but struggle when going down. Need to look into that.

76 -

77 - Notice the complete lack of ballast to the right. Still turns around though


Edited by Luca Brazzi on Thursday 4th April 00:46

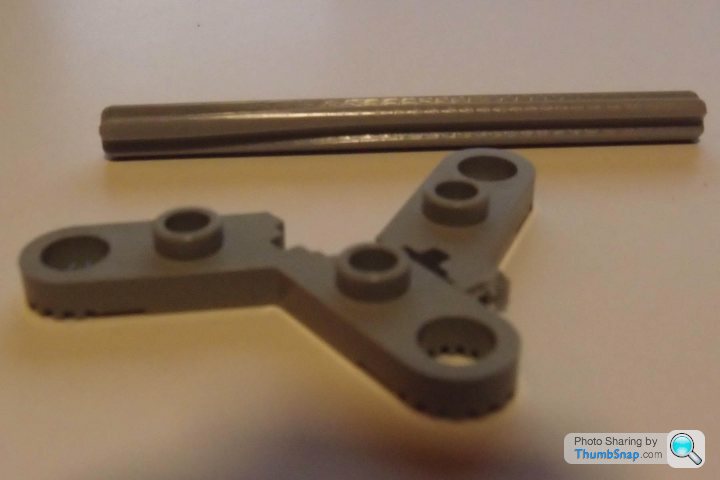
Not much visual progress this weekend. More about packaging and strengthening. Tried swapping the cams for a 3 pronged rotor to speed up repeat firing. It worked....for 3 minutes, then disintegrated, pictures to follow....as well as a pretty twisted axle. I never realised there is so much stress on some of the parts. Trying to get things to fit while still keeping the motors in position proved too difficult and having to use several universal joints to move the motor drive around obstacles.
Sadly the ultra neat packaging of the motor underneath the cams had to be abandoned as this created problems when I figured out a method to encourage the weapon back on the firing pin as it retracted prior to firing. But the results are pretty pleasing. I now have the final position of the gun barrel on the turret, with decent elevation possible. And used 2 battery packs as ballast at the back of the turret. This has taken too many hours and been pretty annoying just figuring out problems rather than building stuff. But hey ho, that's where the satisfaction comes in I guess. Now going to remount the turret to the chassis after strengthening it some more lol.
Pics later.
Total time, bearing in mind it's from scratch, and with all the problem solving that goes with it, meaning lots of dismantling, relocating, mending....probably about 30 hours.

Luca Brazzi said:

Total time, bearing in mind it's from scratch, and with all the problem solving that goes with it, meaning lots of dismantling, relocating, mending....probably about 30 hours.

78 - Changed much of the red to black on the gun. Relocated the motor to behind the gun. I think it's lead to less 'backlash and better connectivity. Battery packs slotted on to each side for ballast. Only one is used, the other is 'spare'. They will have sliding covers to allow for easy changes. The remote receiver will probably be moved. Picture shows maximum elevation angle.
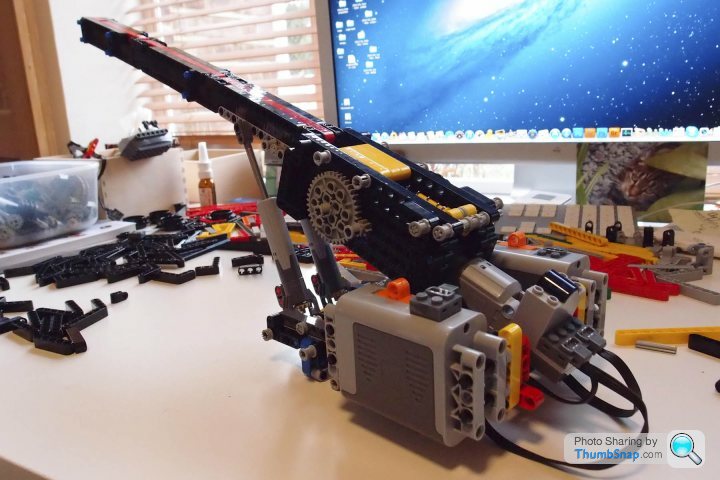
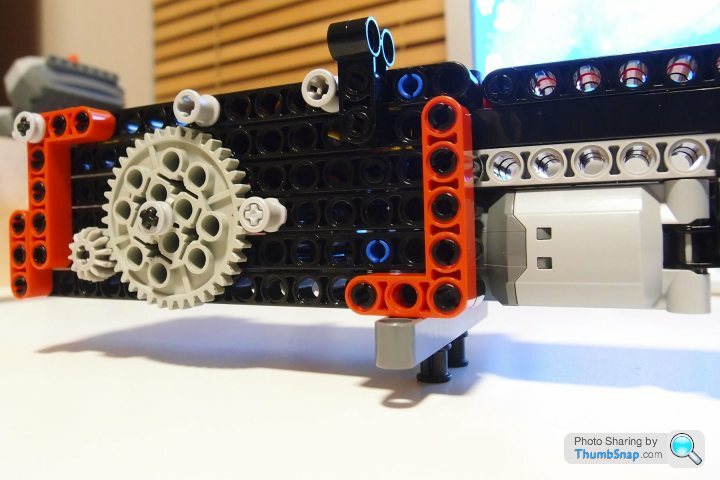
79 - Reverse side shows gearing and chain driven weapon 'encourager'.
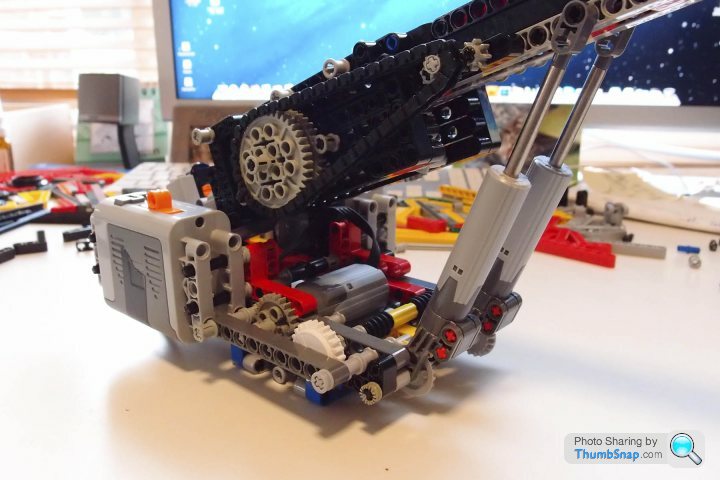
80 - Back view showing battery holders on sliding axles for easy changing.
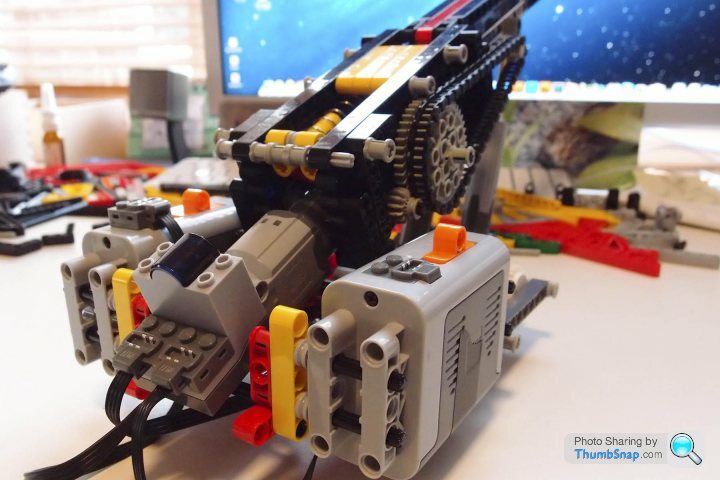
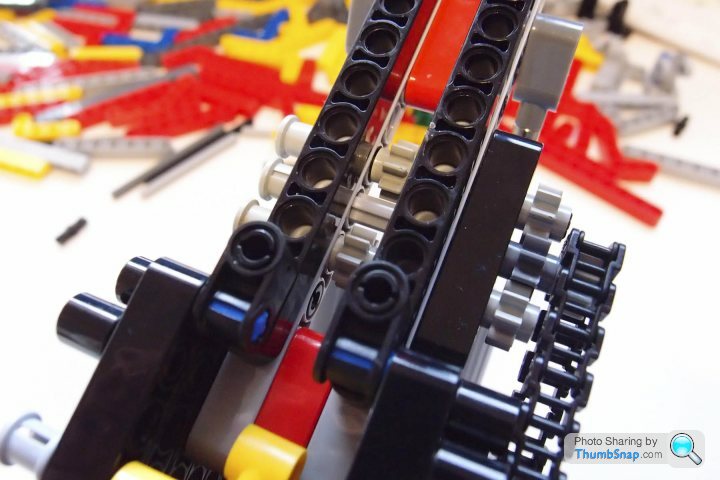
81 - Chain drive linked to firing mechanism, turns tiny cogs backwards in the chamber which results in the weapon gently but insistently urged back towards the firing pin as it is drawn back by the springs. Pretty cool device in my opinion
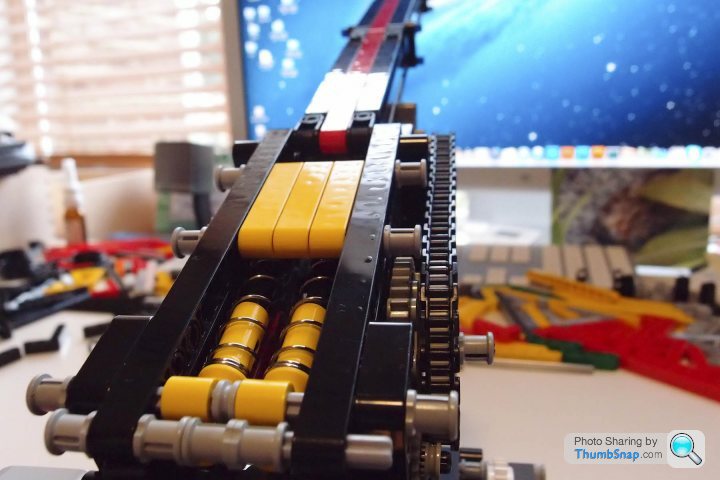
82 - Close up of the chain drive to make the small cogs turn rapidly.
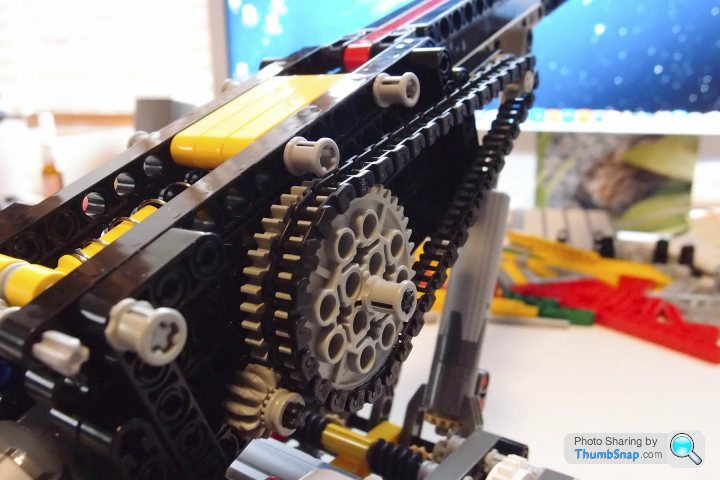
83 - Weapon loading cover up, showing the small cogs that spin backwards rapidly, making the weapon constantly stay in contact with the firing pin
84 - New mount in the chassis for the turret, now much lower and improves CoG as well as rigidity. Also changed the gearing to make the turret rotate more quickly.
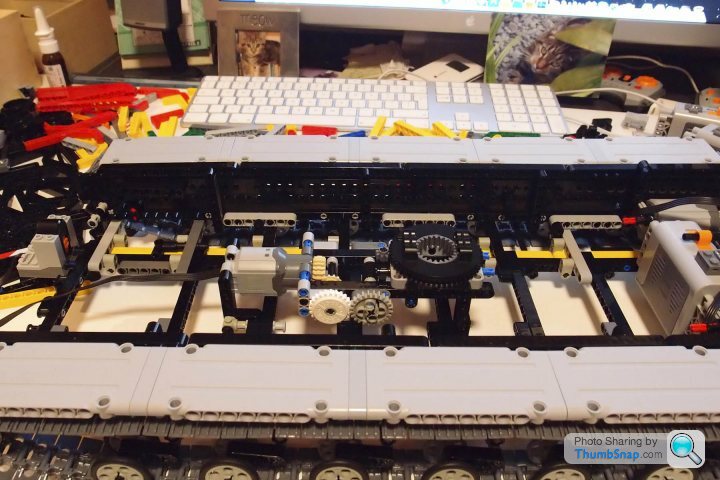
85 - Turret mountings
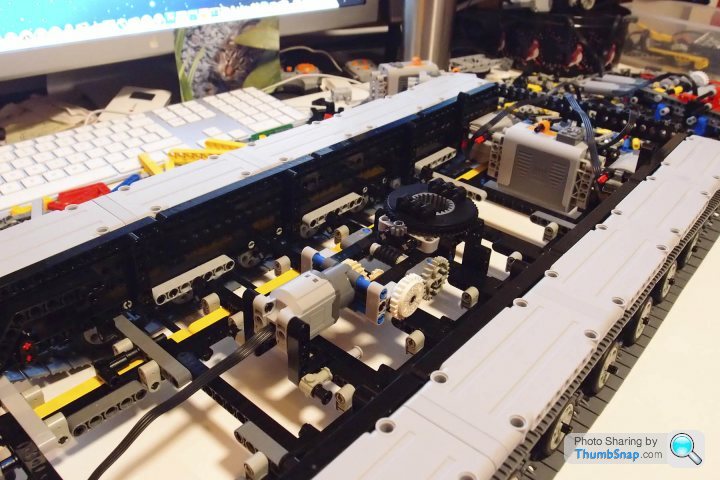
86 - Overhead of turret gearing. Very simple really.
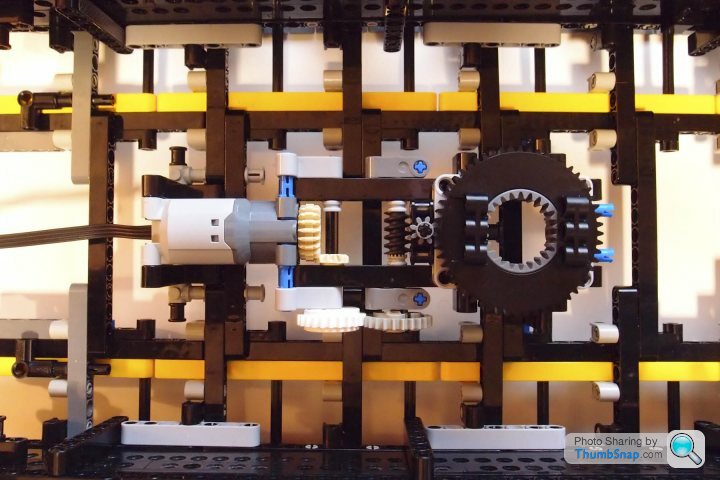
87 - Shows the lowered turret mounting plate.
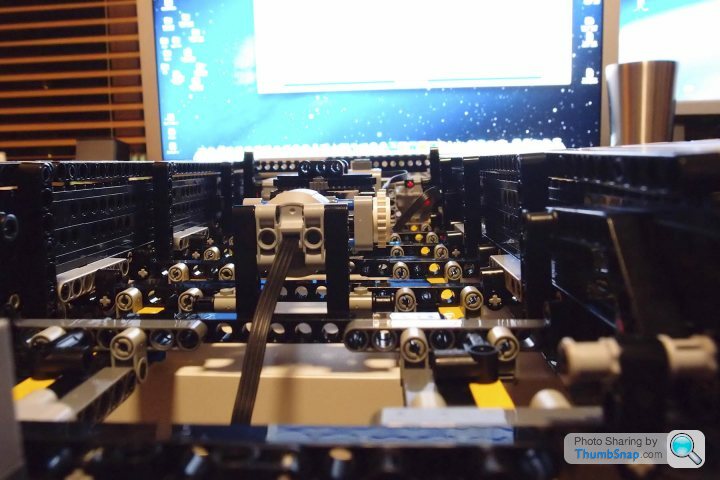
88 - Close up of the turret mechanism
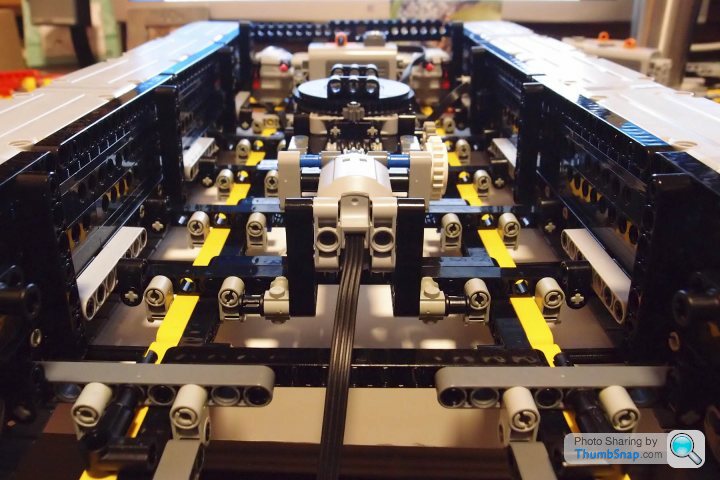
89 - All put together so far. About 60 cm in length/ All controls working so far, except the drive motors slip on the cogs.....need to fix that properly, perhaps replacing studless pieces for traditional technic studded pieces.
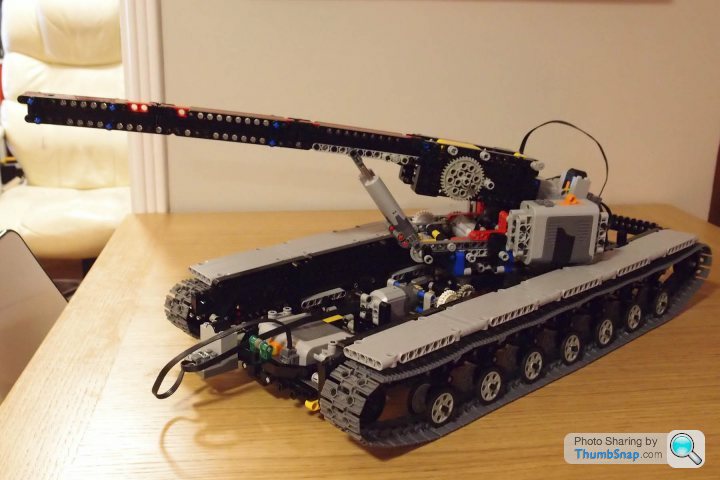
90 - Is the barrel the correct length for the tank? I'm not sure.
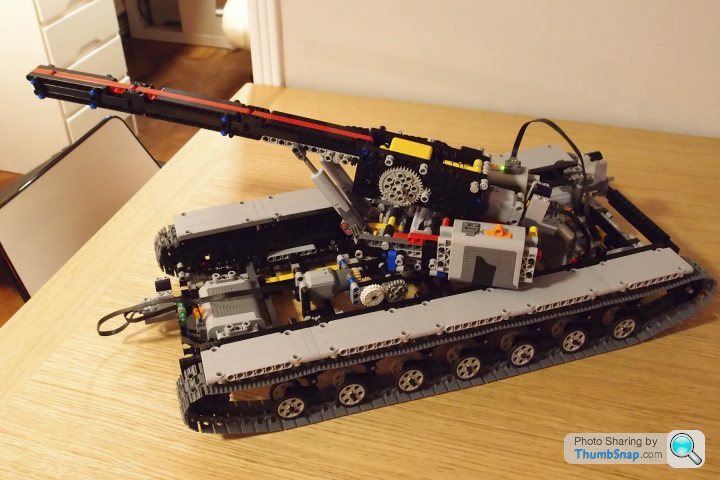
91 - General angle
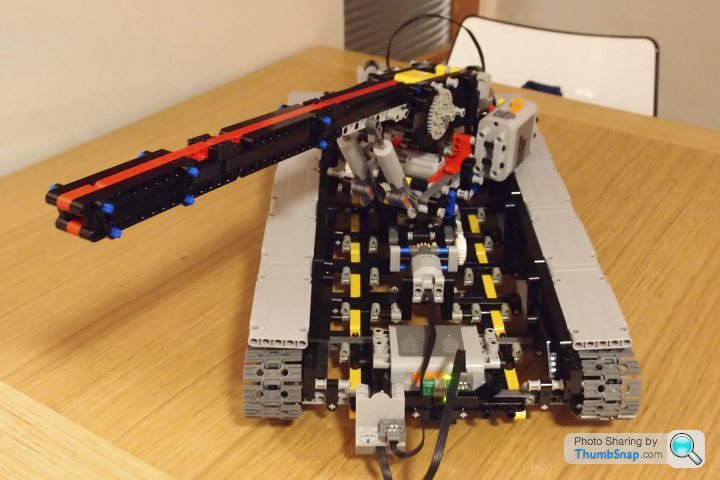
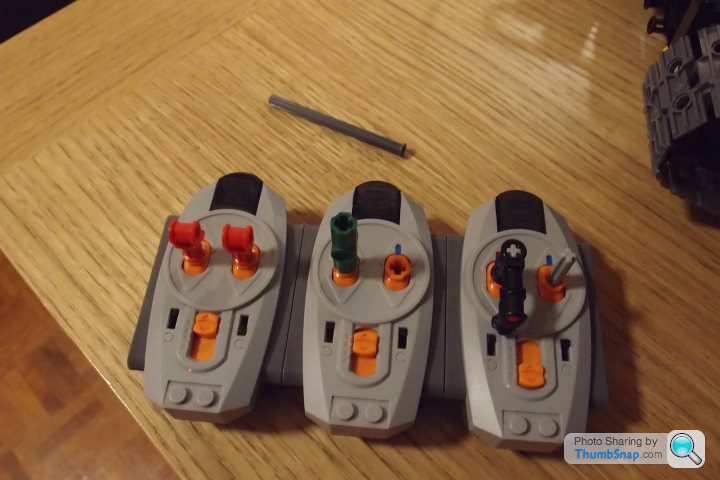
92 - Temporary controls and the main weapon. Will replace the drive controls (lefthand side) with the wheels again I think. Middle green is turret rotate. Black with attachment is for weapon firing (one direction locked), right hand side elevates the barrel. Need to find a way to speed up the barrel elevation, but the gearing is already pretty tough on the little motor. Might have to replace with a more powerful one.
93 - Broken pieces.

79 - Reverse side shows gearing and chain driven weapon 'encourager'.

80 - Back view showing battery holders on sliding axles for easy changing.

81 - Chain drive linked to firing mechanism, turns tiny cogs backwards in the chamber which results in the weapon gently but insistently urged back towards the firing pin as it is drawn back by the springs. Pretty cool device in my opinion


82 - Close up of the chain drive to make the small cogs turn rapidly.

83 - Weapon loading cover up, showing the small cogs that spin backwards rapidly, making the weapon constantly stay in contact with the firing pin


84 - New mount in the chassis for the turret, now much lower and improves CoG as well as rigidity. Also changed the gearing to make the turret rotate more quickly.

85 - Turret mountings

86 - Overhead of turret gearing. Very simple really.

87 - Shows the lowered turret mounting plate.

88 - Close up of the turret mechanism

89 - All put together so far. About 60 cm in length/ All controls working so far, except the drive motors slip on the cogs.....need to fix that properly, perhaps replacing studless pieces for traditional technic studded pieces.

90 - Is the barrel the correct length for the tank? I'm not sure.

91 - General angle

92 - Temporary controls and the main weapon. Will replace the drive controls (lefthand side) with the wheels again I think. Middle green is turret rotate. Black with attachment is for weapon firing (one direction locked), right hand side elevates the barrel. Need to find a way to speed up the barrel elevation, but the gearing is already pretty tough on the little motor. Might have to replace with a more powerful one.

93 - Broken pieces.


Edited by Luca Brazzi on Sunday 7th April 22:04
Gassing Station | Scale Models | Top of Page | What's New | My Stuff


