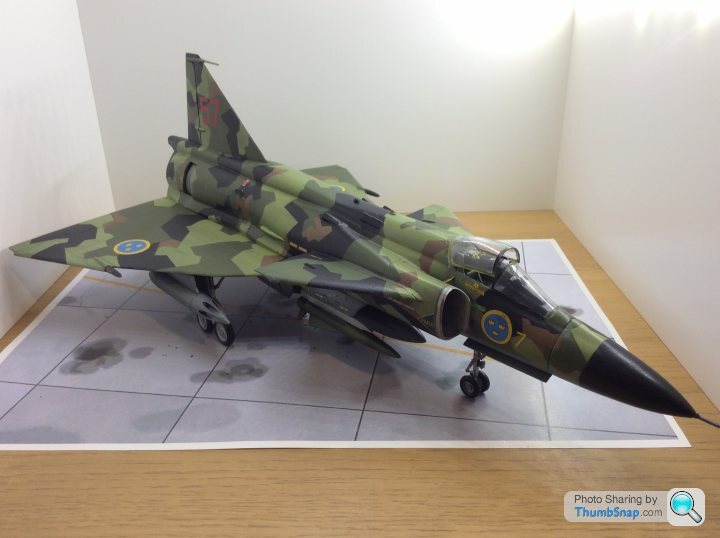
Saab Viggen - Special Hobby, 1:72
Discussion


With the first Spitfire almost done, I've come back to this one.
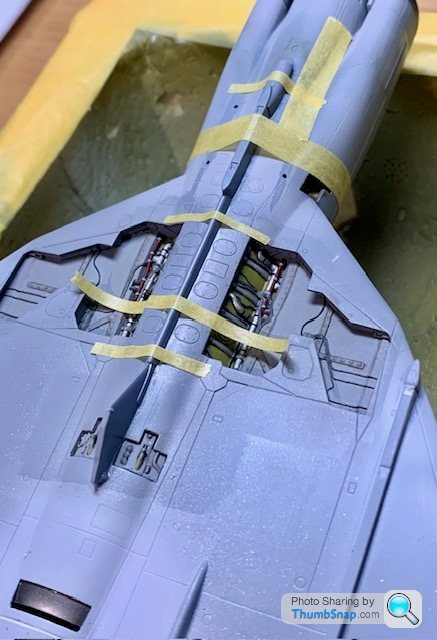
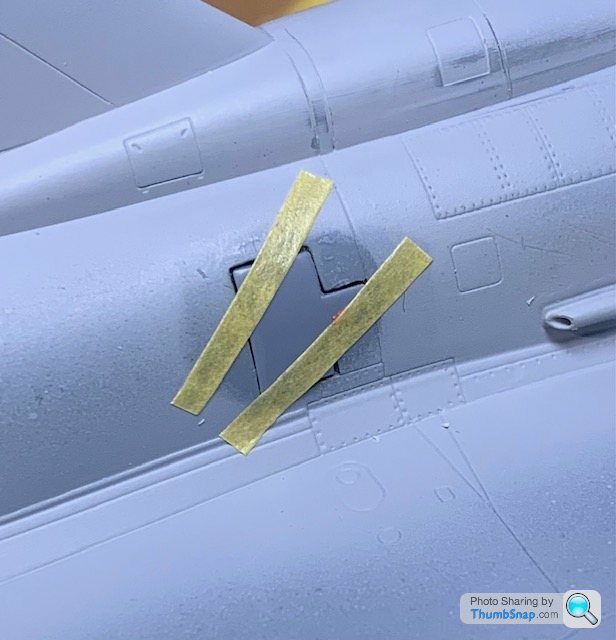
Got some Mlliput along the wing and fin joints, being careful to scrape any excess out of the nearby panel line and rivet detail:
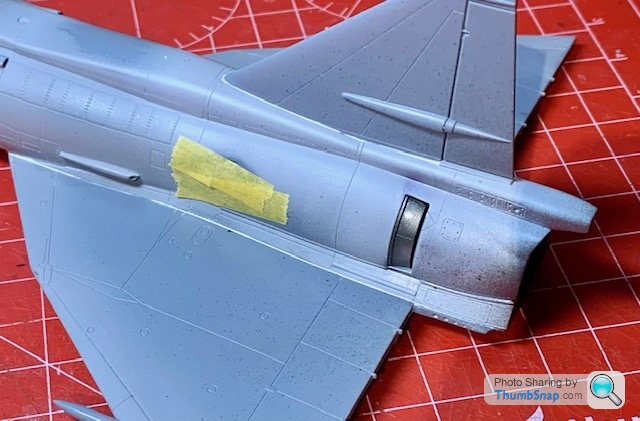
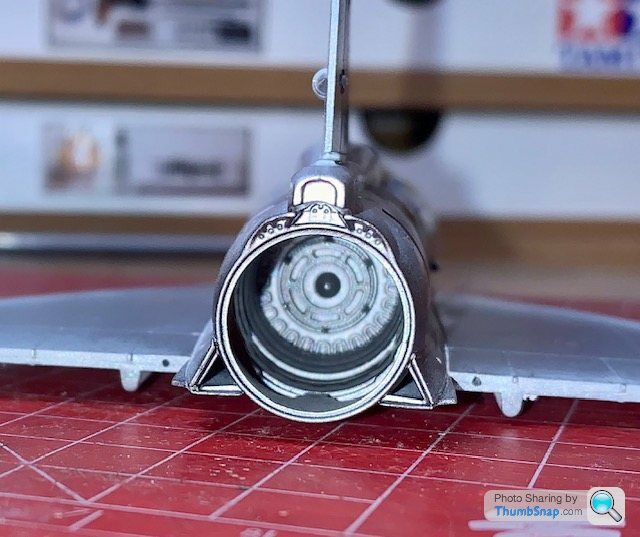
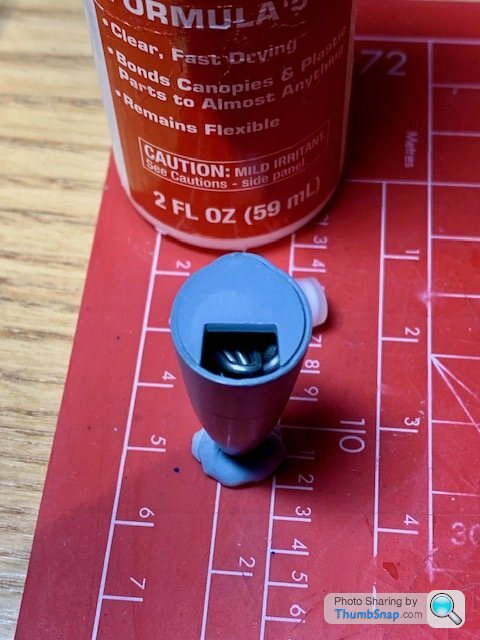
and filled some of the more obvious joint lines inside the jetpipe. I used Vallejo Gunmetal mixed with PVA for this, since there's hardly any room for subsequent fettling:
Got some Mlliput along the wing and fin joints, being careful to scrape any excess out of the nearby panel line and rivet detail:
and filled some of the more obvious joint lines inside the jetpipe. I used Vallejo Gunmetal mixed with PVA for this, since there's hardly any room for subsequent fettling:
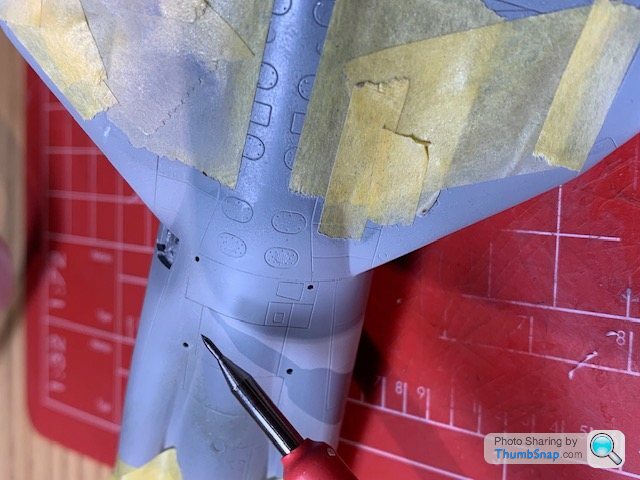
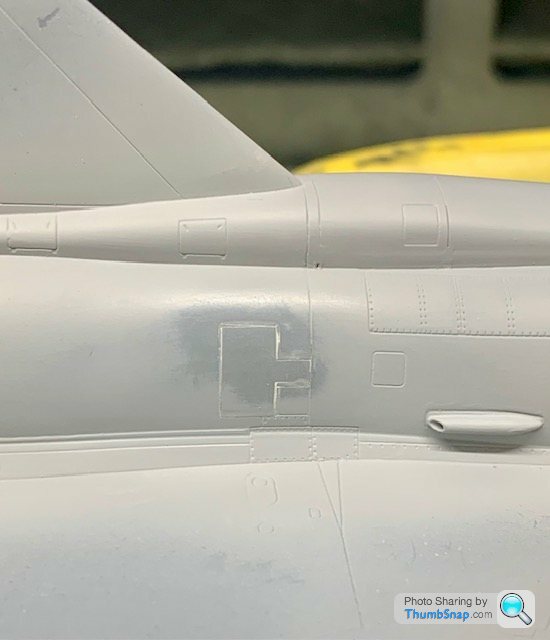
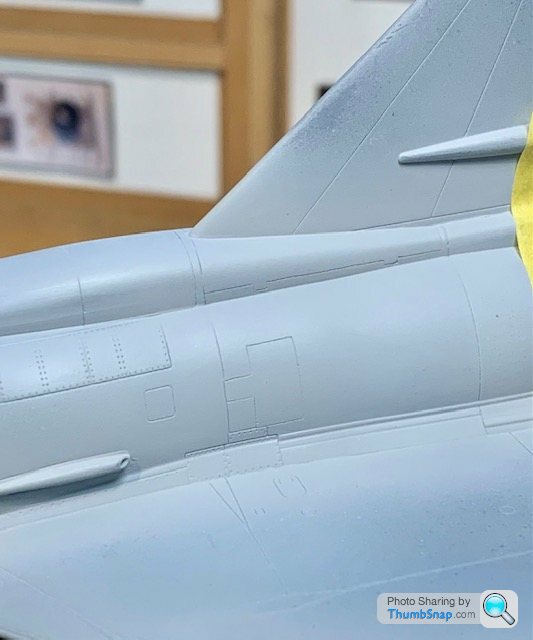
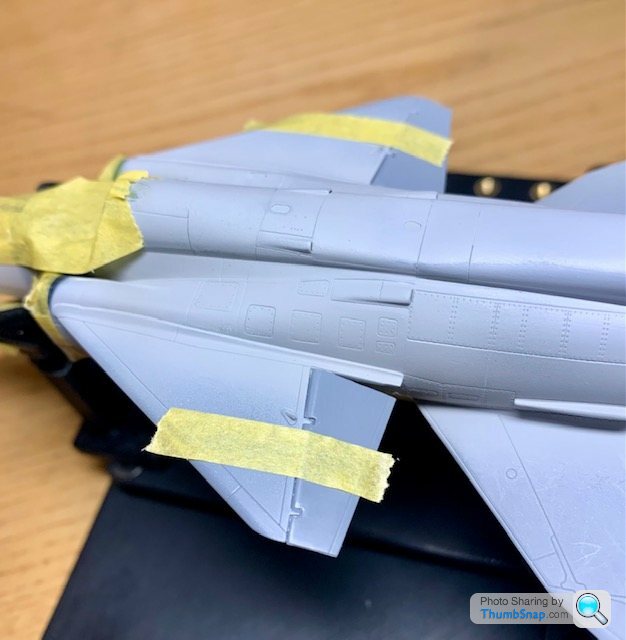
Did some filling and flatting of airframe joints, and re-scribed any lost panel lines:
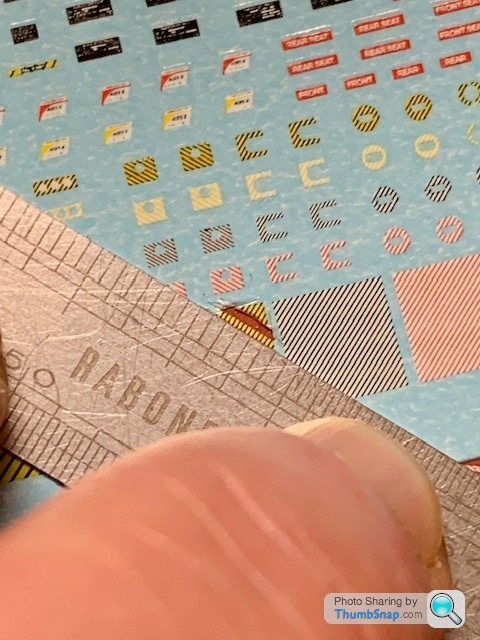
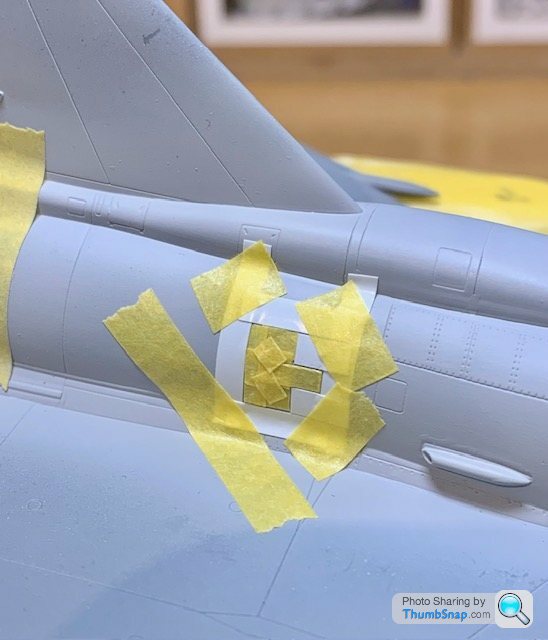
The SAAB ejection handle is a bit strange, sticking out next to the pilot's head. It has a series of yellow stripes on it, which also form ridged grips. I puzzled over how to paint these, but found a nice little set of decals at Telford, which solved the issue:
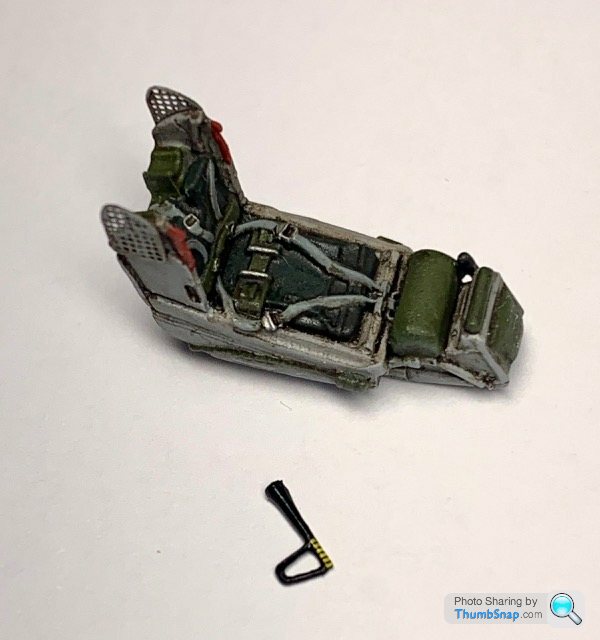
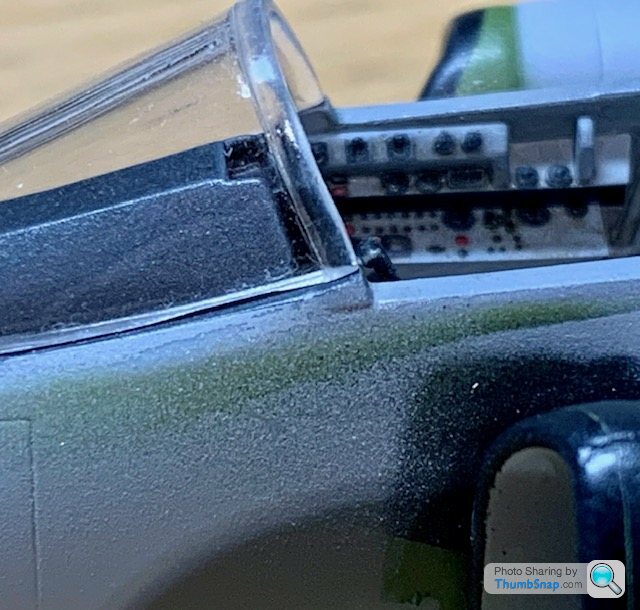
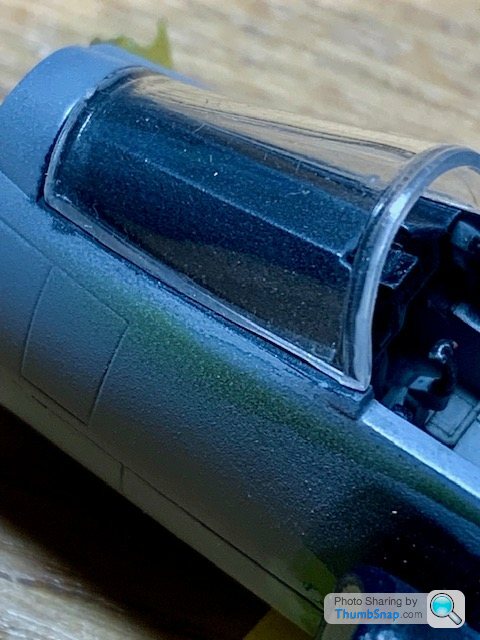
I'm now trying to figure out the windscreen, and whether the lower part (frame) is meant to be painted (but just very poorly moulded), or whether it's meant to represent the glass only. I'm assuming for now it's the latter, in which case I must remember to abrade the lower edges and paint them black before assembly:
Any thoughts?
The SAAB ejection handle is a bit strange, sticking out next to the pilot's head. It has a series of yellow stripes on it, which also form ridged grips. I puzzled over how to paint these, but found a nice little set of decals at Telford, which solved the issue:
I'm now trying to figure out the windscreen, and whether the lower part (frame) is meant to be painted (but just very poorly moulded), or whether it's meant to represent the glass only. I'm assuming for now it's the latter, in which case I must remember to abrade the lower edges and paint them black before assembly:
Any thoughts?
Finally got to glue some things together today:
Started with the four-piece ventral spine and fin - no locating pins, just a notch between the front of the fin and the spine, so you have to fit the rest by eye.
And the fuselage rails:
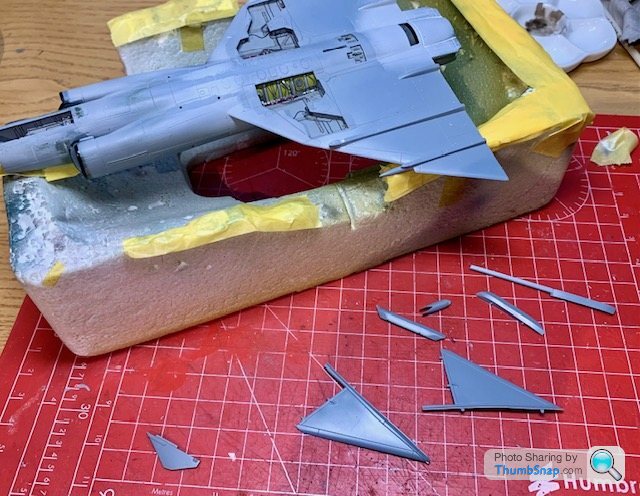
Then the canards:
PVA'd some lead in the nose (doesn't seem to need it, but I'm sure I read somewhere it was a tail-sitter):
And fitted it to the fuselage:
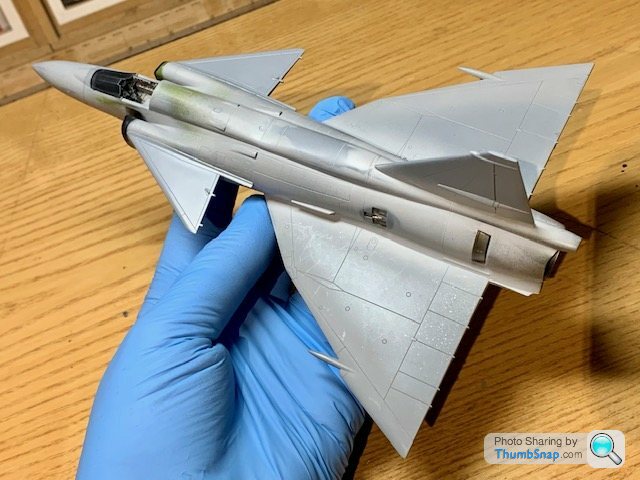
Will need some work around the join, but so far so good:

Also needs the elevons and canard control surfaces fitting, but then it will be ready for some paint I think.
Started with the four-piece ventral spine and fin - no locating pins, just a notch between the front of the fin and the spine, so you have to fit the rest by eye.
And the fuselage rails:
Then the canards:
PVA'd some lead in the nose (doesn't seem to need it, but I'm sure I read somewhere it was a tail-sitter):
And fitted it to the fuselage:
Will need some work around the join, but so far so good:
Also needs the elevons and canard control surfaces fitting, but then it will be ready for some paint I think.
Thanks both.
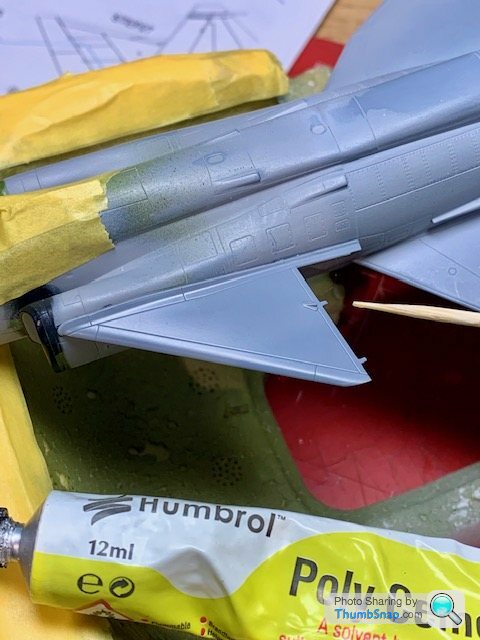
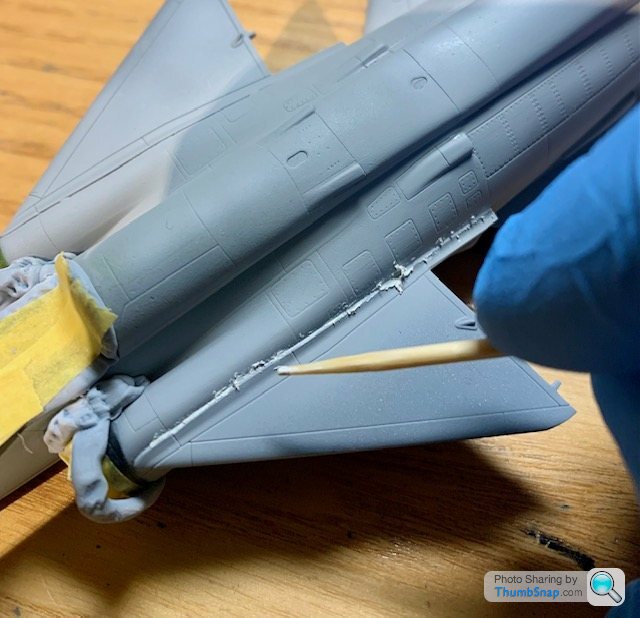
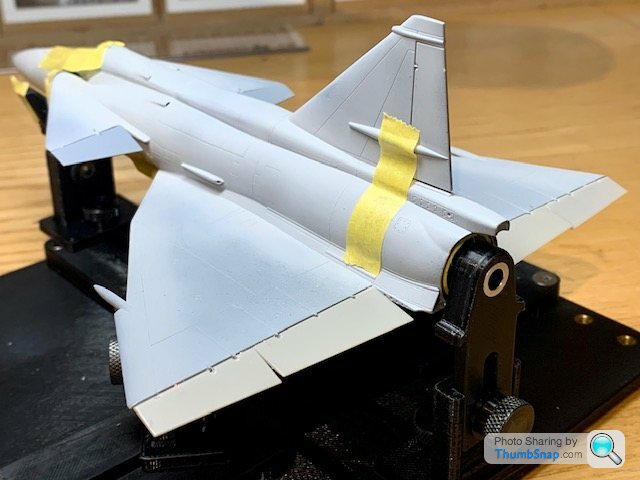
I've filled the canard joints with Milliput, and smoothed them with water:
In the end I thought the upper airbrakes being open would make the whole thing a bit fussy, what with the canopy, lower airbrakes and RAT all also being open. I think I read that they were often never used and fixed closed when in service anyway.
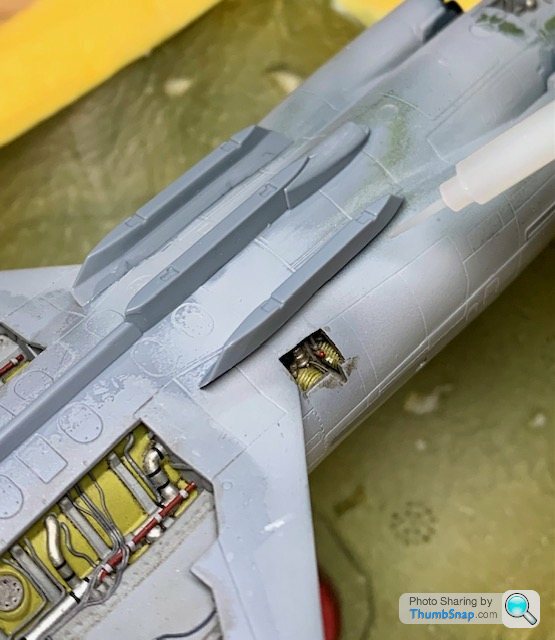
I still had the original panels, so scraped the resin detail away:
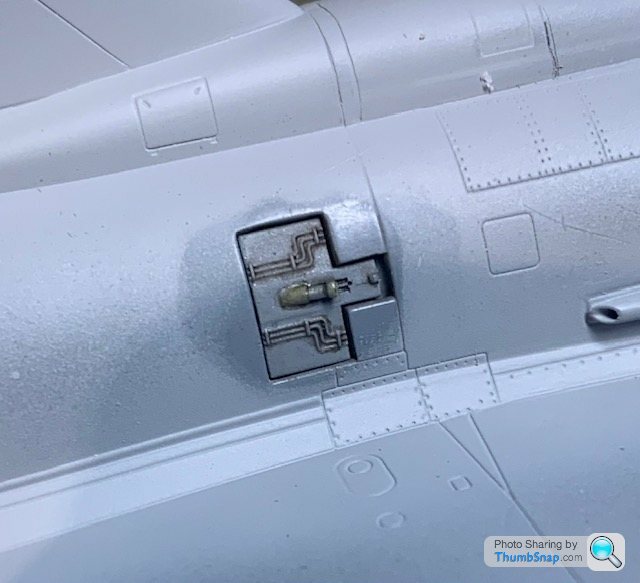
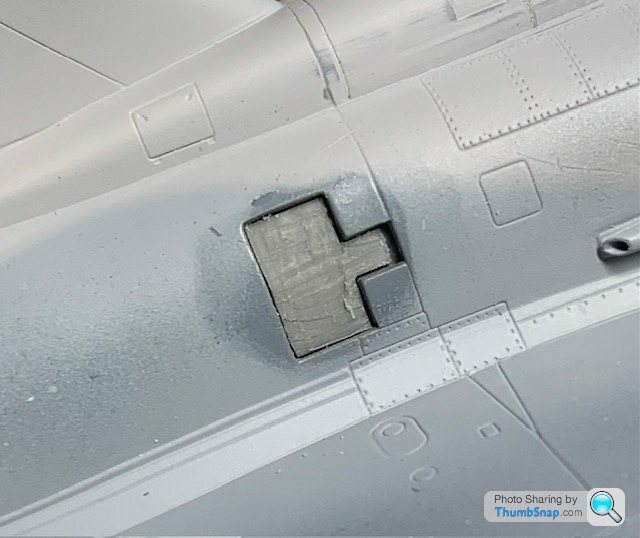
And Araldited the panels in place:
Then filled with Milliput:
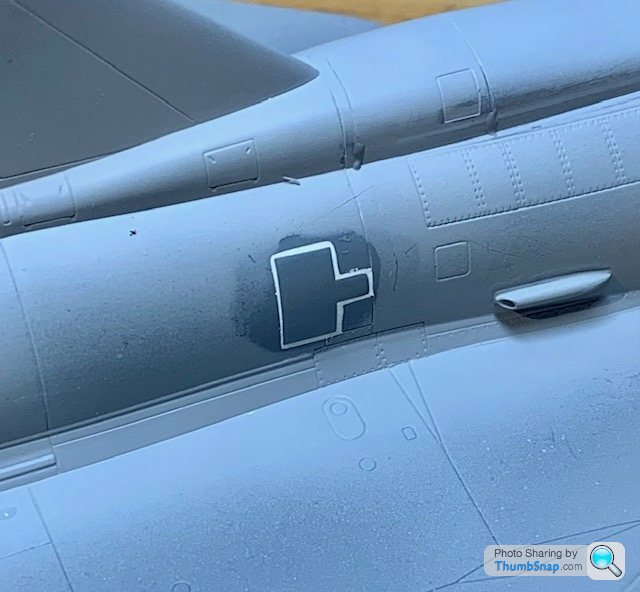
I'll flat them back to fuselage profile, then re-scribe the outlines.
I've filled the canard joints with Milliput, and smoothed them with water:
In the end I thought the upper airbrakes being open would make the whole thing a bit fussy, what with the canopy, lower airbrakes and RAT all also being open. I think I read that they were often never used and fixed closed when in service anyway.
I still had the original panels, so scraped the resin detail away:
And Araldited the panels in place:
Then filled with Milliput:
I'll flat them back to fuselage profile, then re-scribe the outlines.
Nice work, love the level of detail you are achieving on such a small scale.
My eyesights not up to 1/72, only returned to modelling a three or four years ago after a 30+ year hiatus and what with work etc i’ve only managed 5 in that time. Still very much learning but I too love a Viggen and was thrilled to see one at RIAT last year, even got to see it fly as it arrived on the Friday afternoon.
As my second model on returning to the hobby I made a 1/48 Italeri Viggen. Not the greatest kit but OK to practice.
Painting was fun working out exactly how to achieve the correct pattern. I scaled a copy of the plans on the computer and printed them out at 1/48 and used them as a template but of course that gives you a 2d template for a 3d model but it gave me a guideline to work from.
I did have a load of pictures of the various stages of masking but can’t find them. But here’s a picture of the finished model.
Roberty said:
Nice work, love the level of detail you are achieving on such a small scale.
My eyesights not up to 1/72, only returned to modelling a three or four years ago after a 30+ year hiatus and what with work etc i’ve only managed 5 in that time. Still very much learning but I too love a Viggen and was thrilled to see one at RIAT last year, even got to see it fly as it arrived on the Friday afternoon.
As my second model on returning to the hobby I made a 1/48 Italeri Viggen. Not the greatest kit but OK to practice.
Painting was fun working out exactly how to achieve the correct pattern. I scaled a copy of the plans on the computer and printed them out at 1/48 and used them as a template but of course that gives you a 2d template for a 3d model but it gave me a guideline to work from.
I did have a load of pictures of the various stages of masking but can’t find them. But here’s a picture of the finished model.
Nice one - very nice paintwork there. I've cheated and bought a pre-cut masking set. How well it fits remains to be seen...I expect it will need some patching here and there with normal tape and masking fluid.My eyesights not up to 1/72, only returned to modelling a three or four years ago after a 30+ year hiatus and what with work etc i’ve only managed 5 in that time. Still very much learning but I too love a Viggen and was thrilled to see one at RIAT last year, even got to see it fly as it arrived on the Friday afternoon.
As my second model on returning to the hobby I made a 1/48 Italeri Viggen. Not the greatest kit but OK to practice.
Painting was fun working out exactly how to achieve the correct pattern. I scaled a copy of the plans on the computer and printed them out at 1/48 and used them as a template but of course that gives you a 2d template for a 3d model but it gave me a guideline to work from.
I did have a load of pictures of the various stages of masking but can’t find them. But here’s a picture of the finished model.
dr_gn said:
Roberty said:
Nice work, love the level of detail you are achieving on such a small scale.
My eyesights not up to 1/72, only returned to modelling a three or four years ago after a 30+ year hiatus and what with work etc i’ve only managed 5 in that time. Still very much learning but I too love a Viggen and was thrilled to see one at RIAT last year, even got to see it fly as it arrived on the Friday afternoon.
As my second model on returning to the hobby I made a 1/48 Italeri Viggen. Not the greatest kit but OK to practice.
Painting was fun working out exactly how to achieve the correct pattern. I scaled a copy of the plans on the computer and printed them out at 1/48 and used them as a template but of course that gives you a 2d template for a 3d model but it gave me a guideline to work from.
I did have a load of pictures of the various stages of masking but can’t find them. But here’s a picture of the finished model.
Nice one - very nice paintwork there. I've cheated and bought a pre-cut masking set. How well it fits remains to be seen...I expect it will need some patching here and there with normal tape and masking fluid.My eyesights not up to 1/72, only returned to modelling a three or four years ago after a 30+ year hiatus and what with work etc i’ve only managed 5 in that time. Still very much learning but I too love a Viggen and was thrilled to see one at RIAT last year, even got to see it fly as it arrived on the Friday afternoon.
As my second model on returning to the hobby I made a 1/48 Italeri Viggen. Not the greatest kit but OK to practice.
Painting was fun working out exactly how to achieve the correct pattern. I scaled a copy of the plans on the computer and printed them out at 1/48 and used them as a template but of course that gives you a 2d template for a 3d model but it gave me a guideline to work from.
I did have a load of pictures of the various stages of masking but can’t find them. But here’s a picture of the finished model.
Also interesting to note how different countries had their own ideas about camouflage. They can't all have been right...
Halmyre said:
dr_gn said:
Roberty said:
Nice work, love the level of detail you are achieving on such a small scale.
My eyesights not up to 1/72, only returned to modelling a three or four years ago after a 30+ year hiatus and what with work etc i’ve only managed 5 in that time. Still very much learning but I too love a Viggen and was thrilled to see one at RIAT last year, even got to see it fly as it arrived on the Friday afternoon.
As my second model on returning to the hobby I made a 1/48 Italeri Viggen. Not the greatest kit but OK to practice.
Painting was fun working out exactly how to achieve the correct pattern. I scaled a copy of the plans on the computer and printed them out at 1/48 and used them as a template but of course that gives you a 2d template for a 3d model but it gave me a guideline to work from.
I did have a load of pictures of the various stages of masking but can’t find them. But here’s a picture of the finished model.
Nice one - very nice paintwork there. I've cheated and bought a pre-cut masking set. How well it fits remains to be seen...I expect it will need some patching here and there with normal tape and masking fluid.My eyesights not up to 1/72, only returned to modelling a three or four years ago after a 30+ year hiatus and what with work etc i’ve only managed 5 in that time. Still very much learning but I too love a Viggen and was thrilled to see one at RIAT last year, even got to see it fly as it arrived on the Friday afternoon.
As my second model on returning to the hobby I made a 1/48 Italeri Viggen. Not the greatest kit but OK to practice.
Painting was fun working out exactly how to achieve the correct pattern. I scaled a copy of the plans on the computer and printed them out at 1/48 and used them as a template but of course that gives you a 2d template for a 3d model but it gave me a guideline to work from.
I did have a load of pictures of the various stages of masking but can’t find them. But here’s a picture of the finished model.
Also interesting to note how different countries had their own ideas about camouflage. They can't all have been right...
The difference in camo concepts reflects the prevalent background terrain for different countries, or primary uses (e.g. maritime or over land), and like the green/brown to green/grey change to RAF Spitfire camo during WW2, can change depending whether the aircraft is primarily used in a defensive or offensive role. Patterns also seem to follow historical precedents; splinter schemes for Luftwaffe, wavy lines for RAF. Over time, concepts can also change to reflect experience and changing roles. For example the Vulcan changed for high to low level operations, with a change from overall white, to grey/green over white undersides, to wrap-around grey/green.
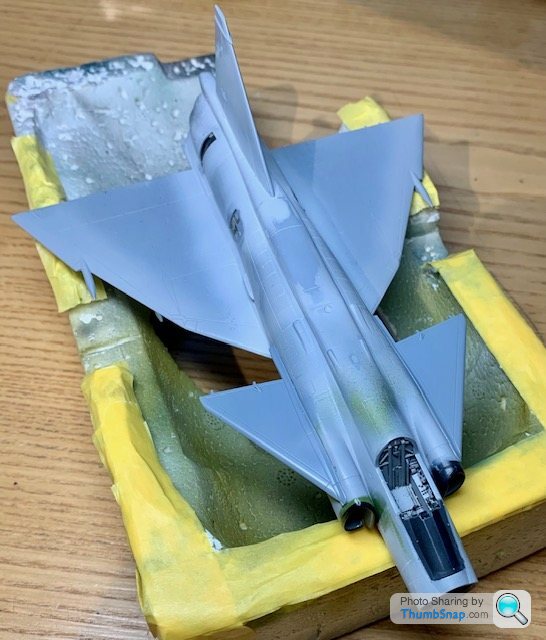
Fitted the slightly drooped control surfaces using Araldite & the copper wire for the resin ones:
and Tamiya Extra Thin for the polystyrene canards:
Adds a bit of interest to the airframe:
Probably have to run some surfacer along the joints to make them more consistent, and fill the gaps behing the underside actuator fairings.
and Tamiya Extra Thin for the polystyrene canards:
Adds a bit of interest to the airframe:
Probably have to run some surfacer along the joints to make them more consistent, and fill the gaps behing the underside actuator fairings.
Gassing Station | Scale Models | Top of Page | What's New | My Stuff