Tamiya Avante build thread
Discussion


Wildfire said:
Build looks great plus the YR kit!
I started a Manta Ray basher a while ago and committed to not buying another until I finished it. I had a Bear Hawk as a kid and now wish I hadn't trashed it. My mate had an Avante 2001, which was just the best thing I had ever seen.
I keep seeing the Avante and Black special come up on eBay and consider putting a bid in...
The Manta Ray is basically a Thunder Shot / Dragon with 2 shocks at the front rather than a single unit isn't it? I always thought the single spring at the front was way too soft but nostalgic internet consensus seems to disagree with me.I started a Manta Ray basher a while ago and committed to not buying another until I finished it. I had a Bear Hawk as a kid and now wish I hadn't trashed it. My mate had an Avante 2001, which was just the best thing I had ever seen.
I keep seeing the Avante and Black special come up on eBay and consider putting a bid in...
I wouldn't buy a thunder shot etc now as, even as child, it wasn't a real challenge to build. The Avante in itself isn't that difficult. The challenge for me and the bit that I've been enjoying is finding ways to upgrade it that aren't off the shelf. The bits of titanium stud / nuts being prime examples.
I'm not enjoying the electronics. I'm not stupid and I have a basic understanding of electronics but I've foundd it difficult to go from my previous knowledge of a 3 speed mechanical speed controller to what is available now. The digital bit is easy but the rating of motors, (turns v's kV) LiPo batteries, amp capacity of esc 's etc has been problematic.
4321go said:
I wasn’t allowed a Rough Rider in circa 1980. Too expensive!! So when it was re-released about a decade ago (as the Buggy Champ) I threw EVERYTHING at it. Including a set of original decals, at ludicrous expense. (Tamiya wouldn’t pay the license fee to use the original stickers, so provided a set that looked similar, but were for imaginary parts suppliers rather than the genuine companies that appeared on the original model. And although reproduction original sticker sheets were available, the quality was poor, with fuzzy, out of register images!)
But I have one “observation”. Surely, using a grub screw of a material that’s significantly lighter than the material of the gear that it’s securing, will introduce a greater imbalance than a grub screw made of the same material? A significant issue in a part that must weigh at least a gram ??
Very nice! I think I was the generation after you but I would love a Toyota truck which I think is from a similar period. Only after a 959.But I have one “observation”. Surely, using a grub screw of a material that’s significantly lighter than the material of the gear that it’s securing, will introduce a greater imbalance than a grub screw made of the same material? A significant issue in a part that must weigh at least a gram ??
I know you're not being serious about the grub screw - nor was I. They are hollowed out after all. But the motor pinion gear is aluminium as are the wheel hubs so, if anything if someone did do the math and calculated the hollowed out space occupied by a steel grub screw was balanced, the the Ti replacement would cause an imbalance by being lighter. Possibly, maybe. I doubt it's ever been seriously considered.
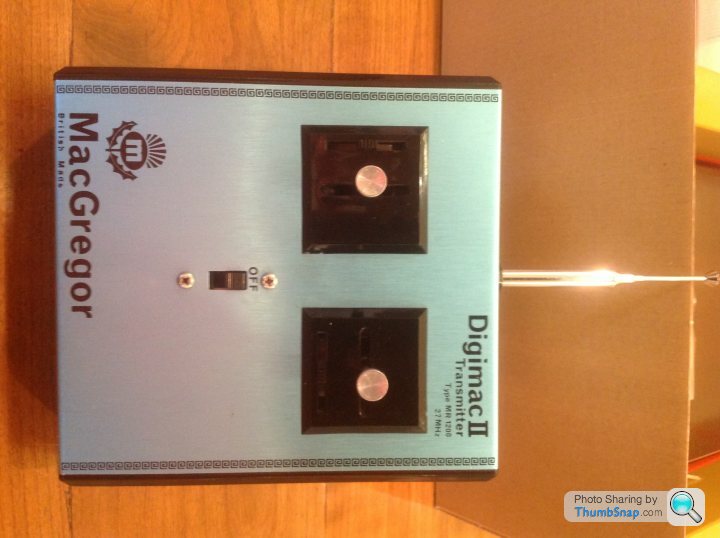
The receiver's nice, but again , I was the generation after and had a Accoms unit with a little battery level indicator so that you were able to confirm that you had, yet again, forgotten to turn it off and drained all 10 (or was it 8) AA batteries.
But the fleshy receiver I have bought is of the same type and not the trigger/wheel style. I know I can use both but I just prefer the older type. I also wanted more channels this suits my plans for the DRS idea and lights.
Edited by Zombie on Friday 12th January 03:06
Zombie said:
The Manta Ray is basically a Thunder Shot / Dragon with 2 shocks at the front rather than a single unit isn't it? I always thought the single spring at the front was way too soft but nostalgic internet consensus seems to disagree with me.
I wouldn't buy a thunder shot etc now as, even as child, it wasn't a real challenge to build. The Avante in itself isn't that difficult. The challenge for me and the bit that I've been enjoying is finding ways to upgrade it that aren't off the shelf. The bits of titanium stud / nuts being prime examples.
I'm not enjoying the electronics. I'm not stupid and I have a basic understanding of electronics but I've foundd it difficult to go from my previous knowledge of a 3 speed mechanical speed controller to what is available now. The digital bit is easy but the rating of motors, (turns v's kV) LiPo batteries, amp capacity of esc 's etc has been problematic.
It was a different chassis. The Top Force was a development of the Manta Ray Tub. It is actually very upgradable and I really just need to get some better shocks and paint the shell..I wouldn't buy a thunder shot etc now as, even as child, it wasn't a real challenge to build. The Avante in itself isn't that difficult. The challenge for me and the bit that I've been enjoying is finding ways to upgrade it that aren't off the shelf. The bits of titanium stud / nuts being prime examples.
I'm not enjoying the electronics. I'm not stupid and I have a basic understanding of electronics but I've foundd it difficult to go from my previous knowledge of a 3 speed mechanical speed controller to what is available now. The digital bit is easy but the rating of motors, (turns v's kV) LiPo batteries, amp capacity of esc 's etc has been problematic.
And I have a Sand Scorcher to build. My dad had ones I crashed when I was 7 and I bought it for him 30 odd years later and he has no interest in it.
I do have a very tricked out Egress to build with custom turnbuckles and everything, hence I would like an Avante.
I’m not massively keen on LiPo, just because I don’t think I’d use it too much and probably get it wrong anyhow.
The Avante seems to go in peaks and troughs for kits, but it’s on the list.
Wildfire said:
It was a different chassis. The Top Force was a development of the Manta Ray Tub. It is actually very upgradable and I really just need to get some better shocks and paint the shell..
And the Manta Ray was a development of the Thunder Shot / Dragon / Terra Scorcher chassis.Wildfire said:
I do have a very tricked out Egress to build with custom turnbuckles and everything, hence I would like an Avante.
The turnbuckles sound interesting, I'm not entirely happy with the amount of movement in the standard ball ends. Where did you find them?Edited by Zombie on Saturday 13th January 01:17
ShredderXLE said:
If you are going to run it I would seriously change those alloy pinions for steel ones, the durability of the stock aluminium Tamiya pinions is terrible and the resulting grease/aluminium dust grinding paste that gets created knackers the spur gear. Other than that, lovely build!
Thanks, Having watch a number of YT videos on that ver subject over the weekend, I shall do exactly as you have suggested. Although, it will end up on a shelf.Zombie said:
The turnbuckles sound interesting, I'm not entirely happy with the amount of movement in the standard ball ends. Where did you find them?
I didn't know the TDF01 was an evolution of the Thunder Dragon, I thought it was all new and then evolved in the T series. Edited by Zombie on Saturday 13th January 01:17
I got them off a guy in the states on eBay a while ago. He was making up custom kits. I wanted him to do my Manta Ray, but then life took over. I have them and some YR bits for the Egress and a period Avante 2001 shell.
Step 27:
 IMG_8748 by Chris, on Flickr
 IMG_8751 by Chris, on Flickr
I'm planning on providing a technical date sheet of the 3 sets of dampers I have for my build. I've started this by measuring spring rates.
 IMG_8754 by Chris, on Flickr
 IMG_8763 by Chris, on Flickr
Standard dampers built up...
 IMG_8766 by Chris, on Flickr
Levelling up to the next upgrade option:
 IMG_8769-2 by Chris, on Flickr
 IMG_8772 by Chris, on Flickr
Aside from the larger bore and slightly nicer springs, I'm not impressed. Not worth the money.
 IMG_8778 by Chris, on Flickr
 IMG_8784 by Chris, on Flickr
These on the other hand....
 IMG_8799 by Chris, on Flickr
Yes they expensive but relative to the Hi Caps, they're a bargain.
 IMG_8802 by Chris, on Flickr
 IMG_8805 by Chris, on Flickr
I used the blue TRF o rings to build the dampers. They had a very odd (sticky , like cooked fried rice)consistency to them.
 IMG_8814 by Chris, on Flickr
I ended up just using the plastic spacer from the high caps to build them up. I've cover my rationale on this in a separate post.
 IMG_8820 by Chris, on Flickr
Filled with oil and left to sit.
 IMG_8829 by Chris, on Flickr
 IMG_8835 by Chris, on Flickr
I used a Ti bolt and X6 to mount to to of the shock to the H bar extension. This follows the instructions for the DB02 Chassis mount.
 Screenshot 2024-01-21 at 23.27.07 by Chris, on Flickr
I did spend a lot of time procrastinating over whether an M3 washer was required until I realised that X6 is (IMO) designed to compress and expand, to secure the top mount. Therefore i think no washer is required.
 IMG_8841 by Chris, on Flickr
And I used a standard plastic lower mount.
 IMG_8844 by Chris, on Flickr
IMG_8748 by Chris, on FlickrIMG_8751 by Chris, on FlickrI'm planning on providing a technical date sheet of the 3 sets of dampers I have for my build. I've started this by measuring spring rates.
IMG_8754 by Chris, on FlickrIMG_8763 by Chris, on FlickrStandard dampers built up...
IMG_8766 by Chris, on FlickrLevelling up to the next upgrade option:
IMG_8769-2 by Chris, on FlickrIMG_8772 by Chris, on FlickrAside from the larger bore and slightly nicer springs, I'm not impressed. Not worth the money.
IMG_8778 by Chris, on FlickrIMG_8784 by Chris, on FlickrThese on the other hand....
IMG_8799 by Chris, on FlickrYes they expensive but relative to the Hi Caps, they're a bargain.
IMG_8802 by Chris, on FlickrIMG_8805 by Chris, on FlickrI used the blue TRF o rings to build the dampers. They had a very odd (sticky , like cooked fried rice)consistency to them.
IMG_8814 by Chris, on FlickrI ended up just using the plastic spacer from the high caps to build them up. I've cover my rationale on this in a separate post.
IMG_8820 by Chris, on FlickrFilled with oil and left to sit.
IMG_8829 by Chris, on FlickrIMG_8835 by Chris, on FlickrI used a Ti bolt and X6 to mount to to of the shock to the H bar extension. This follows the instructions for the DB02 Chassis mount.
Screenshot 2024-01-21 at 23.27.07 by Chris, on FlickrI did spend a lot of time procrastinating over whether an M3 washer was required until I realised that X6 is (IMO) designed to compress and expand, to secure the top mount. Therefore i think no washer is required.
IMG_8841 by Chris, on FlickrAnd I used a standard plastic lower mount.
IMG_8844 by Chris, on FlickrEdited by Zombie on Monday 22 January 02:23
Step 30 - mounting the rear dampers. For some guidance on mounting position, I mocked up the standard damper first.
 IMG_8856-2 by Chris, on Flickr
And used the standard damper (upper) mount to come up with this arrangement. An M3 ti bolt goes through an M3 flange nut and then the "rabbit ears" as I don't have any M3 washers to hand atm.
In terms of the strut or tower brace mount, I've used a partially drilled and tapped ball (bearing?) that I found on eBay.
 IMG_8857 by Chris, on Flickr
I've used a 10mm spacer in the rear dampers (as well as the fronts) to bring the full extension of the damper in line with the standard item.
On full sag it is very close to the gearbox.
 IMG_8877 by Chris, on Flickr
However, once compressed , the suspension articulation moves the damper away from the gearbox, so there is no clearance issue.
 IMG_8883-3 by Chris, on Flickr
 IMG_8865 by Chris, on Flickr
 IMG_8868 by Chris, on Flickr
IMG_8856-2 by Chris, on FlickrAnd used the standard damper (upper) mount to come up with this arrangement. An M3 ti bolt goes through an M3 flange nut and then the "rabbit ears" as I don't have any M3 washers to hand atm.
In terms of the strut or tower brace mount, I've used a partially drilled and tapped ball (bearing?) that I found on eBay.
IMG_8857 by Chris, on FlickrI've used a 10mm spacer in the rear dampers (as well as the fronts) to bring the full extension of the damper in line with the standard item.
On full sag it is very close to the gearbox.
IMG_8877 by Chris, on FlickrHowever, once compressed , the suspension articulation moves the damper away from the gearbox, so there is no clearance issue.
IMG_8883-3 by Chris, on FlickrIMG_8865 by Chris, on FlickrIMG_8868 by Chris, on Flickrdom9 said:
Great build! Liking the dampers - I have some on a Schumacher!
Thanks. What?! You can't be putting poxy Tamiya parts on a proper RC car!!!
Thanks. What?! You can't be putting poxy Tamiya parts on a proper RC car!!!
dom9 said:
The gear diffs aren't torque biasing, sadly, though!
Yup, you're right, very similar in design but not the same, I did realise after I'd thought about it. dom9 said:
Great build! Liking the dampers - I have some on a Schumacher!
Absolute icon of a car and nice to see one getting built up to this spec and attention to detail!
Again, Thank you. Absolute icon of a car and nice to see one getting built up to this spec and attention to detail!

Step 32 - Steering servo / electronics
 IMG_8889 by Chris, on Flickr
I bought a carbon / ti servo horn but the information about its fitment type was not provided within the eBay advert and it doesn't fit the servo, which was disappointing but not unexpected. Hence the High torque hop up.
 IMG_8892 by Chris, on Flickr
The alloy servo mounts are also the standard tamiya hop up. They're mounted to the servo with Ti screws, which, like a lot of other fixings, weren't included with the YR screw set - I've ended up buying a second set alongside some M3 and M4 nuts.
 IMG_8895 by Chris, on Flickr
I've used a titanium turnbuckle shaft for the servo link rather than the standard part. The servo horn position is different to the standard part so the ease of adjustment to account for this provided by the LH/RH threads will probably prove helpful. I've just set it at the specified length called for by the manual to start with.
 IMG_8898 by Chris, on Flickr
I don't have any M3x12mm Ti counter sunk screws, so I think I'm going to cut these 18mm bolts down to fit. I can't do that ATM, so that's brought me as far as I can go.
I also need to look at the position of the electronics / switch / wiring now which really means I need a body shell now so that I know where to position everything. I have plans to open up the implied air vents in the body into functioning vents as the position of them and the top mounted fan on the ESC look like they will coalesce.
I think my plans to build a DRS / air brake into it will also impact on the position of some items and I have SMD LEDs that I want to build into the driver figure base that aside from being pretty, will also provide some basic info like power on lights / batter connected.
 IMG_8901 by Chris, on Flickr
IMG_8889 by Chris, on FlickrI bought a carbon / ti servo horn but the information about its fitment type was not provided within the eBay advert and it doesn't fit the servo, which was disappointing but not unexpected. Hence the High torque hop up.
IMG_8892 by Chris, on FlickrThe alloy servo mounts are also the standard tamiya hop up. They're mounted to the servo with Ti screws, which, like a lot of other fixings, weren't included with the YR screw set - I've ended up buying a second set alongside some M3 and M4 nuts.
IMG_8895 by Chris, on FlickrI've used a titanium turnbuckle shaft for the servo link rather than the standard part. The servo horn position is different to the standard part so the ease of adjustment to account for this provided by the LH/RH threads will probably prove helpful. I've just set it at the specified length called for by the manual to start with.
IMG_8898 by Chris, on FlickrI don't have any M3x12mm Ti counter sunk screws, so I think I'm going to cut these 18mm bolts down to fit. I can't do that ATM, so that's brought me as far as I can go.
I also need to look at the position of the electronics / switch / wiring now which really means I need a body shell now so that I know where to position everything. I have plans to open up the implied air vents in the body into functioning vents as the position of them and the top mounted fan on the ESC look like they will coalesce.
I think my plans to build a DRS / air brake into it will also impact on the position of some items and I have SMD LEDs that I want to build into the driver figure base that aside from being pretty, will also provide some basic info like power on lights / batter connected.
IMG_8901 by Chris, on FlickrZombie said:
IMG_8772 by Chris, on FlickrAside from the larger bore and slightly nicer springs, I'm not impressed. Not worth the money.
Edited by Zombie on Monday 22 January 02:23
Great choice on the big bores though! Ive not yet seen an Avante built with those so really keen to see this progress now as they look brilliant with the carbon parts and Ti rods. Have you had any thoughts on the body yet? Box art?
ShredderXLE said:
I think in the context of an upgrade over the standard Avante gold shocks, you're right, they dont offer a great deal extra but as an upgrade to the yellow plastic CVAs on the Vanquish which they are the intended hop up for theyre very reasonable and brilliant dampers in use, ive also got them on my Top Force but with the longer front cylinders.
Great choice on the big bores though! Ive not yet seen an Avante built with those so really keen to see this progress now as they look brilliant with the carbon parts and Ti rods. Have you had any thoughts on the body yet? Box art?
I've got some JPS stickers and some Senna Helmet decals. Senna being a driver of the era when the Avante was released and it being 30 years this year, but I also have box art decals for the black edition and the 2011 ReRe alongside 2 spare (genuine) shells.Great choice on the big bores though! Ive not yet seen an Avante built with those so really keen to see this progress now as they look brilliant with the carbon parts and Ti rods. Have you had any thoughts on the body yet? Box art?
But I haven't made up my mind. I have thought of doing a military style body inspired on this:
https://www.pistonheads.com/regulars/ph-potw/eagle...
Edited by Zombie on Friday 26th January 00:36
Gassing Station | Scale Models | Top of Page | What's New | My Stuff