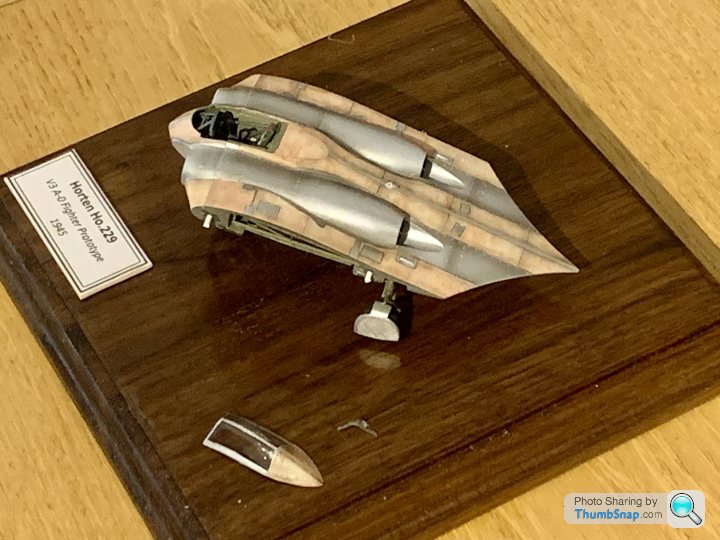
Revell 1:72 Horten 229 - Wood Finish
Discussion


My son started this a few years ago, and didn’t get very far. Then last week he realised that he’s still eligible to enter the junior class (last chance) at the local model show on Sunday, and that was that.
The idea was always to finish it as bare wood, like the Mosquito I did a few years ago. It’s a slow, tedious process, and I’m obviously not allowed to help him to build it (not that he’ asked come to think of it!), only with advice on the sequence of how I did it. I think it will be a miracle if he finishes it in time, especially with revision for tests at school getting in the way, but I’ve been surprised before!
Working on the central body:
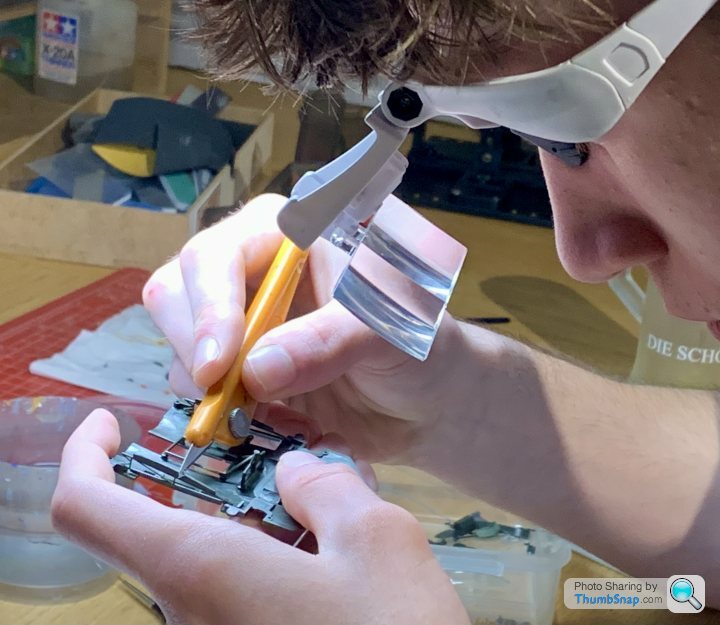
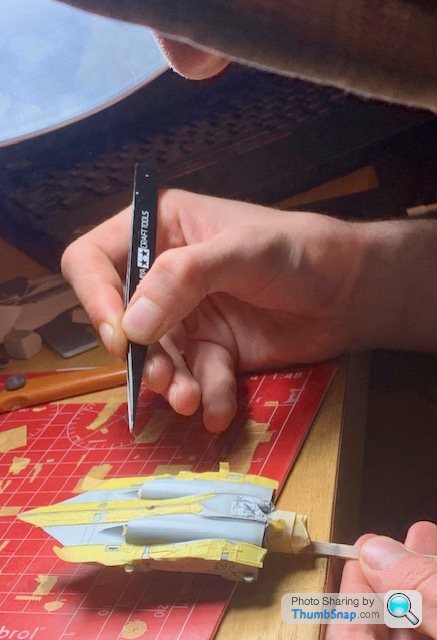
Drawing on the panel demarcations with pencil, using Tamiya profile tape as a guide):
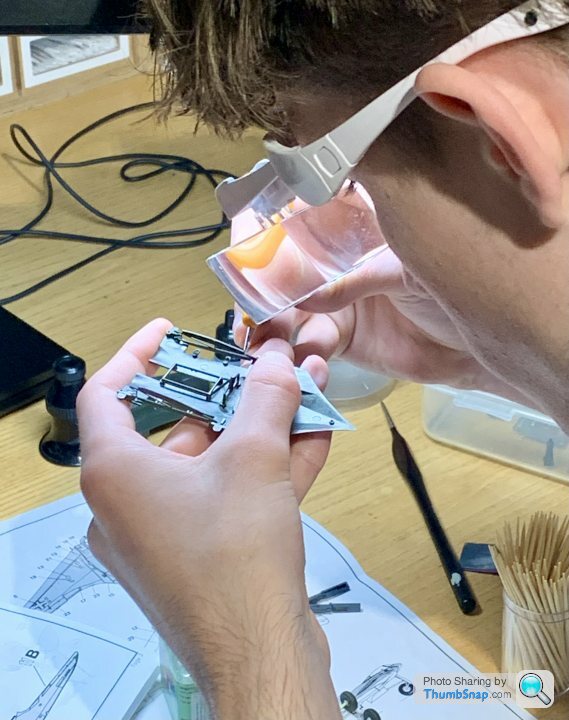
Post-shading the pencil lines with Tamiya Smoke over the white primer decal base:
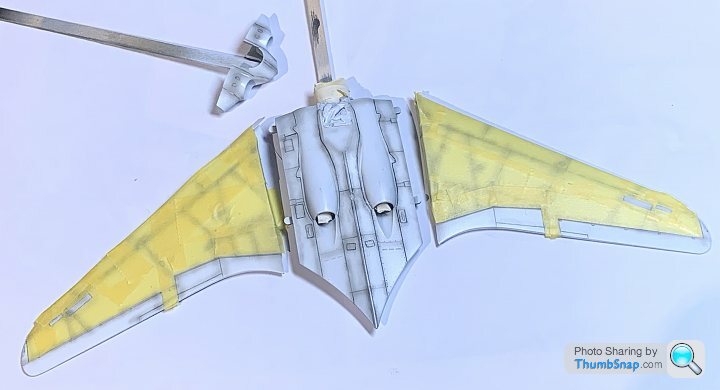
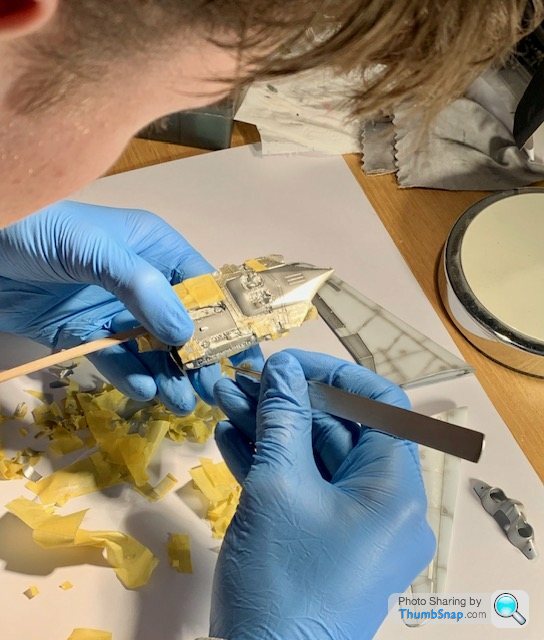
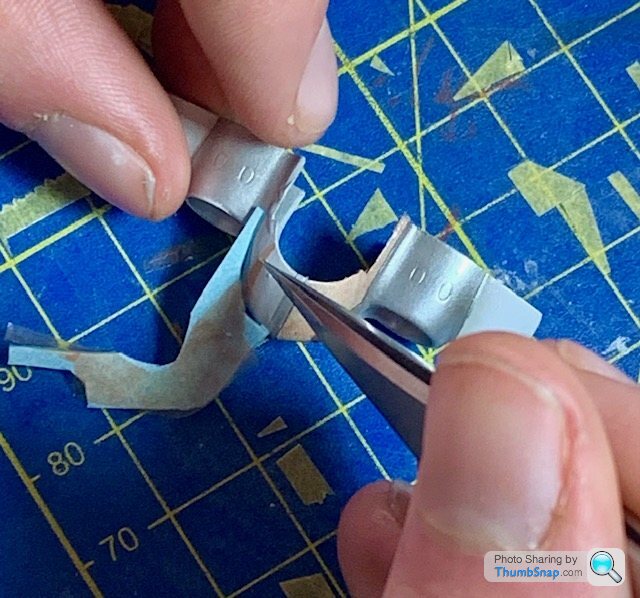
Masking for the silver bits:
More masking tomorrow, and getting the silver down. Then the next three evenings and Saturday doing the wood grain decals…if he can stay motivated.
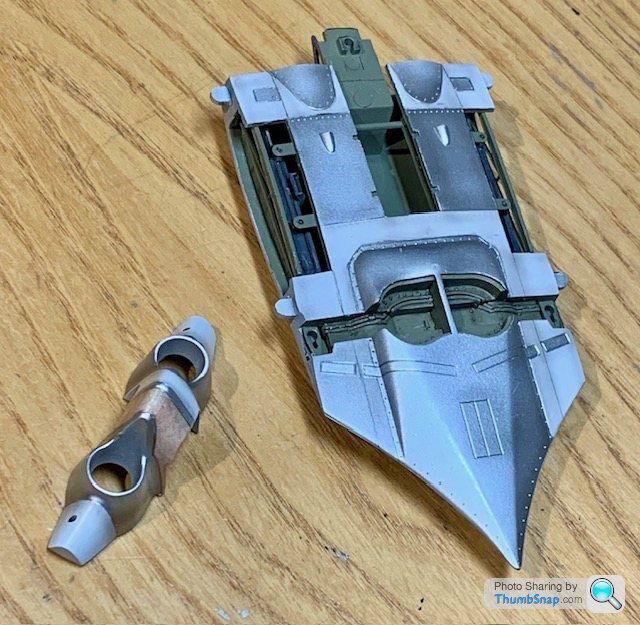
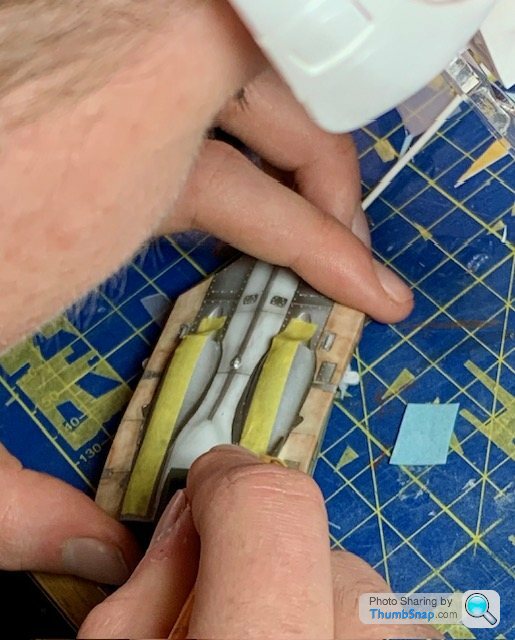
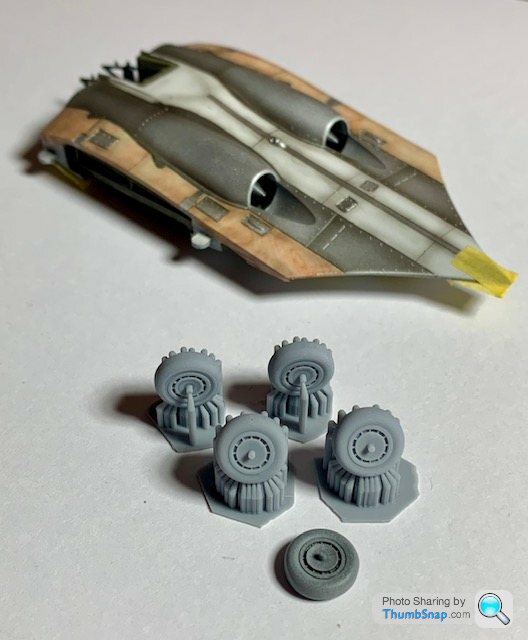
He already finished the cockpit and u/c components before I got chance to take progress pics; they actually look great, although he lost a main wheel to the workshop monster while priming it. I guess my practical contribution could be printing a new one.
The idea was always to finish it as bare wood, like the Mosquito I did a few years ago. It’s a slow, tedious process, and I’m obviously not allowed to help him to build it (not that he’ asked come to think of it!), only with advice on the sequence of how I did it. I think it will be a miracle if he finishes it in time, especially with revision for tests at school getting in the way, but I’ve been surprised before!
Working on the central body:
Drawing on the panel demarcations with pencil, using Tamiya profile tape as a guide):
Post-shading the pencil lines with Tamiya Smoke over the white primer decal base:
Masking for the silver bits:
More masking tomorrow, and getting the silver down. Then the next three evenings and Saturday doing the wood grain decals…if he can stay motivated.
He already finished the cockpit and u/c components before I got chance to take progress pics; they actually look great, although he lost a main wheel to the workshop monster while priming it. I guess my practical contribution could be printing a new one.
Simpo Two said:
Which bit is going to be wood (wood effect I presume)?
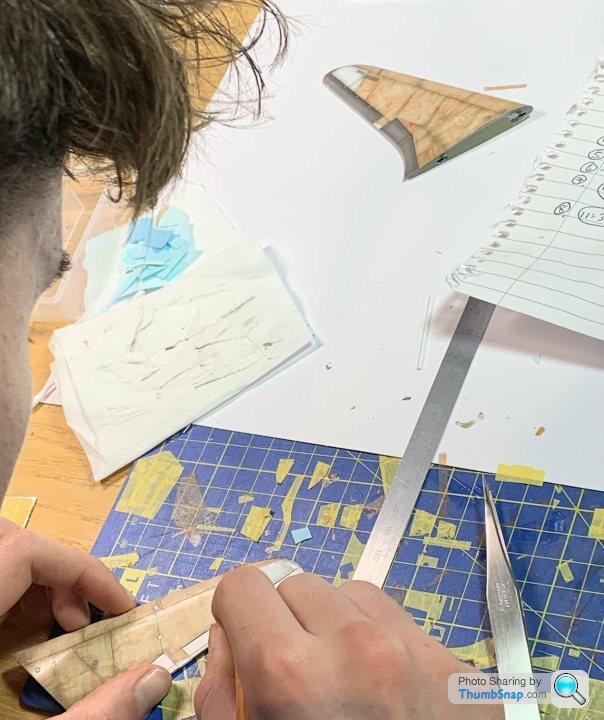
It's good to see those little orange craft knives are still around - or is it your old one? Takes me right back to my early days building Keil Kraft aeroplanes.
The wood (decals) will be applied to all the bits masked in yellow on the wings, and most of the central body, excluding the engine covers.It's good to see those little orange craft knives are still around - or is it your old one? Takes me right back to my early days building Keil Kraft aeroplanes.
I've had those orange scalpel handles for decades - I find them much easier to use on plastic than the slotted handles because you can adjust how much of the blade protrudes, and that helps when you're using the blade for scraping, since the blade isn't as flexible.
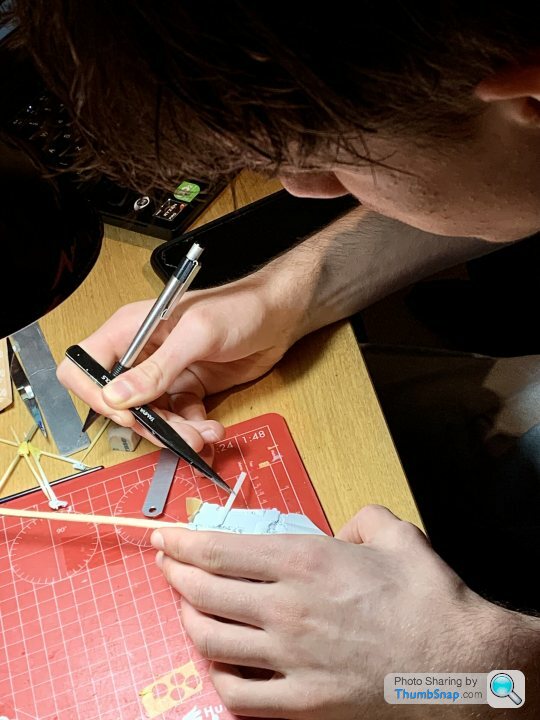
These are the parts he painted last weekend, dark washed, and a bit of weathering powder:

One of the small u/c wheels pinged off it's cocktail stick, and despite thinking he saw where it went, a complete turning upside-down of that area of the garage failed to find it. So I think it's fair to say I'll end up printing a replacement.
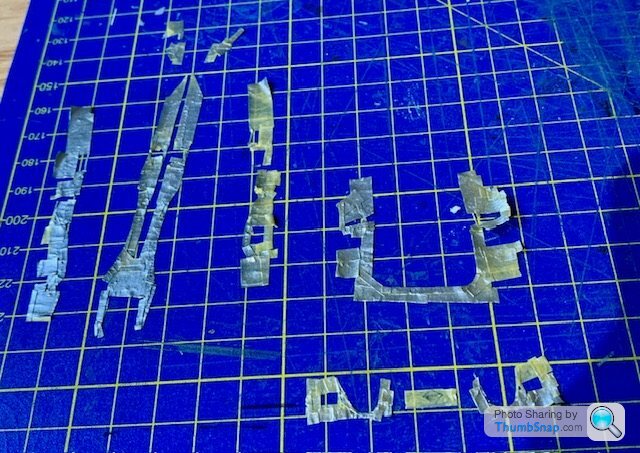
After a monumental masking session:
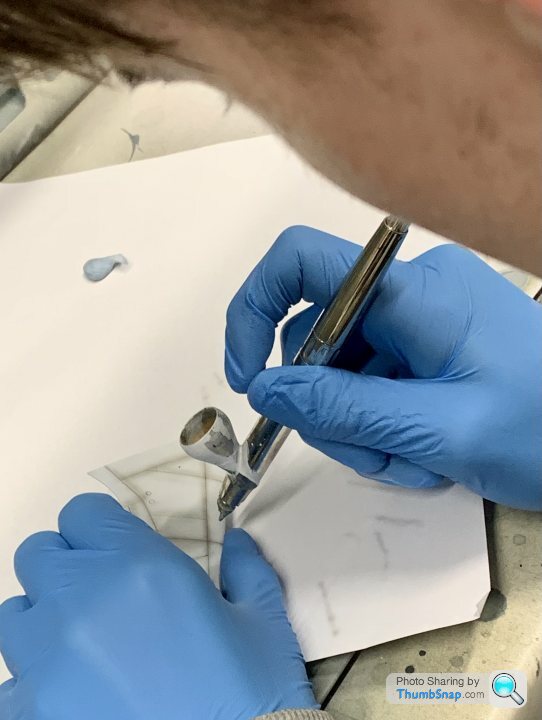
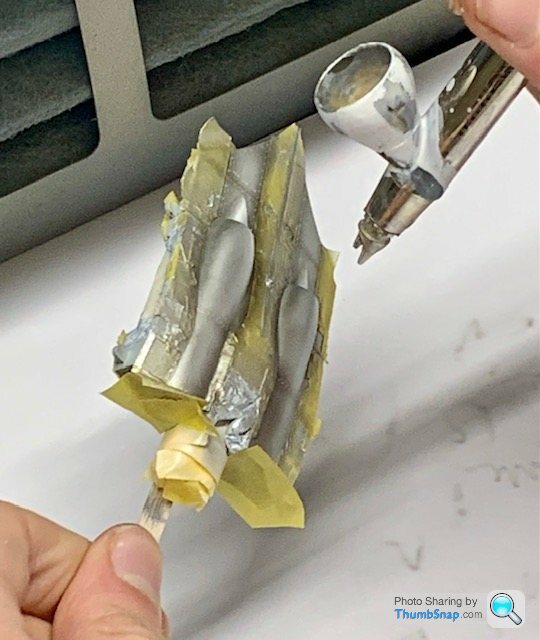
...tonight he got on with painting the aluminium parts:
And post-shaded them with Tamiya Smoke:

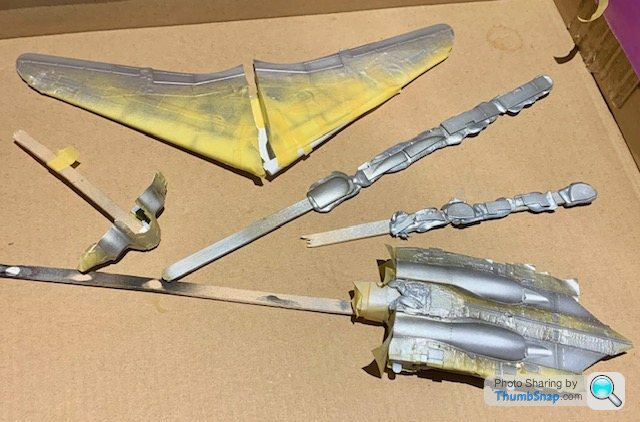
End of play tonight:
Still needs a bit more masking to add smoke to selected panels to give some contrast, but that's tomorrow's job.
I think it's increasingly unlikely he'll get it done for Sunday (I know what's to come with the decals - he doesn't!), but at least it's another model off the shelf of doom.
One of the small u/c wheels pinged off it's cocktail stick, and despite thinking he saw where it went, a complete turning upside-down of that area of the garage failed to find it. So I think it's fair to say I'll end up printing a replacement.
After a monumental masking session:
...tonight he got on with painting the aluminium parts:
And post-shaded them with Tamiya Smoke:
End of play tonight:
Still needs a bit more masking to add smoke to selected panels to give some contrast, but that's tomorrow's job.
I think it's increasingly unlikely he'll get it done for Sunday (I know what's to come with the decals - he doesn't!), but at least it's another model off the shelf of doom.
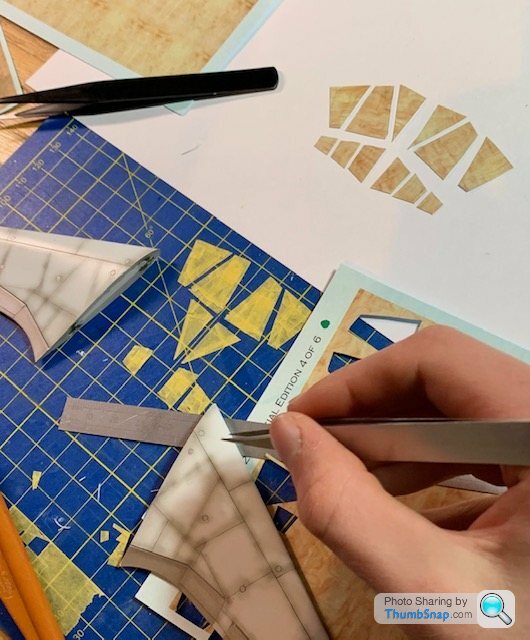
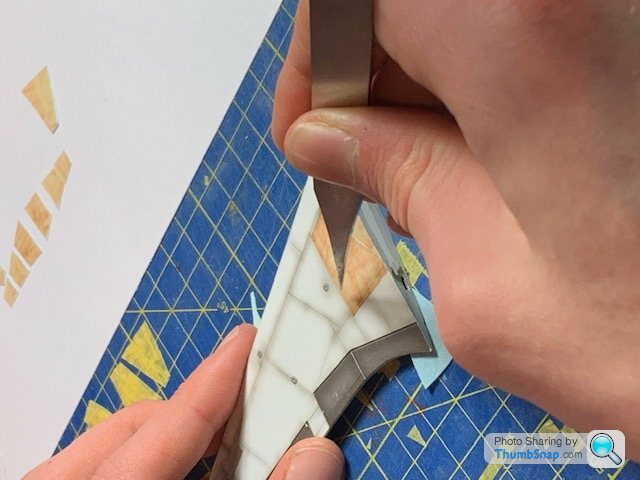
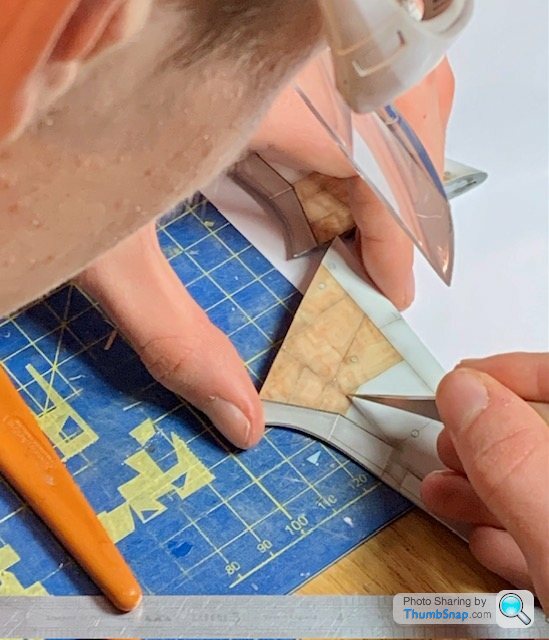
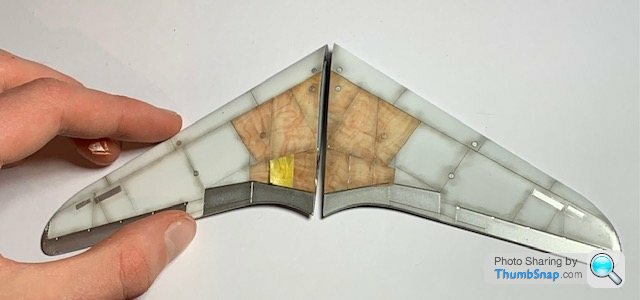
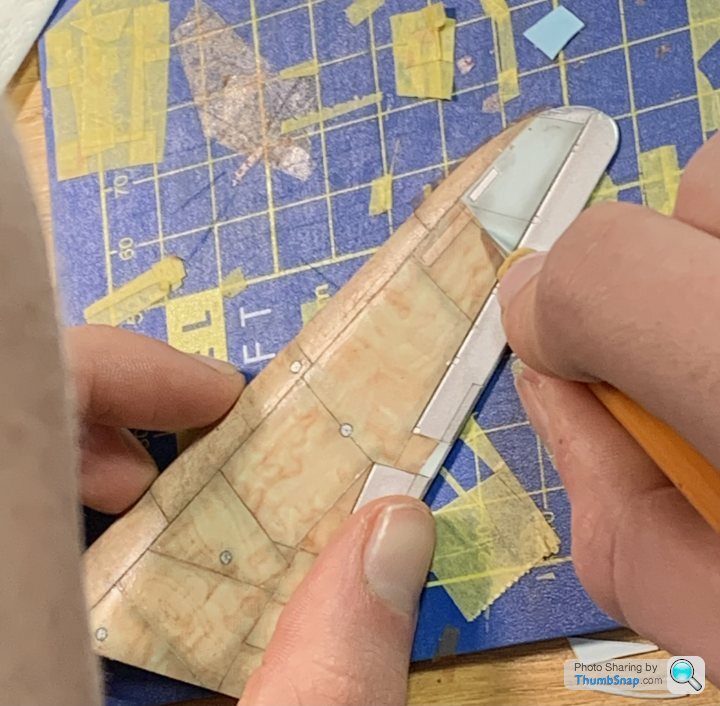
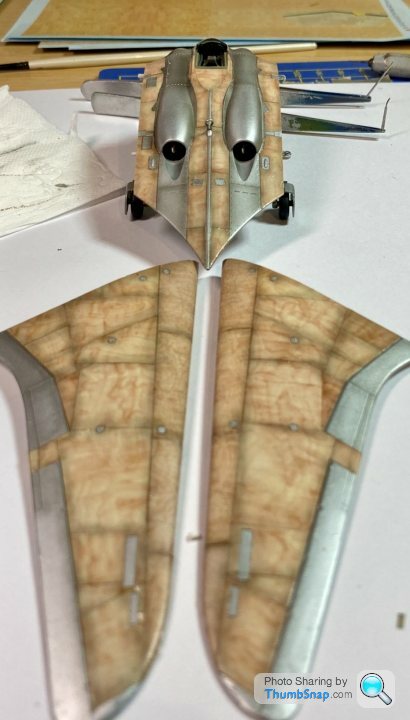
Masked for a coat of Smoke on selected panels, then told him to remove it all very carefully around the engines. Thinking about the lack of time, I thought if he could use the old masking as a template for the wood decals, it would save some time:
Also tried a decal on the most difficult bit - the nose. Using a tape template, it seemd to work fine:
Then gave it a coat of Klear in preparation for the rest of the decals, starting tomorrow after school:
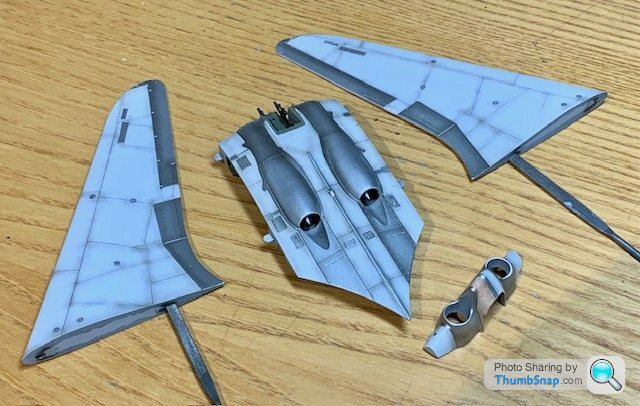
Also tried a decal on the most difficult bit - the nose. Using a tape template, it seemd to work fine:
Then gave it a coat of Klear in preparation for the rest of the decals, starting tomorrow after school:
dr_gn said:
One of the small u/c wheels pinged off it's cocktail stick, and despite thinking he saw where it went, a complete turning upside-down of that area of the garage failed to find it. So I think it's fair to say I'll end up printing a replacement.
Ahem...HE will print the replacement...ahem...Hard-Drive said:
dr_gn said:
One of the small u/c wheels pinged off it's cocktail stick, and despite thinking he saw where it went, a complete turning upside-down of that area of the garage failed to find it. So I think it's fair to say I'll end up printing a replacement.
Ahem...HE will print the replacement...ahem...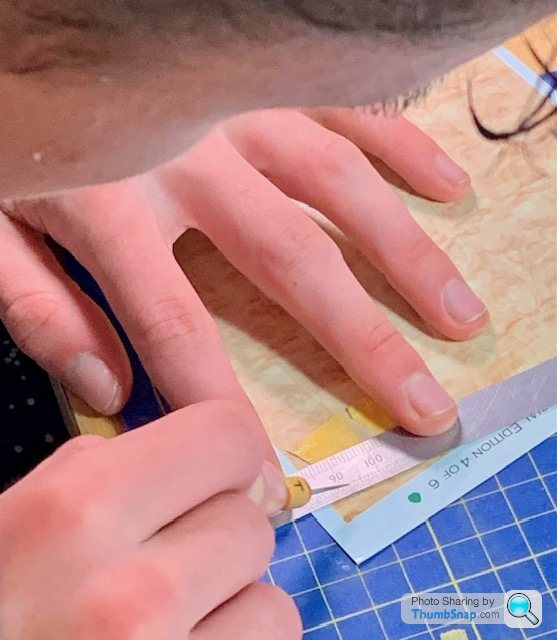

Simpo Two said:
It's good to see those little orange craft knives are still around - or is it your old one? Takes me right back to my early days building Keil Kraft aeroplanes.
I think the same thing every time I see it in one of Docs posts! I had (still have somewhere) one of those Orange ones and a scalpel back in the early to mid 70's when I started. Scalpel blades seemed hard to get in those days.
Oh, and cracking model, looks great so far.
eccles said:
Simpo Two said:
It's good to see those little orange craft knives are still around - or is it your old one? Takes me right back to my early days building Keil Kraft aeroplanes.
I think the same thing every time I see it in one of Docs posts! I had (still have somewhere) one of those Orange ones and a scalpel back in the early to mid 70's when I started. Scalpel blades seemed hard to get in those days.
Oh, and cracking model, looks great so far.
You can still get the orange handles ftom Swann Morton.
gruffgriff said:
Looking really good dr_gn_jr. Tick, tick, show tomorrow? Best of luck!
Yep, show tomorrow - meeting our chauffeur at 9:30.He’s still working on it now. Has been since we got back from Donny model railway show at 14:30.
Plan was:
Fit undercarriage and other fuselage bits so that they have time to set:
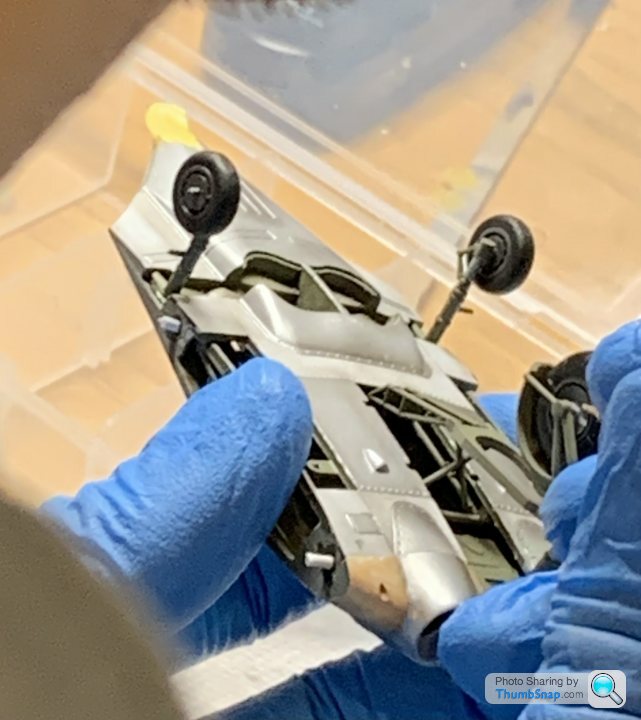
Done:
Finish windscreen & canopy and varnish. I printed him a name card - just in case:
Then work 100% on the wings, until 22:00, at which point, fit them whatever state they’re in:
Then, at 23:00, when the glue has set, fit the remaining u/c covers, and overcoat with satin varnish. When dry enough, fit windscreen & canopy.
Put in airing cupboard.
At 8:00 tomorrow, hope the varnish has set, and figure out how to transport it to Leeds.
So he’s been working on it almost solidly for a week, and hasn’t really compromised. It might just get finished. Even if not, or whether or not he gets placed in the comp, it’s quite an achievement.
Talk about a task fitting a timescale! Tick, tick, tick…
Edited by dr_gn on Saturday 10th February 20:33
gruffgriff said:
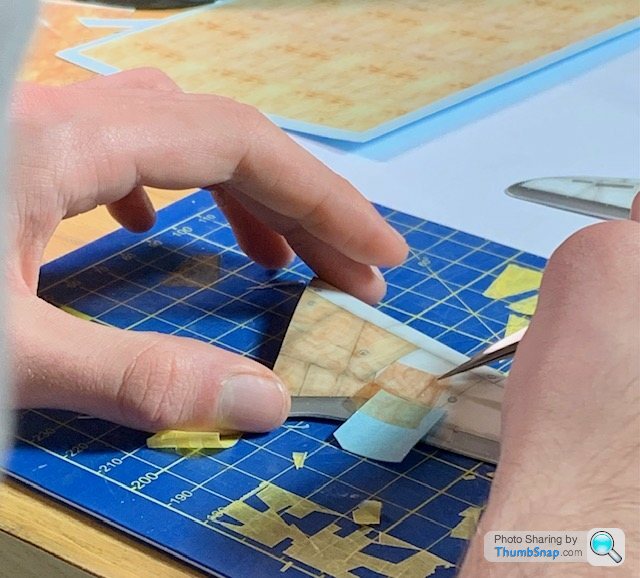
So are the wood decals being trimmed to panel lines as each is allowed to set for a bit?
Assume chauffeur won't allow further spraying in the cabin en-route, but some assembly? Assuming RR Phantom/7 series levels of road smoothing..
Still looking great, I await pics and show report!
Yes. I told him to cut exactly to the masking tape templates, but at some point he changed to making them oversized, and once set for a few minutes, trimmed by hand to the lines he’s previously drawn. There are some slight overlaps, but he’s happy so all good.Assume chauffeur won't allow further spraying in the cabin en-route, but some assembly? Assuming RR Phantom/7 series levels of road smoothing..
Still looking great, I await pics and show report!
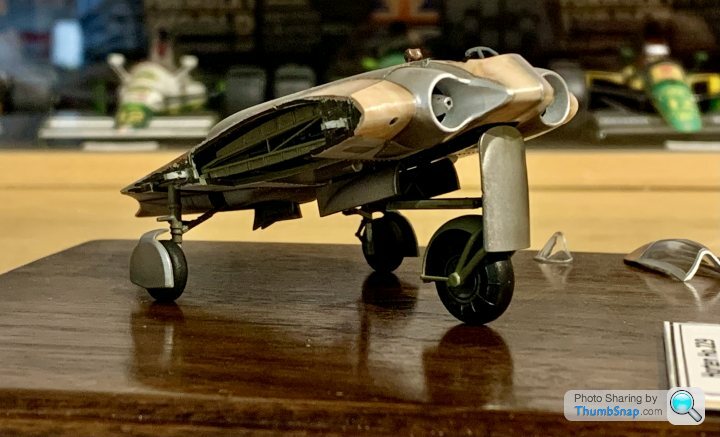
So sure enough, at 21:20 I got a WhatsApp message with this attached:
And at 22:00 on went the wings.
23:00 - satin varnish.
Then added the windscreen - which doesn’t fit! (note he’s automatically adopted the modeller’s left-hand wrist brace pose for detail work ha ha):

And canopy:

Now in the airing cupboard until tomorrow. Hopefully the varnish will have dried enough to transport it.
So luckily no assembly required in the Rolls-Royce!
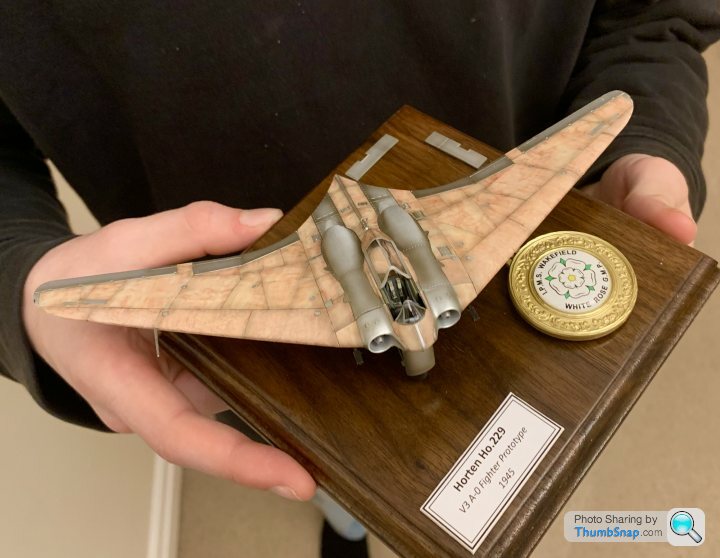
There are some refinements and corrections still needed, whether he’ll touch it again remains to be seen. If I’d put that much concentrated effort into it, my already minimal
Motivation would be used up. But mission accomplished, and he’s chuffed with it.
Edited by dr_gn on Sunday 11th February 00:02

Gassing Station | Scale Models | Top of Page | What's New | My Stuff