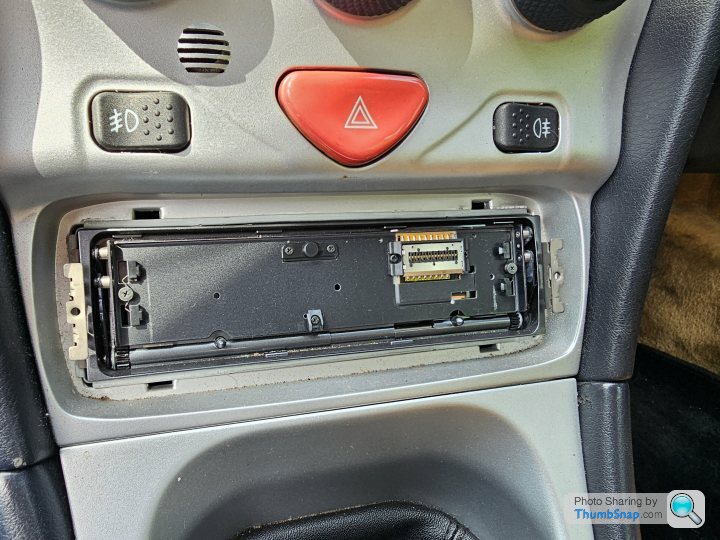
Pioneer head unit remove
Discussion
TO73074E said:
The 4 openings, 2 at the top and 2 at the bottom, can you not put the metal release keys into there? I say key but they are usually just some long thin bits of metal to release it.
Ah, I see now. I think I did try to put the release keys in there, but they seem to be too wide. I'll see if I have anything else that I can get in there. Smurfsarepeopletoo said:
Thiink the black plastic surround is meant to pull off, then you will see the slots for the removal pins, then the headunit slides out, then you remove the cage.
I did wonder about the surround, but 2 black plastic surrounds have been removed before this, and this one won't seem to move for some reason. Any luck yet, OP?
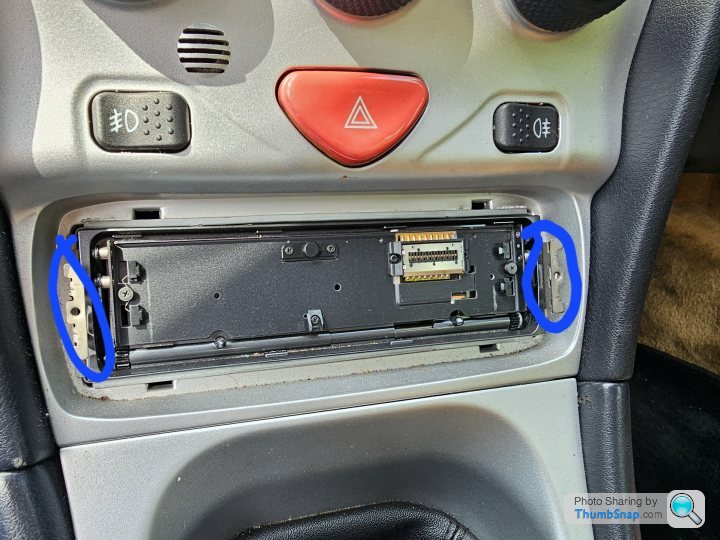
I take it those aren't your removal keys either side of the HU? They seem to be blocking the slots; I don't think that last surround should come off.
The cage itself should be held in the hole by tabs bent up/down around the inside of the hole... there's often enough wobble room to get something long and thin between the cage and the hole, and bend them back again. Some may be bent so they work in a front/back plane, others side-to-side (that is, the "hinge" can be at 90' to each other). So you generally need to either push them backwards from straight on, or back towards the cage with a sliding motion one way or the other.
If you really can't find/reach/access the removal key slots, you can try this... looking at your picture, I'd start at the top, pushing the whole thing down, then have a go at the bottom edge afterwards. How easy it is depends on how much effort the person who put it in originally took to bend the tabs about. It's less common to have tabs bent at the sides, and they're less good at holding, too.
If you're really very stuck, a fair chunk of brute force and ignorance combined with a pokey/lever-y thing between the cage and the dash (as above) and plenty of wiggling will often end up working - the whole cage is pretty soft/bendy metal at the end of the day; there is some risk of taking chunks out of the edge of the hole this way though. The tabs are really there just to stop the HU sliding out of the dash - if they were strong enough to resist a really strong pull, you wouldn't need detachable face plates...
Sorry for the late reply 
Thank you for the replies
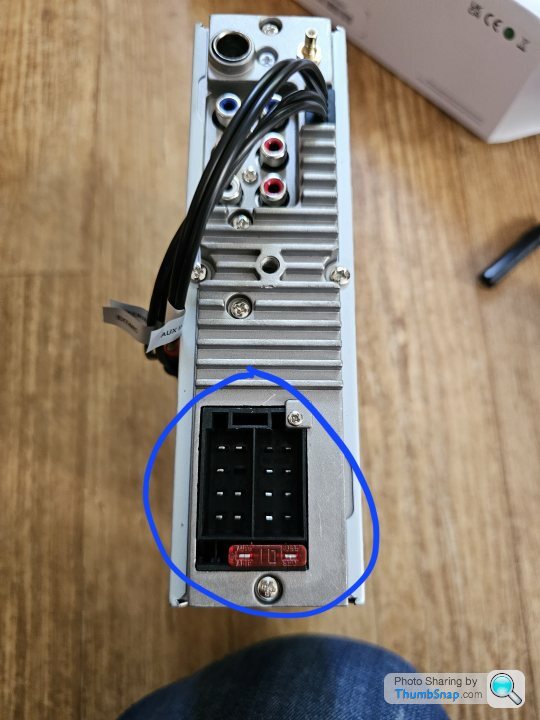
All removed now! It seemed pulling the metal tabs on each side released it, not a system I had seen on my travels to YouTube ! Although I've now found out that the connector on the new head unit is different than the cars connector.. My local garage think that should be able to fit it though.
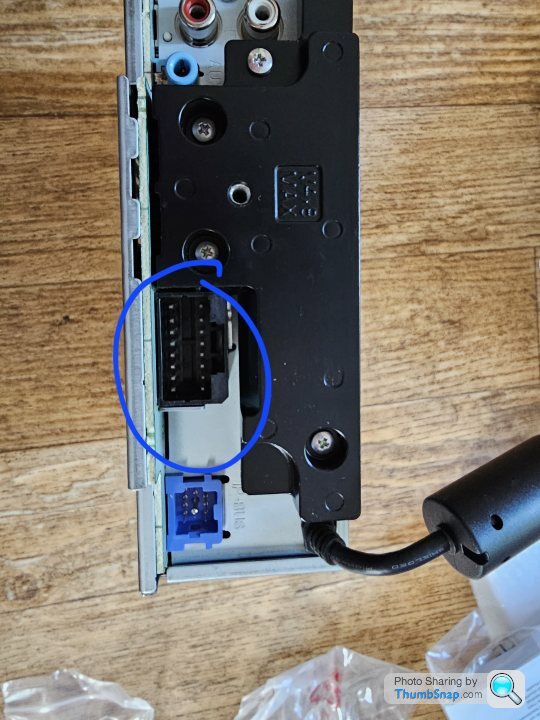
This Is the original head unit
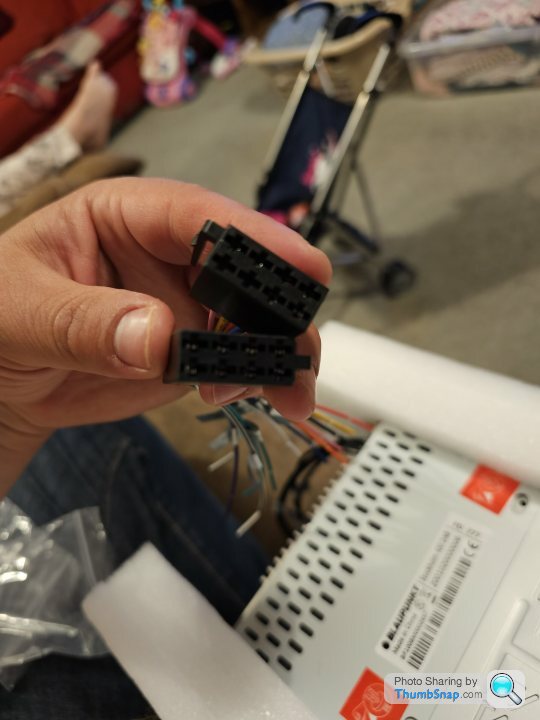
This is the new one

Thank you for the replies
All removed now! It seemed pulling the metal tabs on each side released it, not a system I had seen on my travels to YouTube ! Although I've now found out that the connector on the new head unit is different than the cars connector.. My local garage think that should be able to fit it though.
This Is the original head unit

This is the new one

Edited by jamesbilluk on Saturday 3rd June 02:48
Edited by jamesbilluk on Saturday 3rd June 02:50
The new headunit should have cables that plug into the back and then go to 2 block connectors, 1 that has all the power, power antenna, ground and so on, and the other has all the speaker cables.
The 2 block connectors should then connect to the car wiring, if they dont connect together, you will need an adaptor.
If you havent already, trace the connector that came out of the back of the old stereo to the 2 connector blocks, and remove them.
The 2 block connectors should then connect to the car wiring, if they dont connect together, you will need an adaptor.
If you havent already, trace the connector that came out of the back of the old stereo to the 2 connector blocks, and remove them.
Smurfsarepeopletoo said:
The new headunit should have cables that plug into the back and then go to 2 block connectors, 1 that has all the power, power antenna, ground and so on, and the other has all the speaker cables.
The 2 block connectors should then connect to the car wiring, if they dont connect together, you will need an adaptor.
If you havent already, trace the connector that came out of the back of the old stereo to the 2 connector blocks, and remove them.
Thank you for that The 2 block connectors should then connect to the car wiring, if they dont connect together, you will need an adaptor.
If you havent already, trace the connector that came out of the back of the old stereo to the 2 connector blocks, and remove them.

I think I will need a connector for it by the looks of it.
Magicmushroom666 said:
I'd pull the cable through from the old unit, there's most likely another in line connector further up. Every headunit has their own custom connector on the back like that, but the one on the new one is a standard one, and likely to be the other half of that up the cable
I shall take a look 
Only just seen this, sorry if you've already solved it, the two blocks on the cable you showed are standard ISO connectors, the unit you removed will have a cable that connects to the rear of the unit you removed, that cable will terminate in the same blocks but be joined to the female equivalent in the cars original loom.
I was going to tell you to grab the two tabs either side of the unit and just yank it out as that's what they're for!!!
I was going to tell you to grab the two tabs either side of the unit and just yank it out as that's what they're for!!!
Gassing Station | In-Car Electronics | Top of Page | What's New | My Stuff


