door hinges… again
Discussion


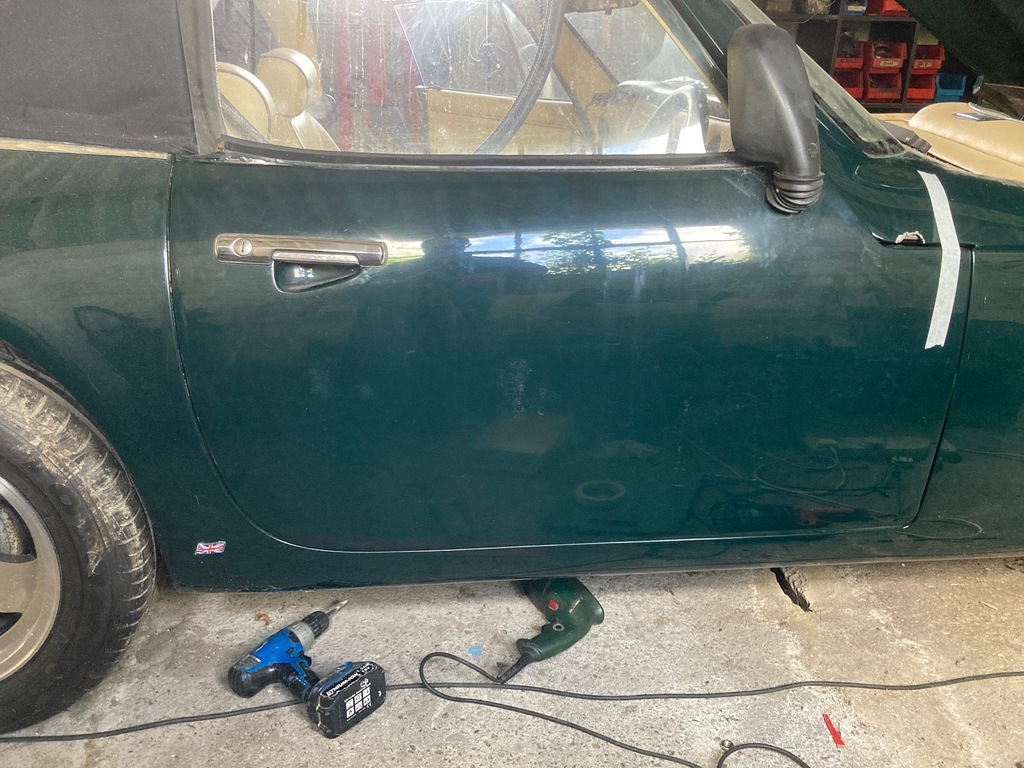
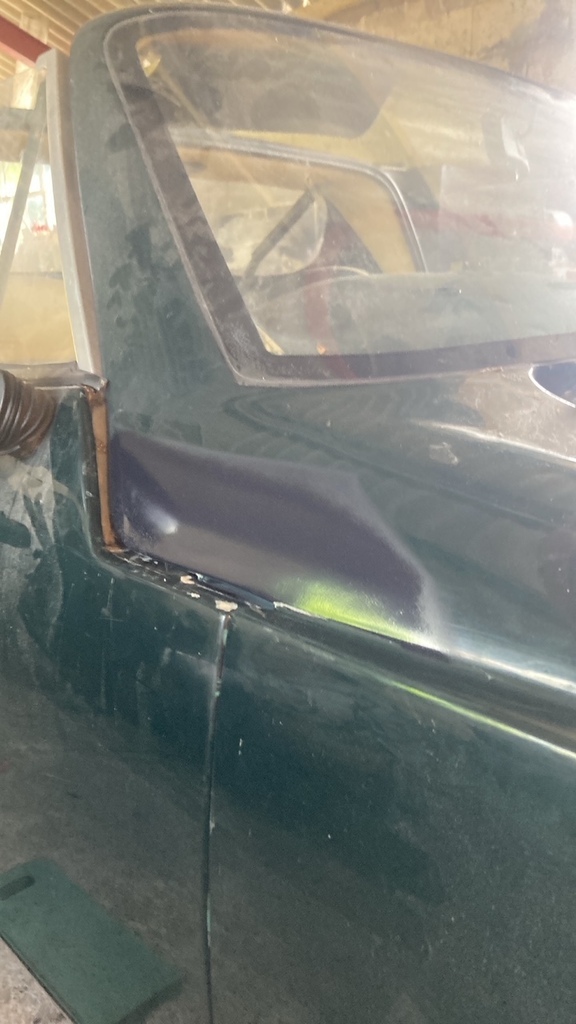
Oh dear ..
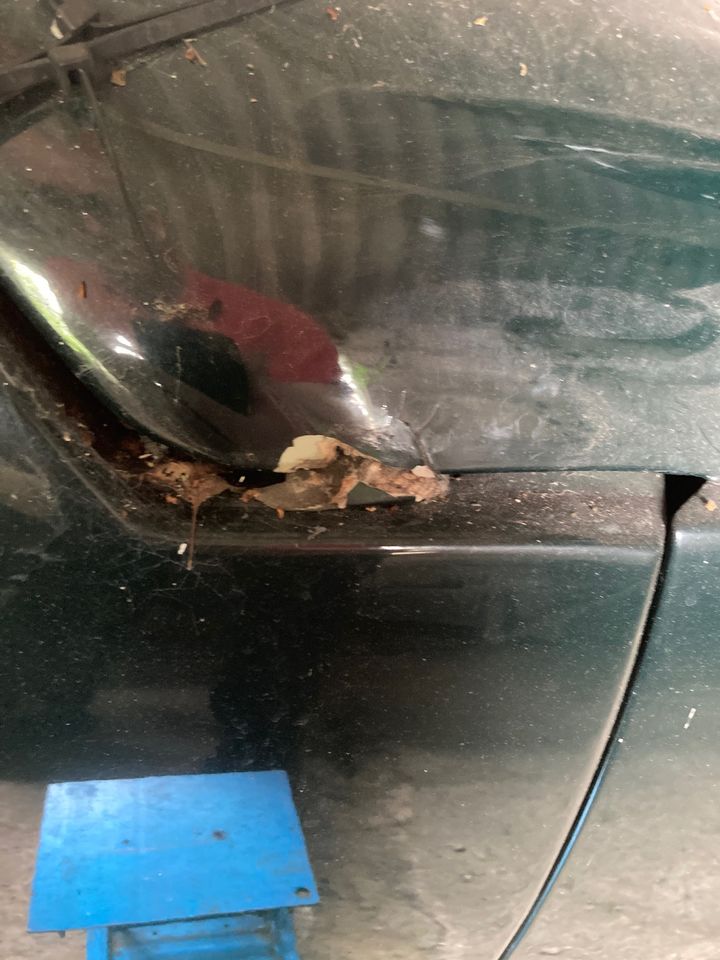
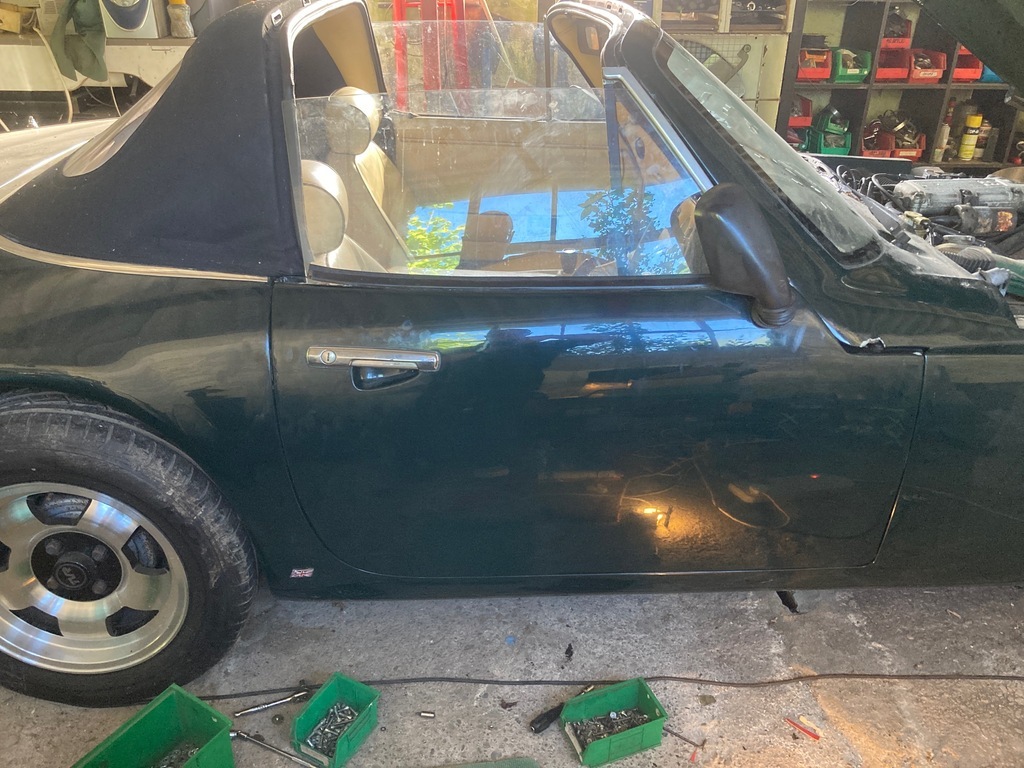
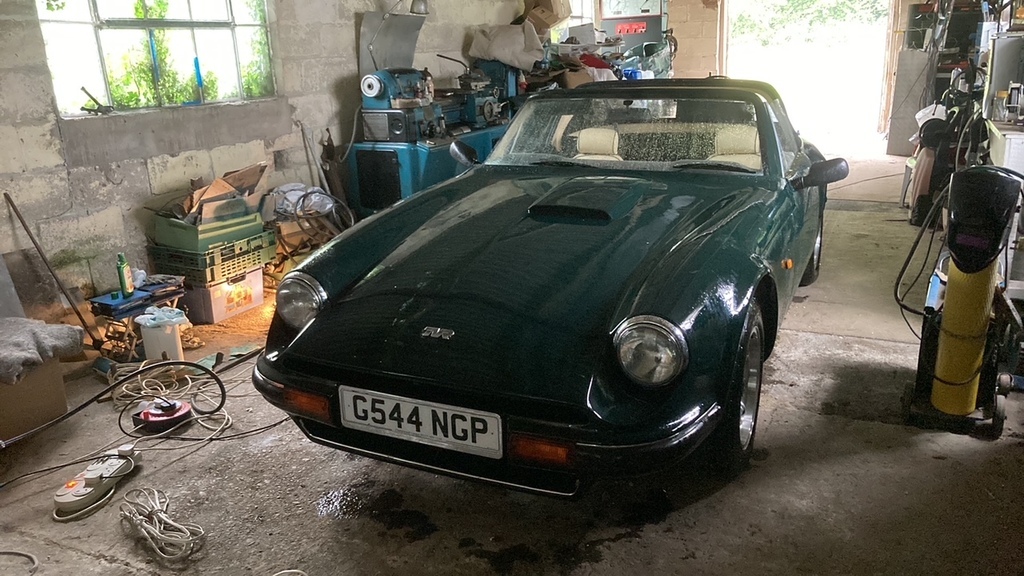
Yup the dreaded door making a bid for freedom situation .
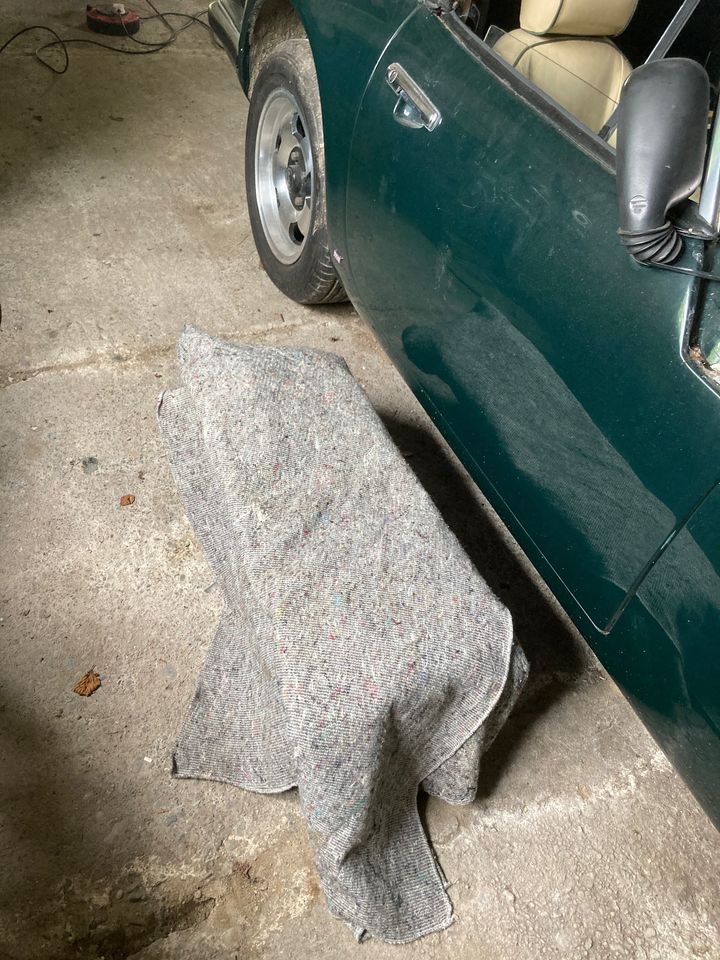
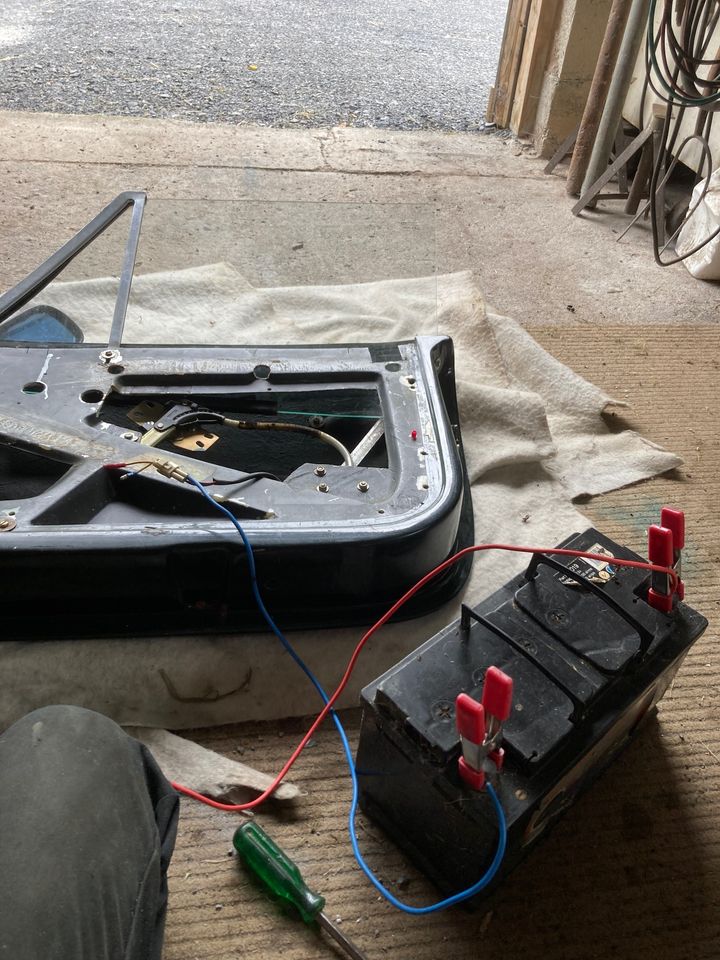
first thing , a platform for the door to rest on ..
door inner off ..
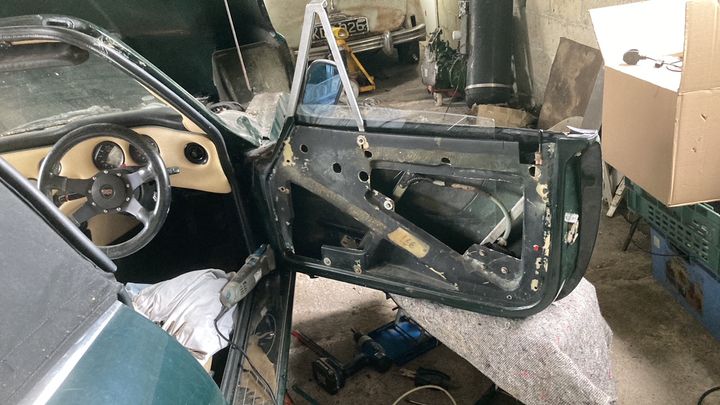
to do this i removed the speaker , which wasn't even connected !... undid the two retaining screws on the door card , and unhooked the cable from the lock after failing to get the inner door opener off .then popped the card off its snappy pegs .
next i had to get the bottom hinge bolt undone .
this just rotated , so i got my die ginder and ground the head down ...
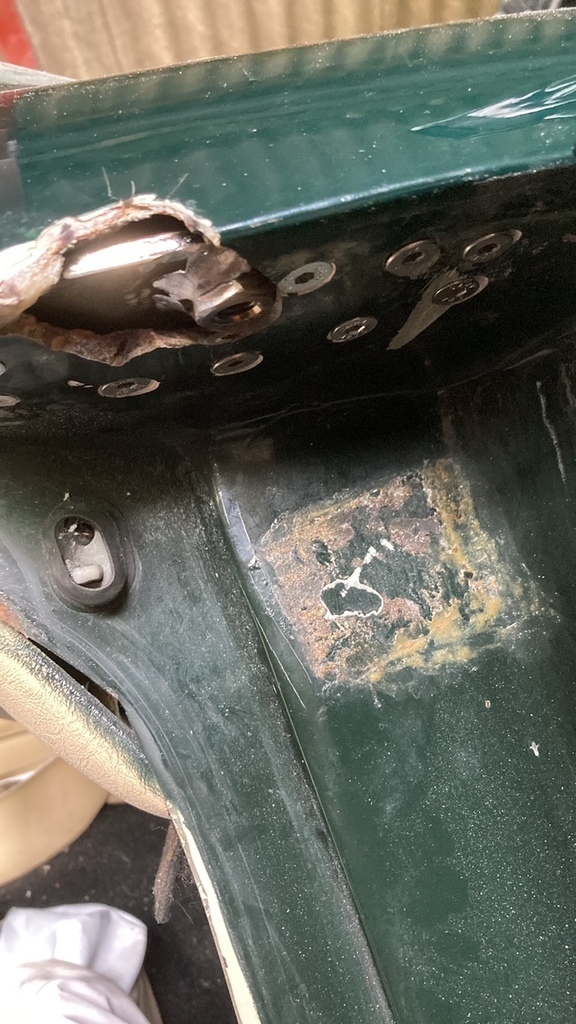
i then undid the two 13mm retaining bolts , and oh ! the whole bobbin popped out with a litte screwdriver leverage ..
pox.
now i could lift the door away , and investigate ..
hmmmm.
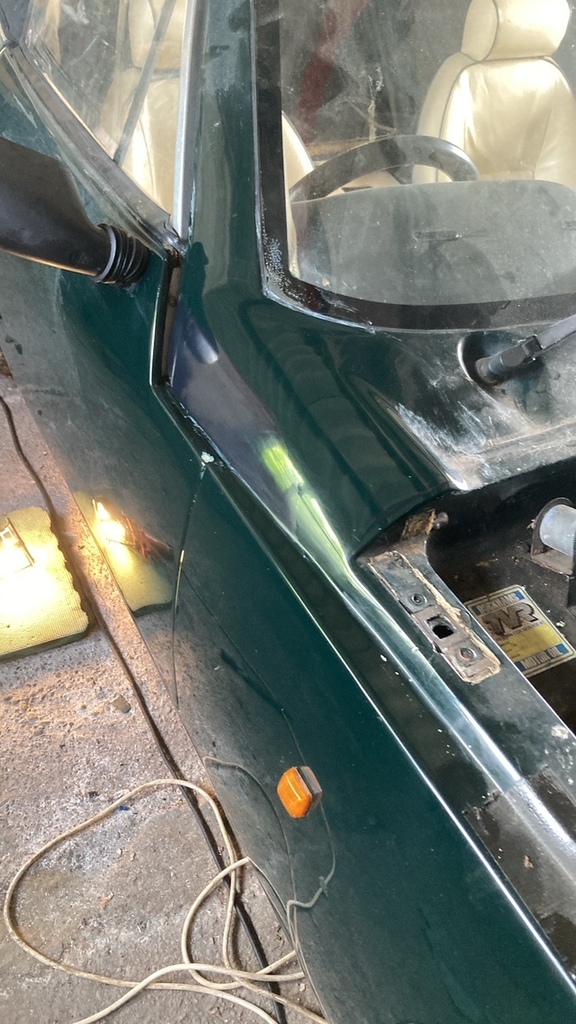
popped the door on the blanket , and tried to get the top hinge undone ,only way i could get at the inner bolt was to electrify the window and wizz it up to the top ..
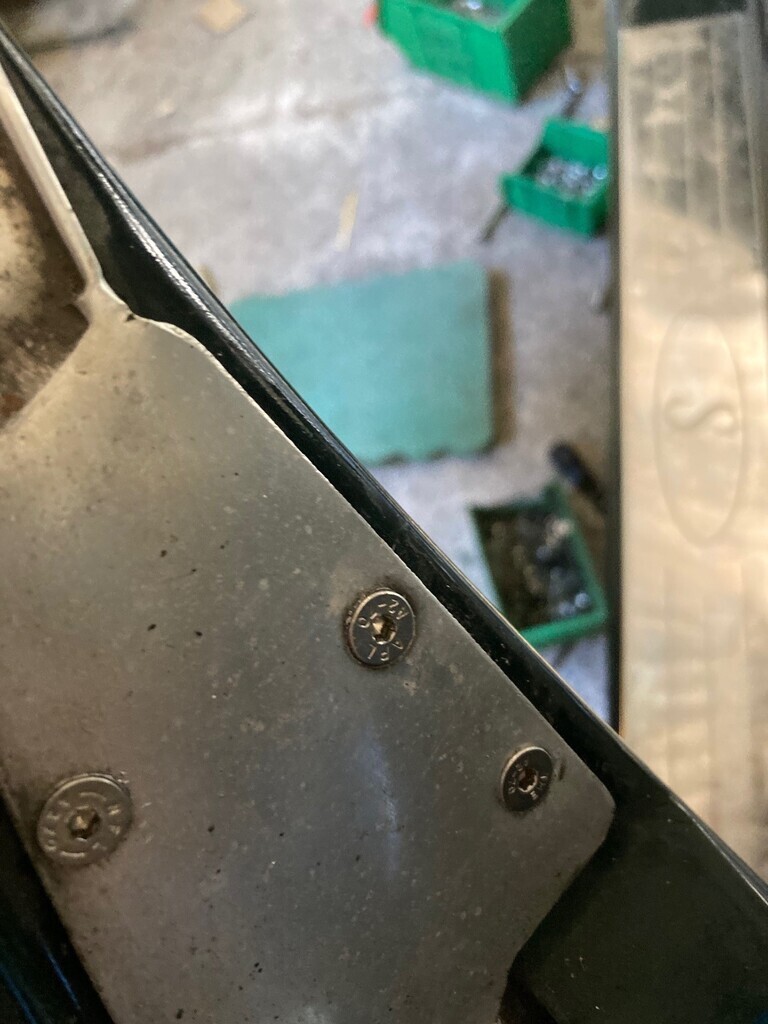
then i could undo these fittings ..
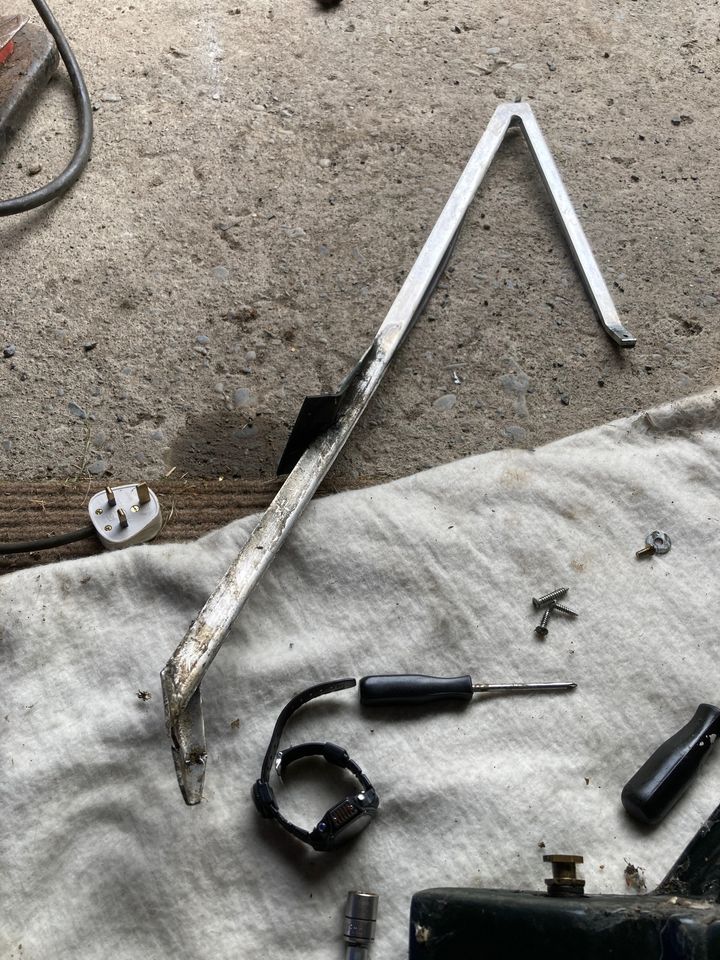
and slide the ally frame section up and out ..
now i can get at the hinge ..
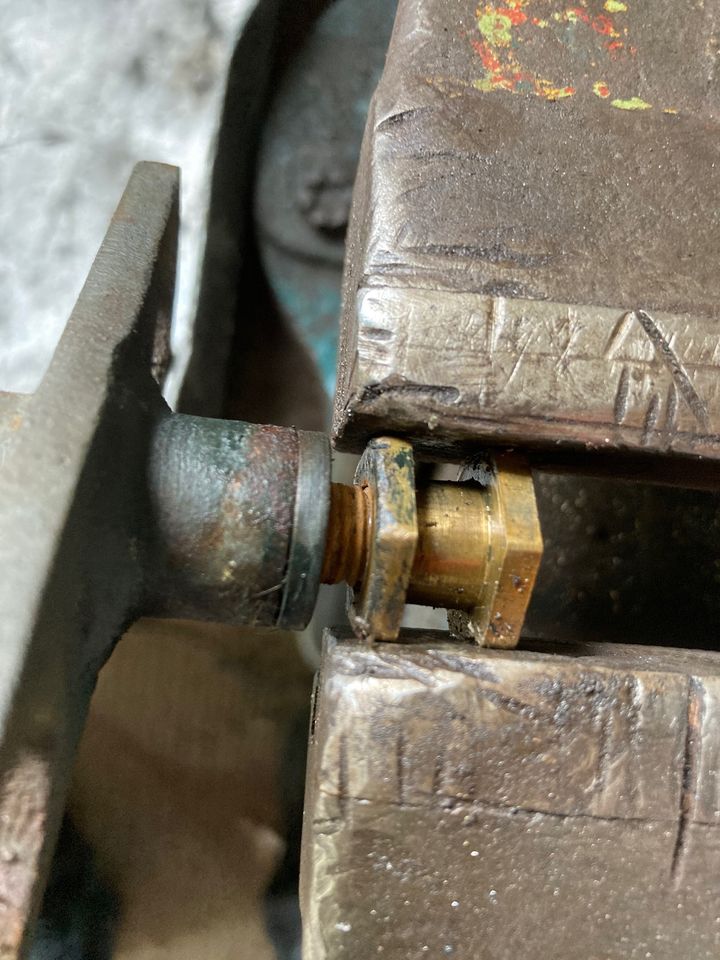
both hinges on the bench ,you can see the bottom one has been openned up a trifle ..
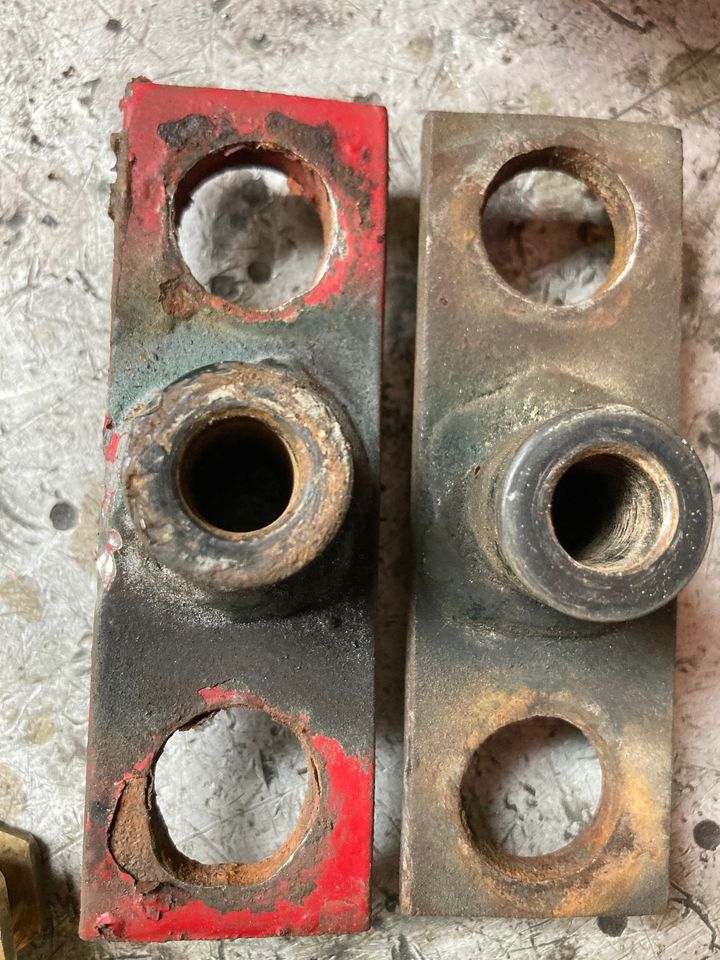
the plastic bushes are like new .
interestingly the electric window cable had 4 seperate joints in it ,
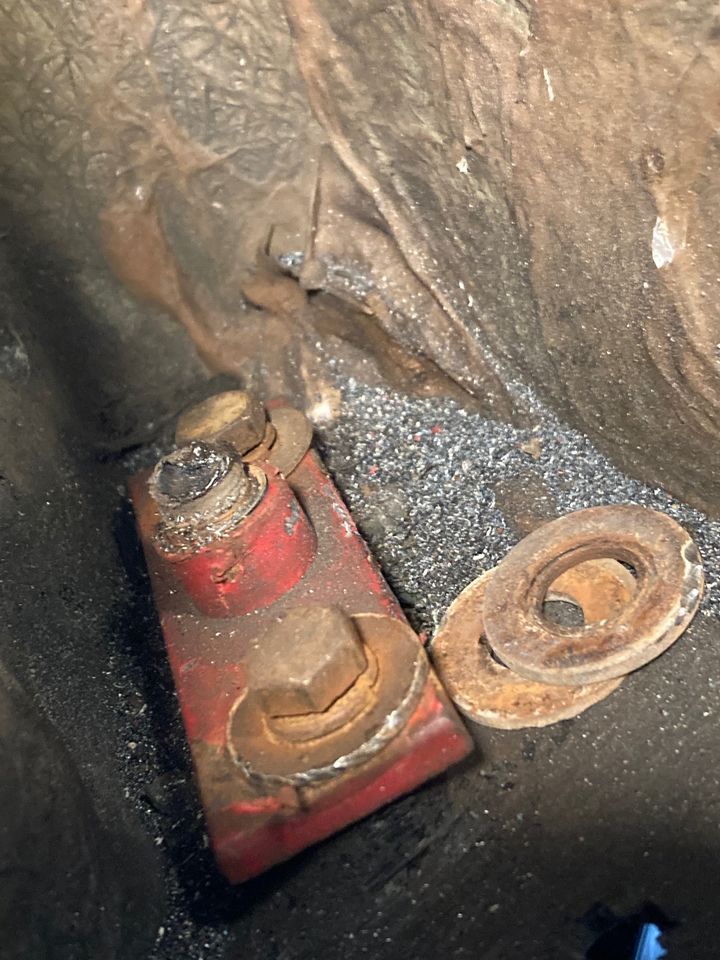
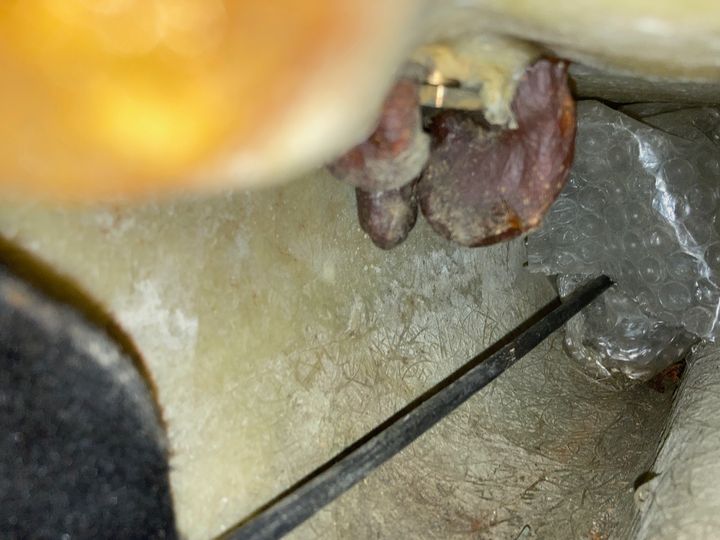
and around the bobbins , when they were in situ , was an interesting mass of blobbage ..
bottom one ..
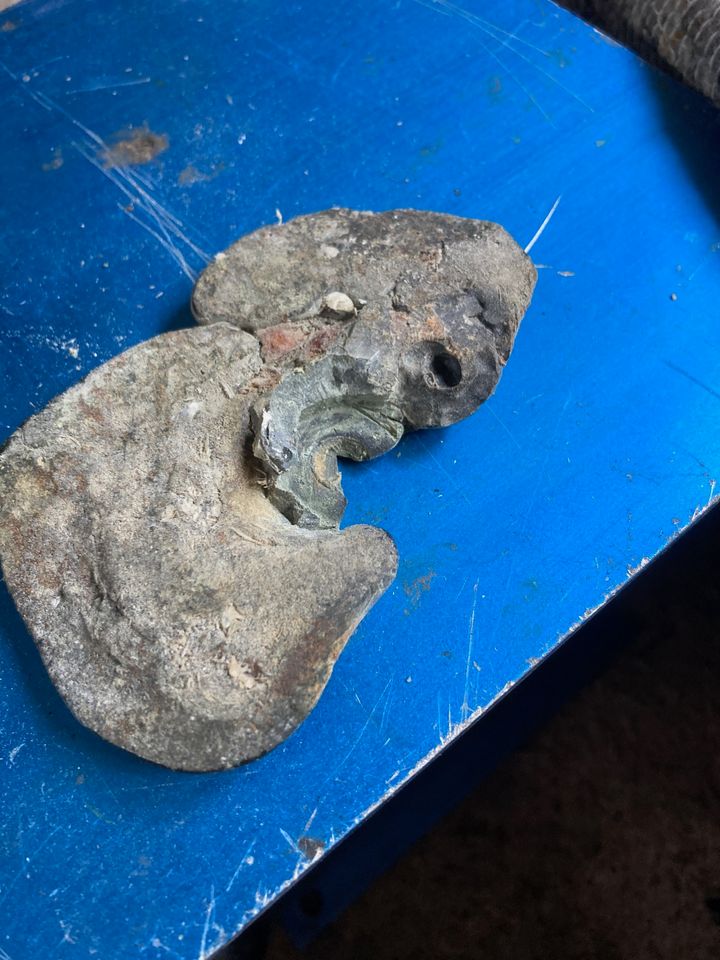
top one.... this all fell out after removal ..
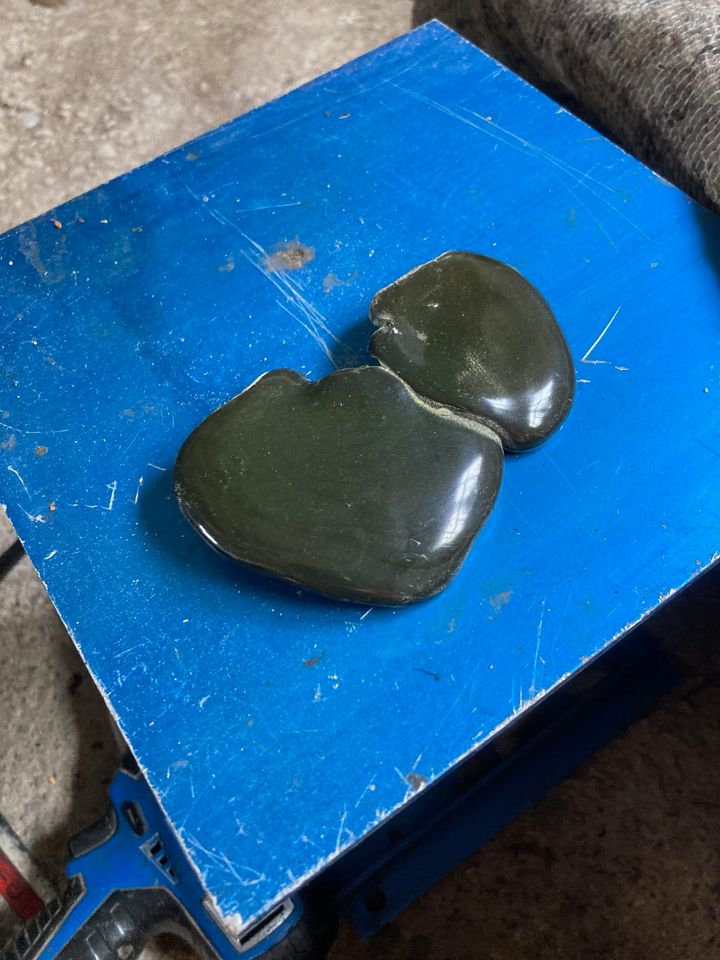
also , once on the bench the pins unscrewed from the bobbins without much force ..

Next is to make stainless steel plates to fix in the body ,and weld twin stacked m10 nuts on each plate to replace the bobbins from hell.
regards
robert
Yup the dreaded door making a bid for freedom situation .
first thing , a platform for the door to rest on ..
door inner off ..
to do this i removed the speaker , which wasn't even connected !... undid the two retaining screws on the door card , and unhooked the cable from the lock after failing to get the inner door opener off .then popped the card off its snappy pegs .
next i had to get the bottom hinge bolt undone .
this just rotated , so i got my die ginder and ground the head down ...
i then undid the two 13mm retaining bolts , and oh ! the whole bobbin popped out with a litte screwdriver leverage ..
pox.
now i could lift the door away , and investigate ..
hmmmm.
popped the door on the blanket , and tried to get the top hinge undone ,only way i could get at the inner bolt was to electrify the window and wizz it up to the top ..
then i could undo these fittings ..
and slide the ally frame section up and out ..
now i can get at the hinge ..
both hinges on the bench ,you can see the bottom one has been openned up a trifle ..
the plastic bushes are like new .
interestingly the electric window cable had 4 seperate joints in it ,
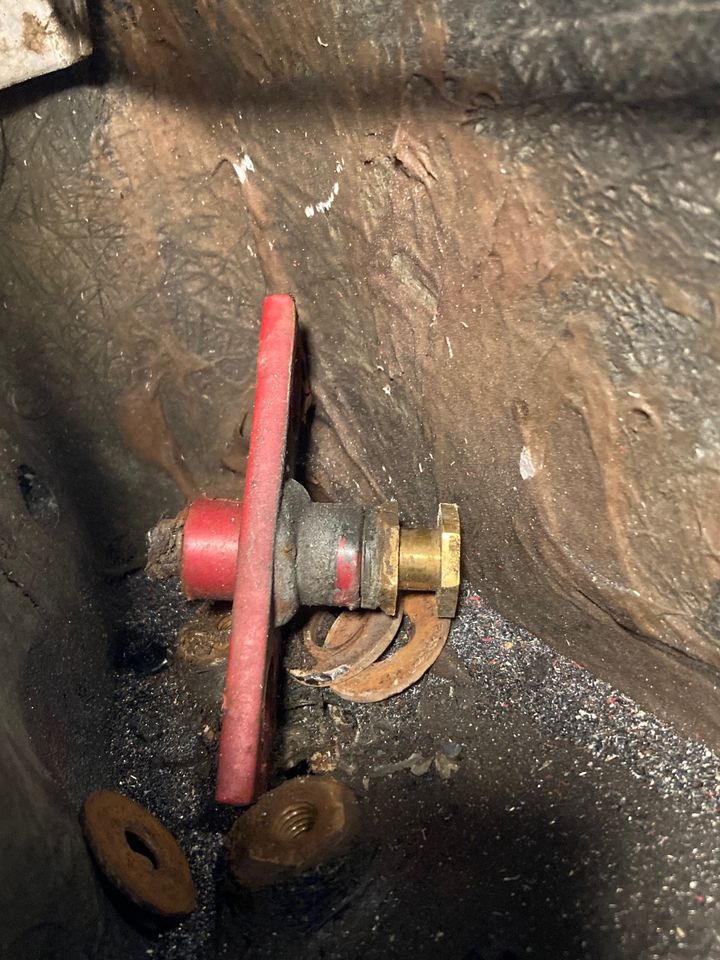
and around the bobbins , when they were in situ , was an interesting mass of blobbage ..
bottom one ..
top one.... this all fell out after removal ..
also , once on the bench the pins unscrewed from the bobbins without much force ..
Next is to make stainless steel plates to fix in the body ,and weld twin stacked m10 nuts on each plate to replace the bobbins from hell.
regards
robert
Edited by ivanhoew on Monday 3rd June 20:24
Edited by ivanhoew on Friday 14th June 09:02
Beast Master said:
Really cool write up! This will be very helpful for people!
Funnily enough I was going to look for how to take the door card off as one of my door handles has become lose. So this helped me! :-)
Thank you mr B , i was wondering if this forum was completely shuffled !Funnily enough I was going to look for how to take the door card off as one of my door handles has become lose. So this helped me! :-)
more fun with the tvr S2 ...
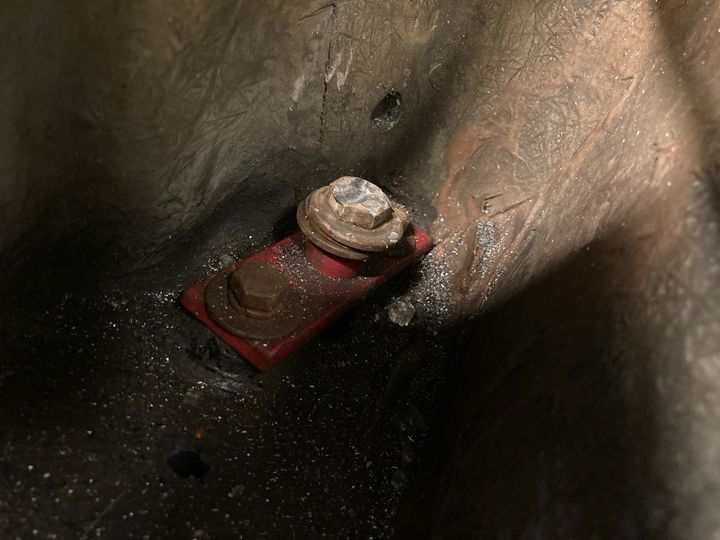
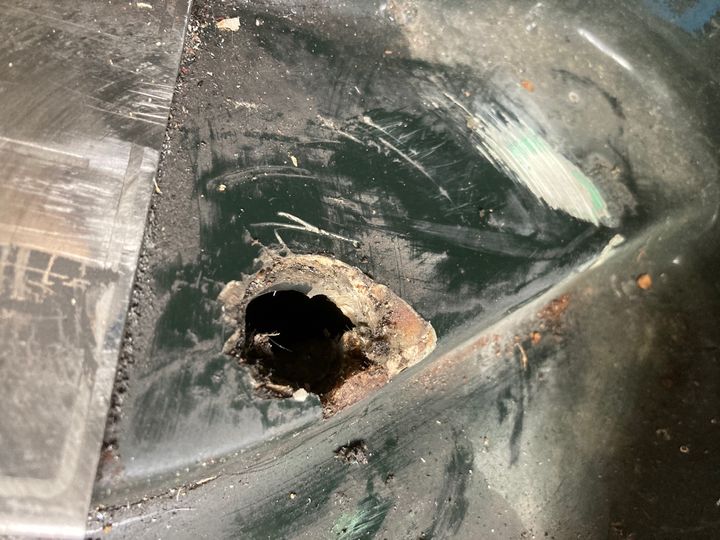
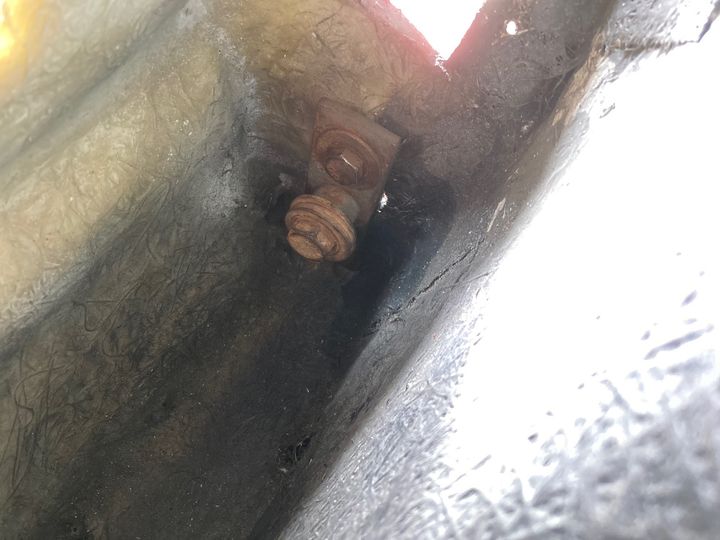
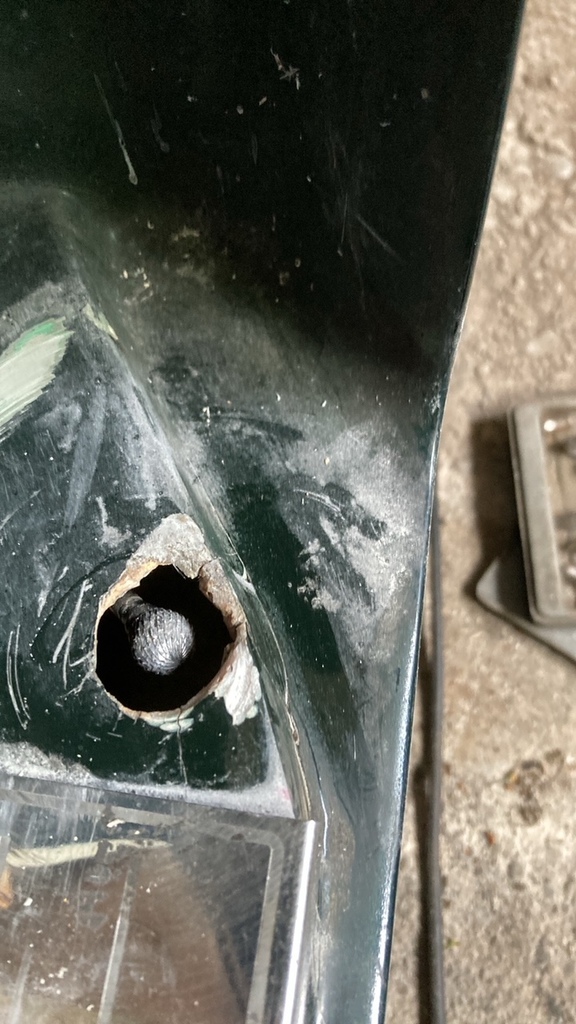
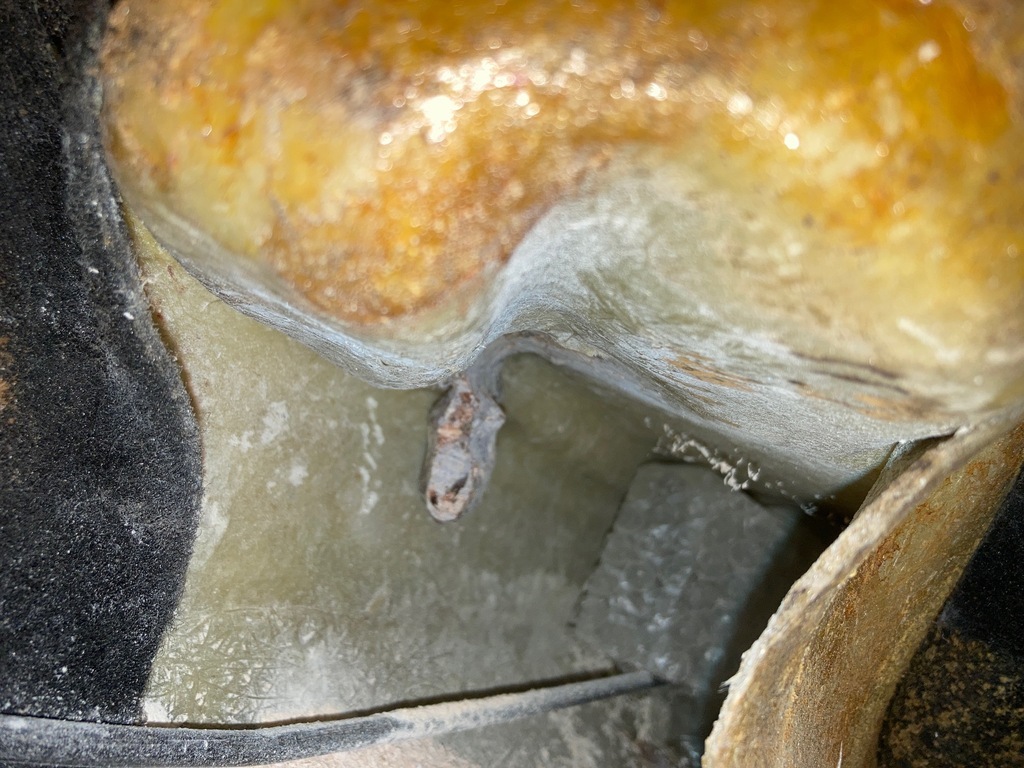
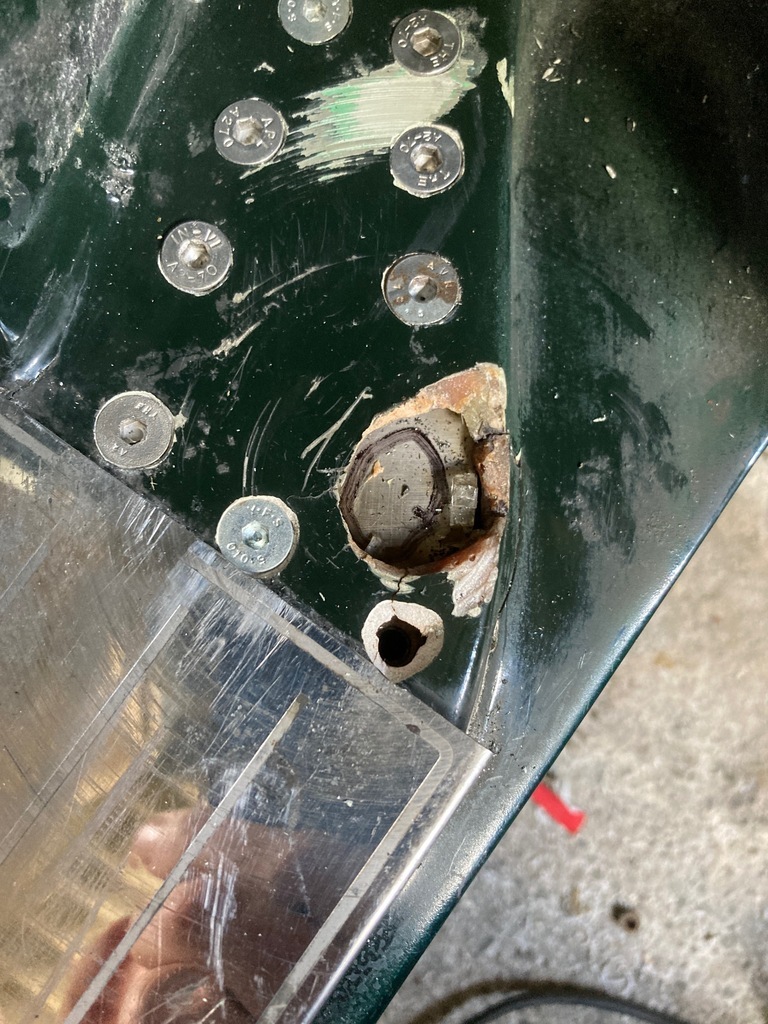
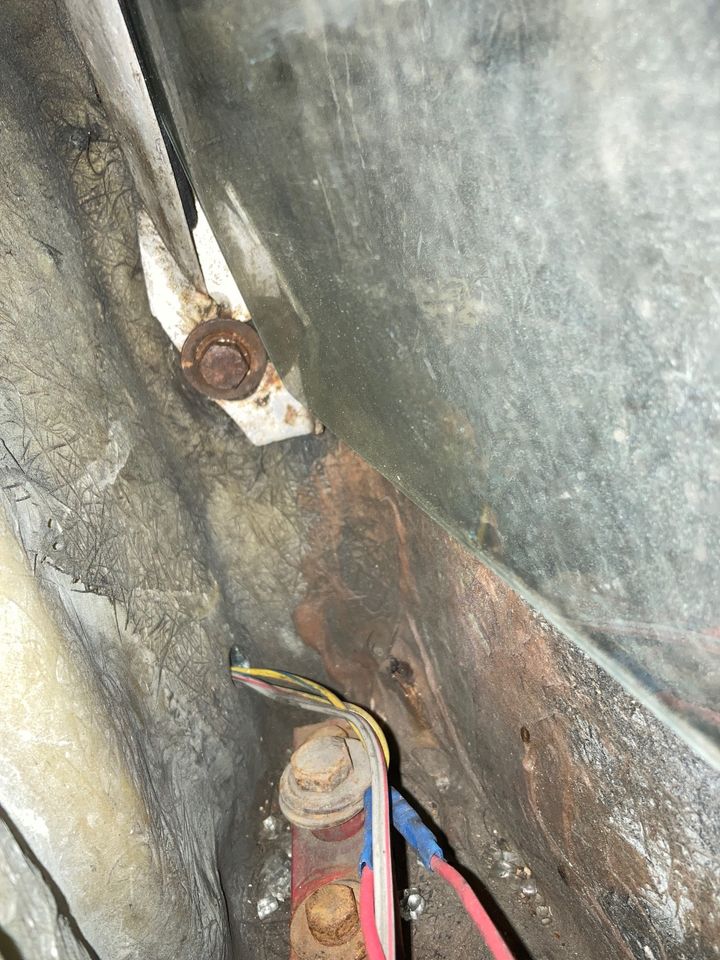
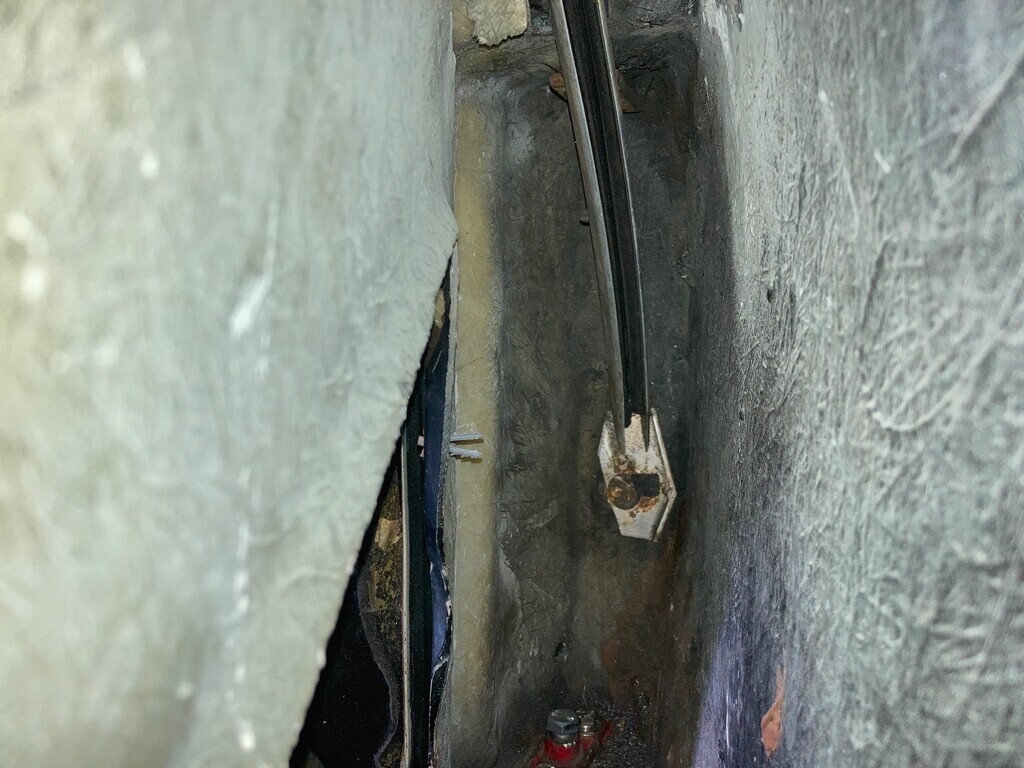
It appears someone had spoodged loads of p40 fibreglass paste down beside the lower nut , and ,so my plate underneath would sit flat , i had to try to remove this .
i did what i could with the die grinder , but in the end had to use the drill with a long carbide cutter and tripple jointed arms ,from inside the foot well..
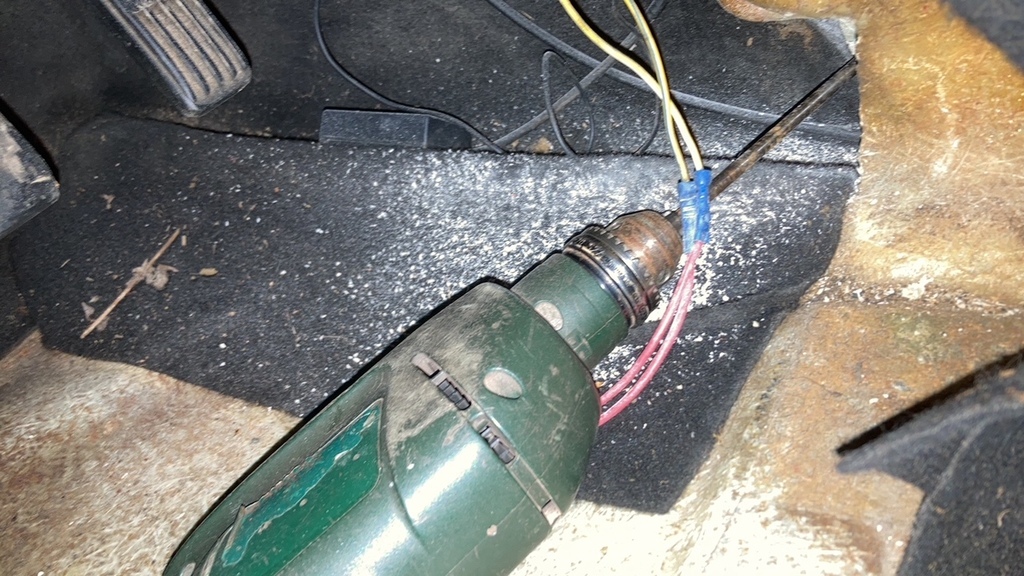
heres how it looked when i started ..

halfway done ..
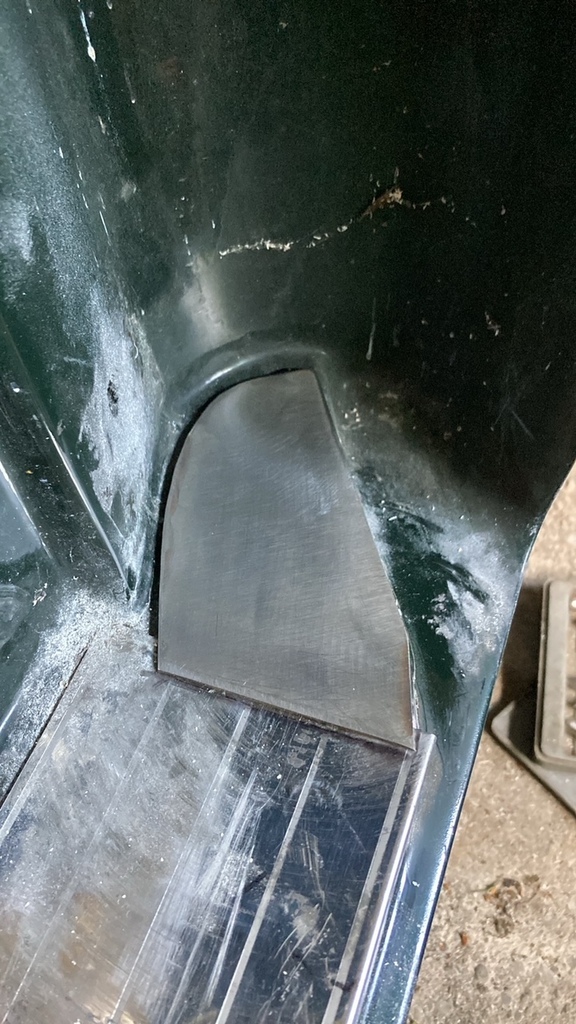
and done ..
now i could finalise my metal plate shape ..
i trimmed it a few times to get it to fit underneath , then drilled the body, then melted through a few drills drilling that poxy stainlss steel , countersunk the holes and found some nice stainless m5 screws ..
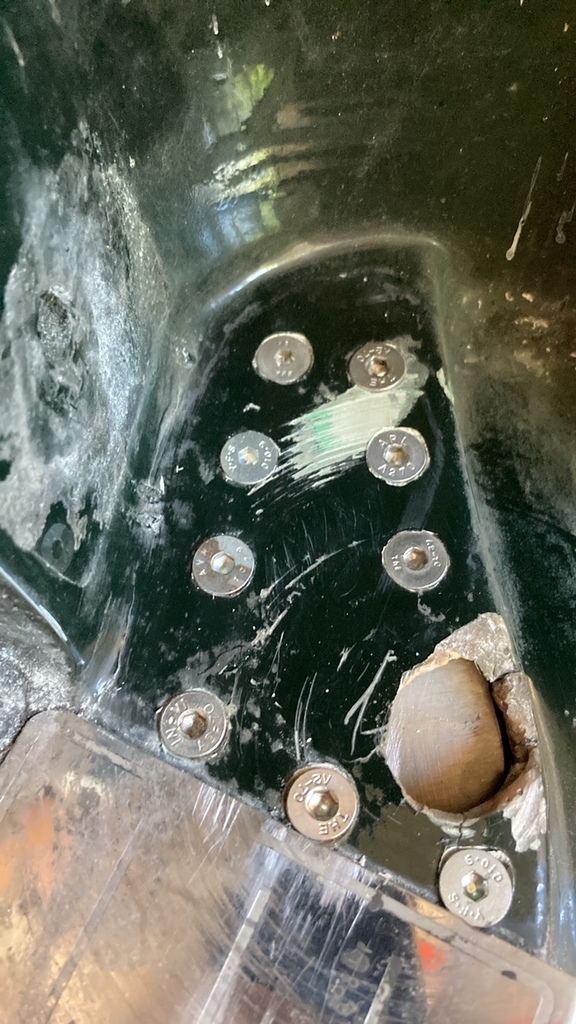
its so innaccessable i am going to mig the nuts to the plate like so ..
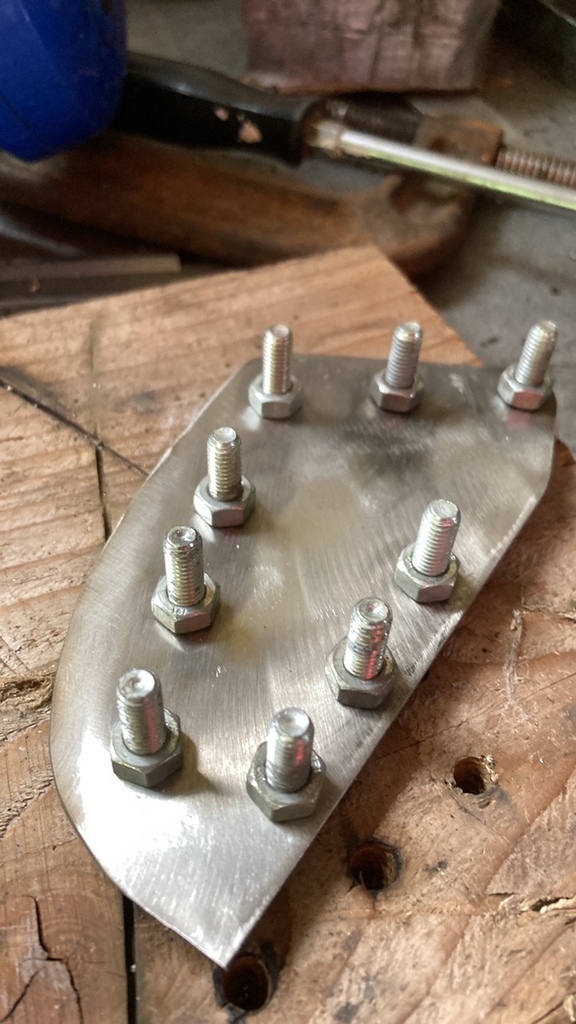
then i can put it bolted in place , then do the same proceedure for the top plate , put the door hinges back in the door , wedge the door in the hole in the right place , and from inside mark out on th plates where the m10 nuts need to be welded on ,for the hinge pins to screw into .
time will tell if this actually works !
regards
robert

phillpot said:
thanks phill , i am hoping to put the nuts either side of the plate , so they stick out the right amount , and also spread the twisting load a bit .
what i'll do is , put the bolt in place on a nut , pop the nut on the plate in situ , then angle the bolt so it points directly at the hinge above , tack it , take it out , then thread the other nut onto the bolt on the other side of the plate , then weld them both in place . then find the bolt has brinelled to the stainless nut , and throw it in the bin and start again .
Astacus said:
Useful write up. Thanks. I think my drivers door has dropped a little so this is on the (growing) list!
Thanks Astacus ,here's a bit more ! 
Welded my nuts ..
tapped out a thread to clear it , but no stuck bolts so that's good ....you have to be very carefull welding m6 not to damage the thread .
re installed ..
now onto the fun top plate of love .
I cut it to shape , and started to bend it to follow the inner face profile ..
i used a 5mm plate , so i could put the threads in it and it would be stronger for the top hinge .
it ended up this shape ..
i marked it out on the body ..
drilled the holes ..
marked out on the plate and drilled and tapped it ..
then mounted in place ..
Now ready to put the door in , wedge it in the correct place , and mark the pivot points .
progress !
regards
robert
Edited by ivanhoew on Saturday 8th June 08:33
Granturadriver said:
I almost missed this interesting thread, probably because of the title.
But I have to admit that I can't really categorize the pictures. Are we looking from underneath the driver's footwell into the sill?
No GD ,all pictures are from the outside looking in...oh ...apart from the few looking inside the sill at the p40 splodgefest someone had created ,presumaably to try to fix a spinning bobbin .Having now fixed my last post of inept postnosity , you may find it easier to see the situaton .But I have to admit that I can't really categorize the pictures. Are we looking from underneath the driver's footwell into the sill?
Edited by ivanhoew on Saturday 8th June 08:44
v8s4me said:
Great job and excellent write up. Definitely one to bookmark.
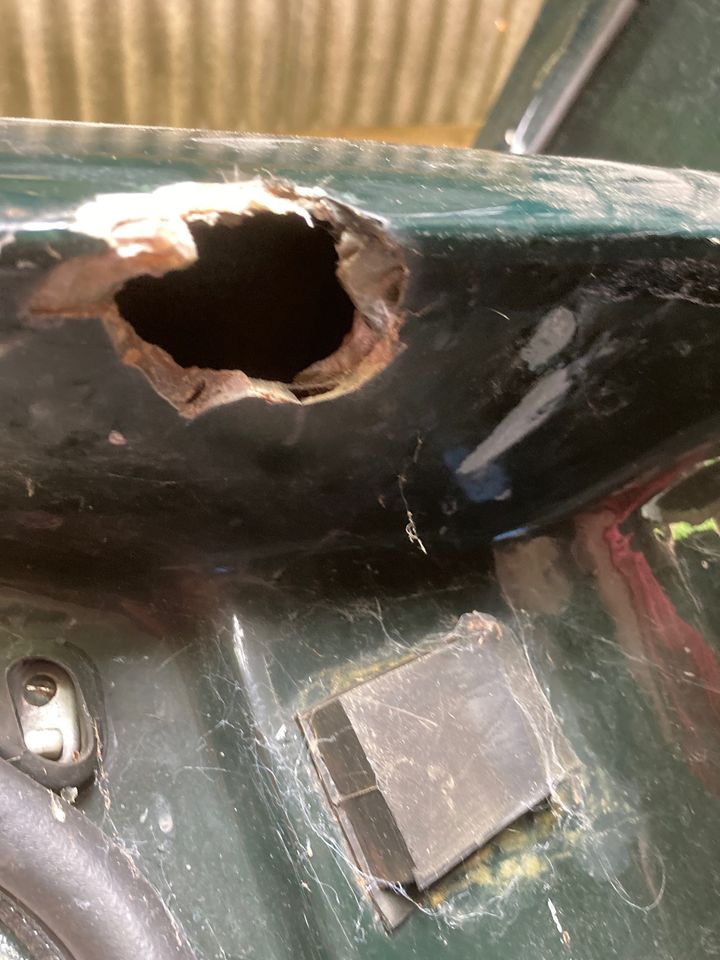
I've never seen a failed hinge damage the bonnet like on yours so you were very unlucky there.
thank you V8s , the bonnet is fine , its the inner under bonnet bit thats broken , where the bobbin tore its way out in a bid for freedom .I've never seen a failed hinge damage the bonnet like on yours so you were very unlucky there.
needless to say , this happened as i was trying to get multiple cars up to my new derelict farmhouse , so i had to zip tie the door on and drive it 50 miles like that .that was in july 2022 , and now i have working water electrcity and heating , i can start to attack the jobs like this that niggle me .
regards
robert
Orlroighty !
More tvr fun and games, oh yes .
I did , in fact , wedge said door in place ,after bolting the plates back in , with cardboard wedges to put it in the right place , which incidentally is about 4mm further forward than it used to be ,
then i could get in from the other side and mark from inside the door, up , and down (copywright venga boys), onto the plates with a black pointy felt tip ..
like so ..
Now , since the holes are round in the door , and the black marker holes are far from round , i needed to work out why , and i realised , the pen had marked the hole round where it got through to the plate , then followed the hole in the sill and top wing , where it overlapped the door hole .
pox.
so , i make a carboard replica of the two holes like so ,
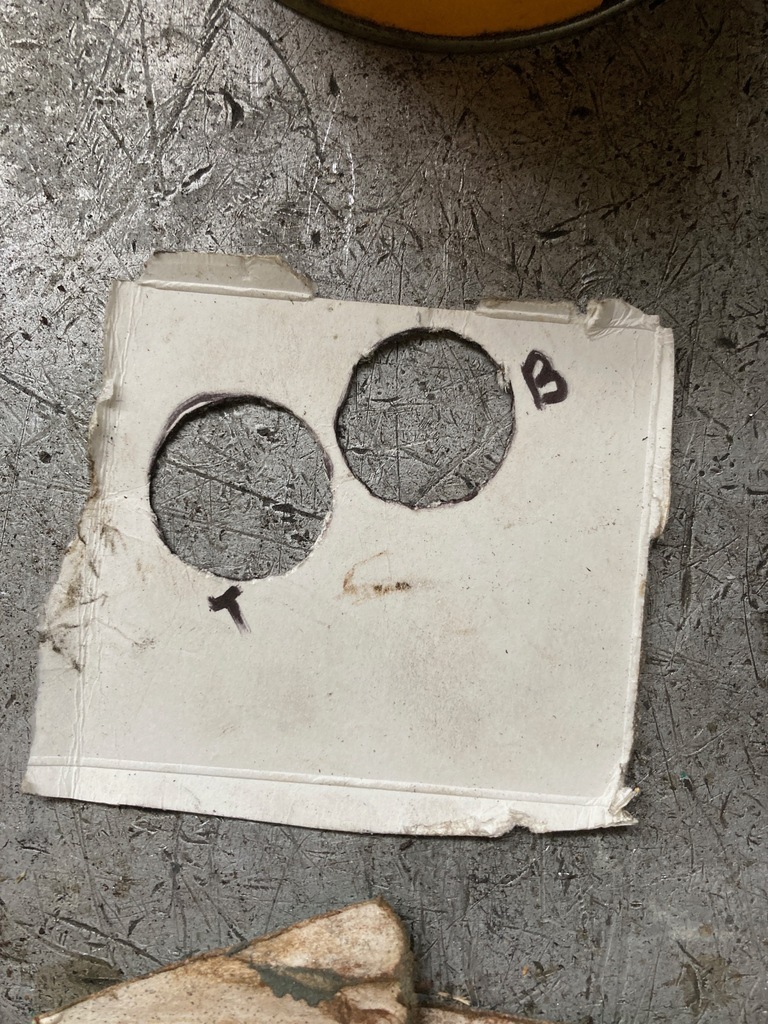
and re assembled the rest of the marked holes so i could get my centre point for drilling ..
drilling and a small tack weld occurred ...

the tack weld allows me to put the plates back on , and then bend the welded nut to get the bolts to line up .
plates back in ,and then bolts in,and i used string to line it all up ..
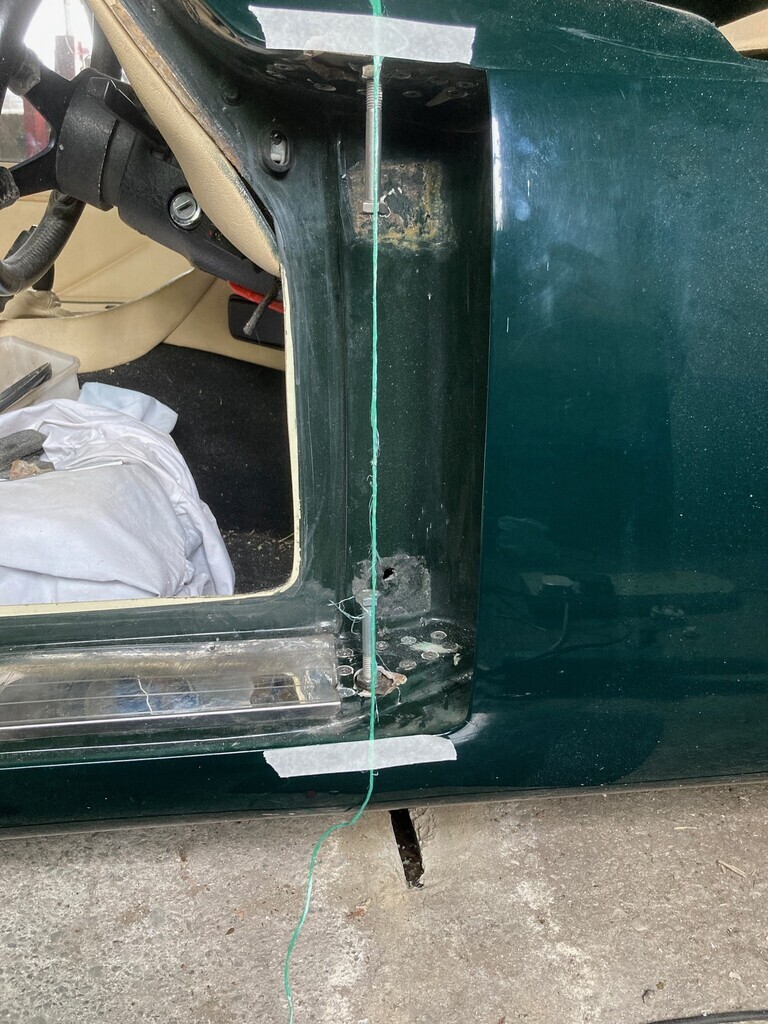
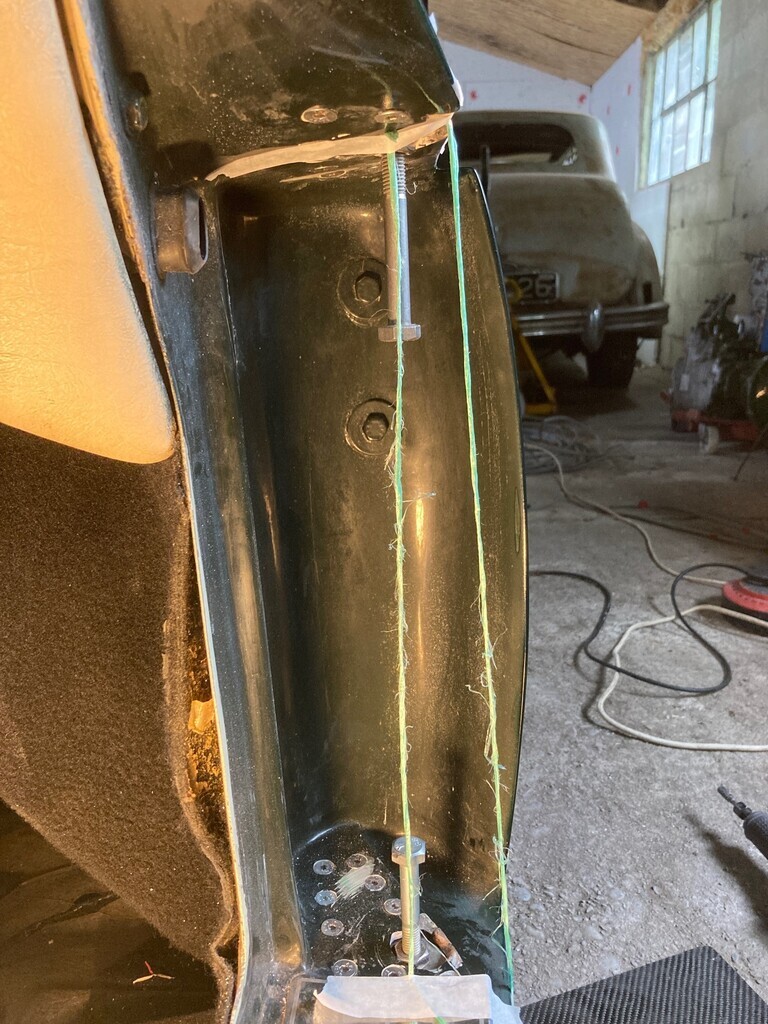
Then i could take off the plates , and weld them .
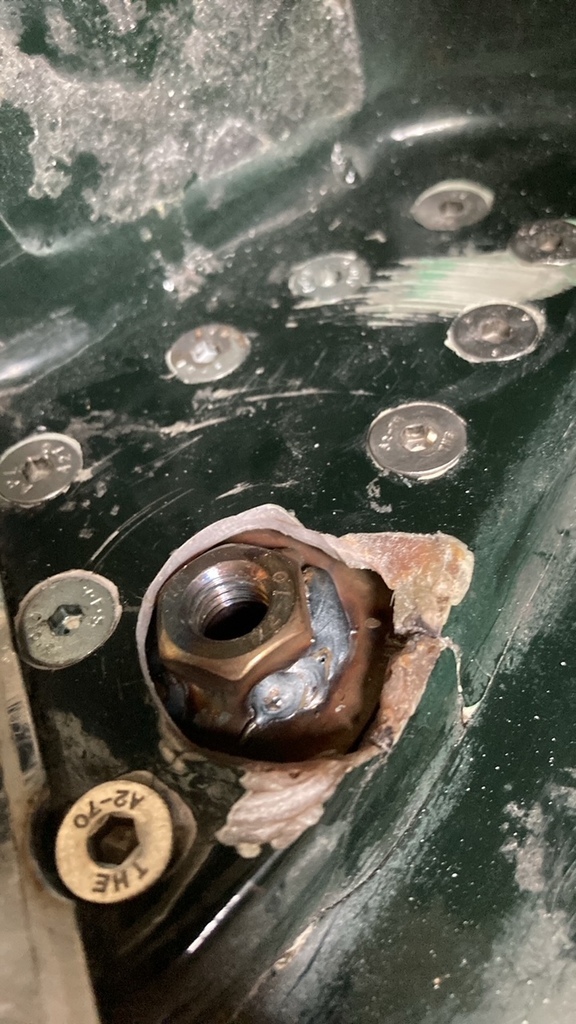
Something i noticed during this hilarious fun , was , the top nut seemed far forwards of where the old bobbin broke out ..

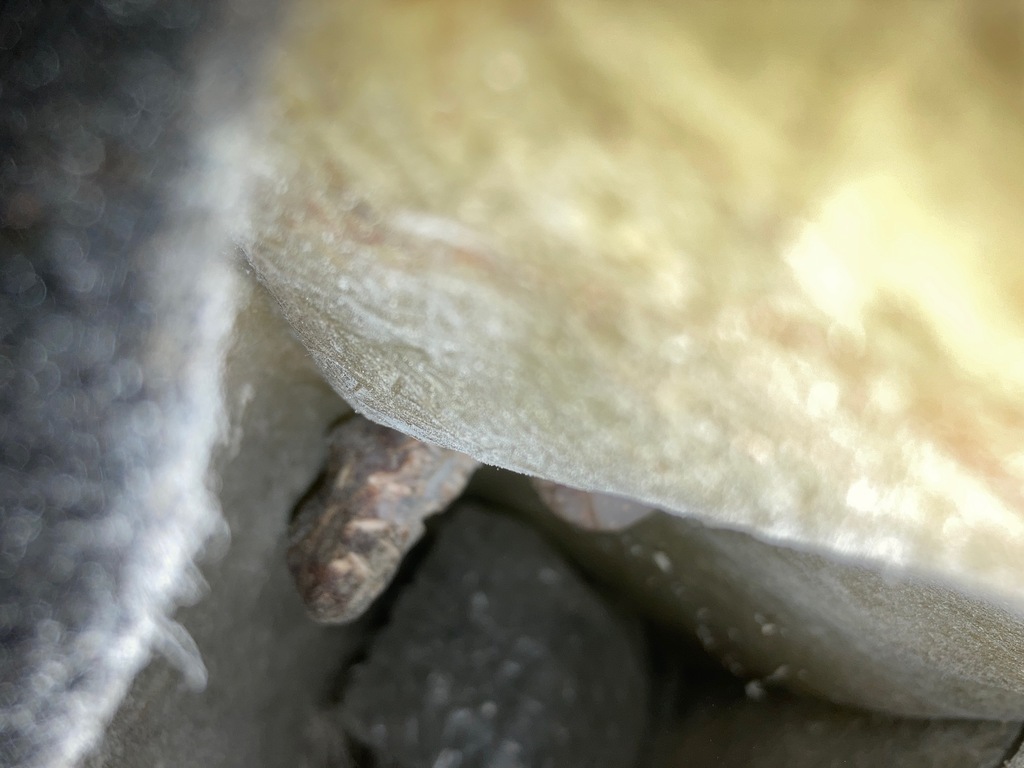
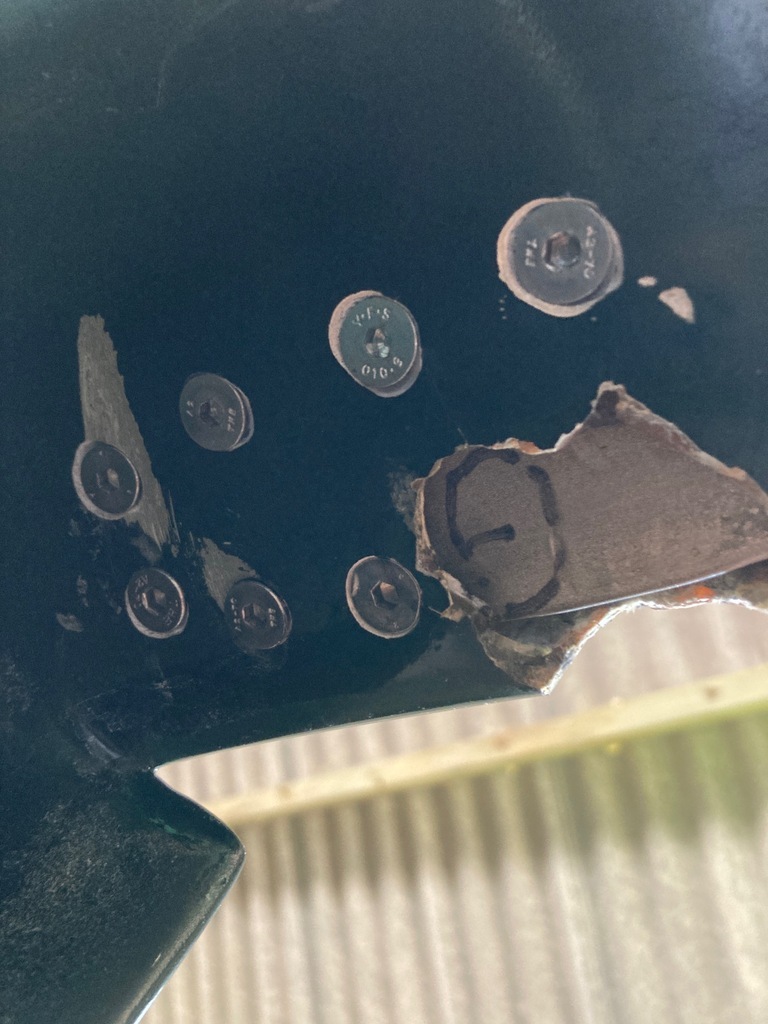
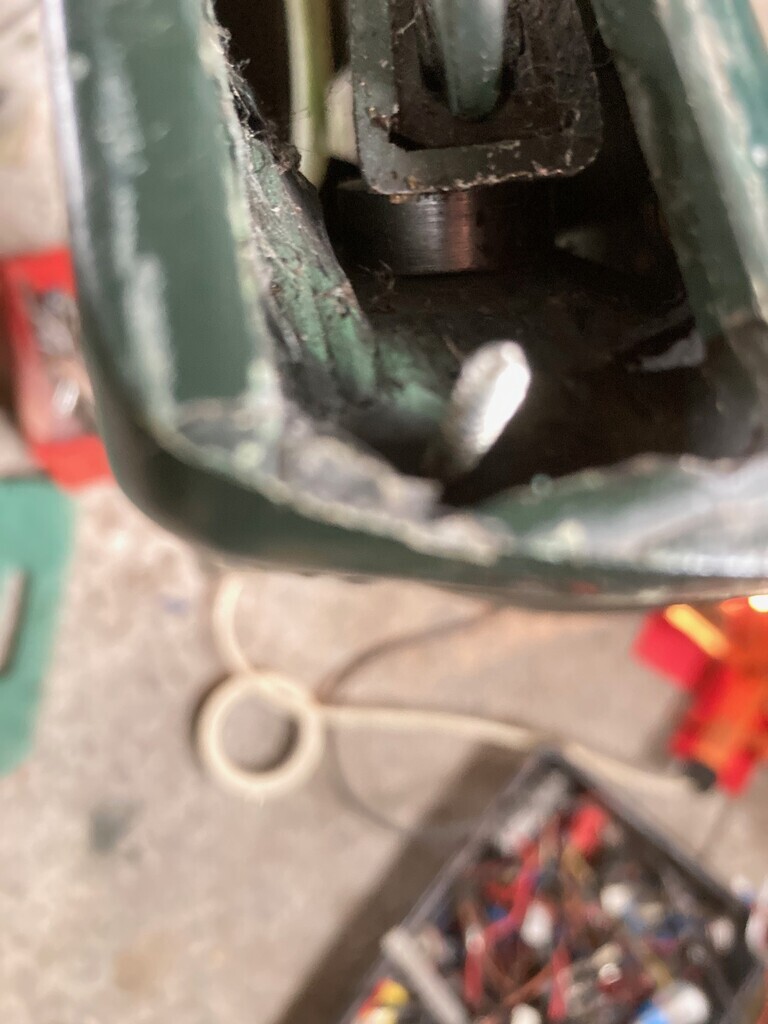
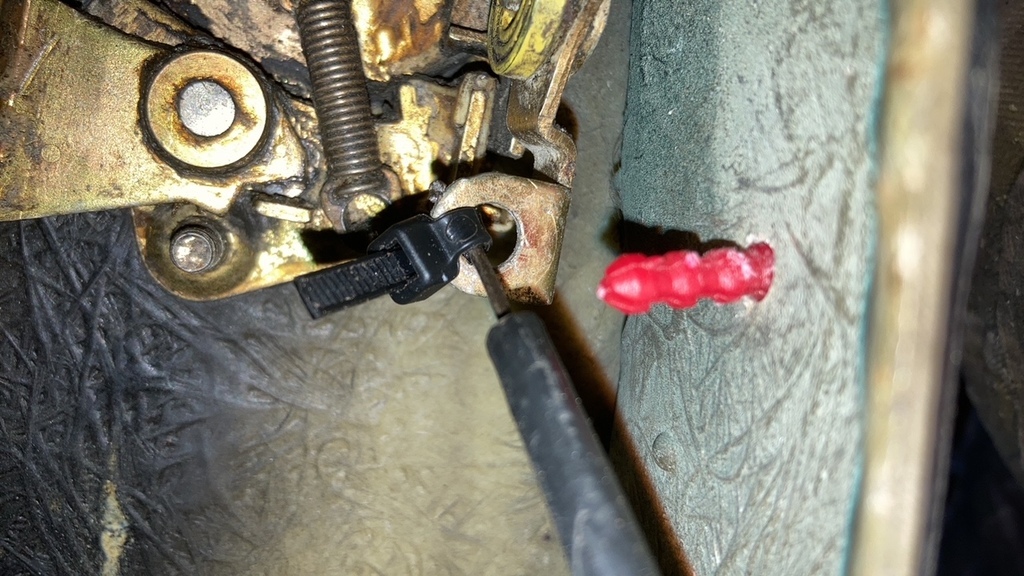
so, of course, i convinced myself i must have made a hash of it all ,and to check , next day i put the door back in yet again , and ,to see if the nuts were anywhere near central to the door holes , i took pictures inside the door up, and down (copywright venga boys) , so i could see how far out i had got it , and whether i had to cut my nuts off and try again..
here are the two piccys ..
bottom nut ..
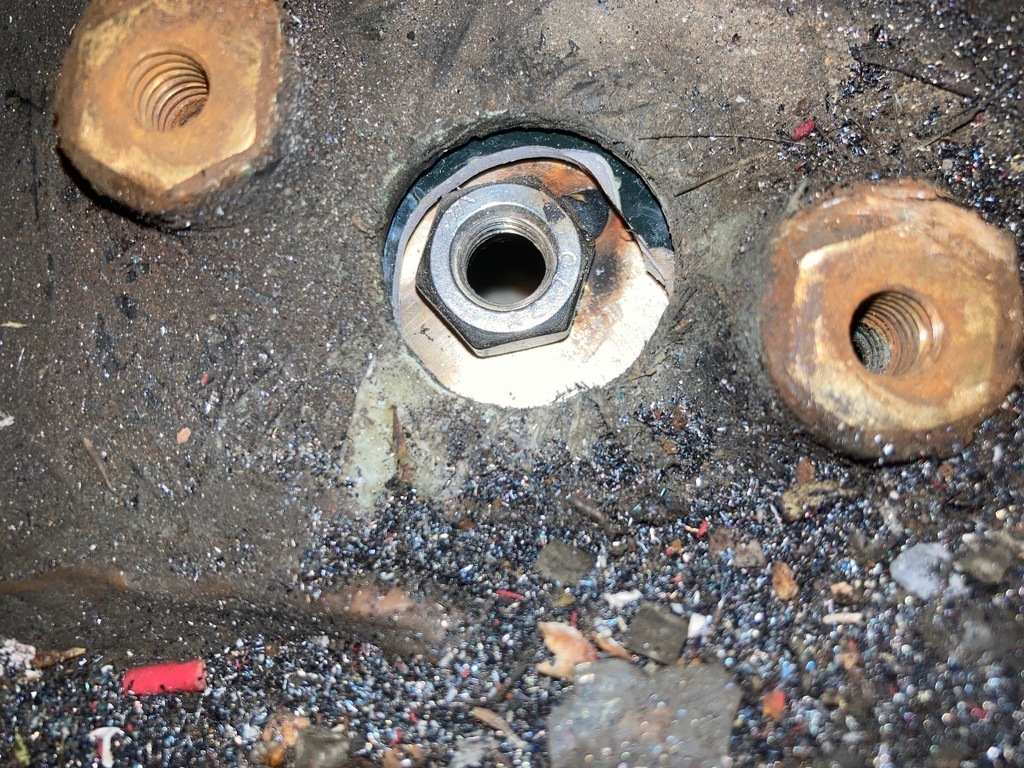
well thats looks ok ..
top nut , the one i lost sleep over ..

stuff my boots and call me gwenlidvine the norse goddess of war with her pneumatic body armour and golden braids !!! its spot on !
Relief.
now finish welded , and put back in ,
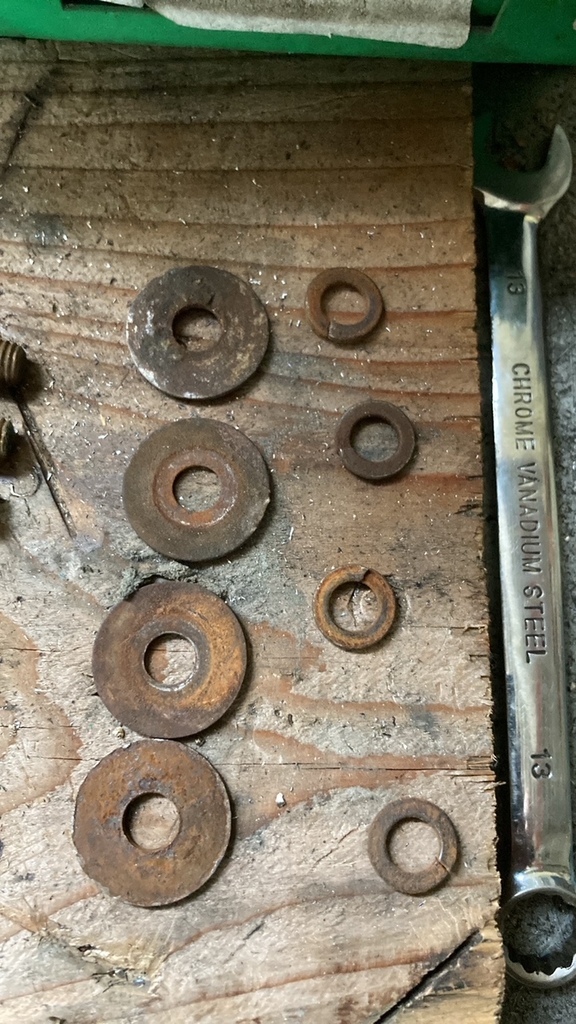
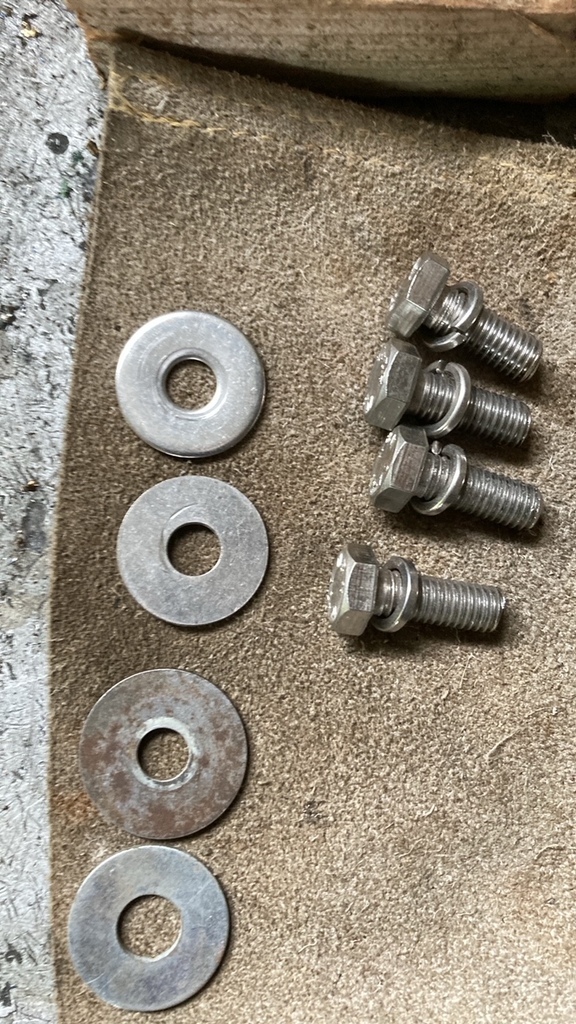
i ended my day by finding some nicer stainless bolts for the mounting plates , and cutting them to length , and then washers and spring washers in S/S to suit .
regards
robert.
More tvr fun and games, oh yes .
I did , in fact , wedge said door in place ,after bolting the plates back in , with cardboard wedges to put it in the right place , which incidentally is about 4mm further forward than it used to be ,
then i could get in from the other side and mark from inside the door, up , and down (copywright venga boys), onto the plates with a black pointy felt tip ..
like so ..
Now , since the holes are round in the door , and the black marker holes are far from round , i needed to work out why , and i realised , the pen had marked the hole round where it got through to the plate , then followed the hole in the sill and top wing , where it overlapped the door hole .
pox.
so , i make a carboard replica of the two holes like so ,
and re assembled the rest of the marked holes so i could get my centre point for drilling ..
drilling and a small tack weld occurred ...
the tack weld allows me to put the plates back on , and then bend the welded nut to get the bolts to line up .
plates back in ,and then bolts in,and i used string to line it all up ..
Then i could take off the plates , and weld them .
Something i noticed during this hilarious fun , was , the top nut seemed far forwards of where the old bobbin broke out ..
so, of course, i convinced myself i must have made a hash of it all ,and to check , next day i put the door back in yet again , and ,to see if the nuts were anywhere near central to the door holes , i took pictures inside the door up, and down (copywright venga boys) , so i could see how far out i had got it , and whether i had to cut my nuts off and try again..
here are the two piccys ..
bottom nut ..
well thats looks ok ..
top nut , the one i lost sleep over ..
stuff my boots and call me gwenlidvine the norse goddess of war with her pneumatic body armour and golden braids !!! its spot on !
Relief.
now finish welded , and put back in ,
i ended my day by finding some nicer stainless bolts for the mounting plates , and cutting them to length , and then washers and spring washers in S/S to suit .
regards
robert.
hi adrain ,phew lots of questions , i'll try to answer from my position of little total expereince in this job , having only done it once before 25 years ago on a crashed prototype s2 ,wher the entire sill was torn off .
Adrian ,what do you do to replace the bobbins torn out of the body , do you use plates as i have done ?
regards
robert
Adrian@ said:
IMHO, it looks like you are repeating a previous repair and the top fracturing of the shell is because that person has not understood that the central pivot bolts (top and bottom) are 'specials', long-er shank M10 bolts with then six threads only and the shank taper locks to the brass bobbin edge so that it completes a locked together item, (ensuring that it does not burst through upwards or downwards) but also to ensure that the pivots are locked tight and not loose on the threads. Both bobbins are fitted during the shell being made (your picture of fibre-fill would not be there from OE).
yes , that's what i thought re the repaired before , and also repaired in the wrong place , hence the rear edge of the door being v tight to the body . with regard to the bolts , on the last one i did i seem to remember th bolt heads being a good 10mm above the plate bush when installed , whereas on this car the bolts were packed out with washers and tight to the bush , on both top and bottom hinges .
The thread length on the bolts was short , so that looked correct , however the plastic bush was siezed on the bolt , so any door action simply span the bobbin in the car body , which then eats its way out gradually .having the top bush in the path of water running down the door frame makes it very prone to siezing i would guess .
This is a repair I have done many times and worked with the late Norman Farmer to help draw up the hinge drawings on PH. (yours are an early version of the S2 hinge plate (mixed with later) as the later versions have the bush up-stands offset to the side of the plate allowing an installer to also rotate the assembly giving more offset than the bush up-stand being central).
thats a good idea , i can remake these offset if i need to ,but looking at the nuts i may be ok .
The method of alignment I used was two pieces of M10 studding and a M10 tube/sleeve with two nuts, screwing into the top and bottom bobbins and spinning the up and down on to the sleeving.
that's much better than a bit of string ,time will tell if i have it close enough .
I 'think' from memory that the alloy runner is missing an eyelet at the very bottom (I might be wrong as it may simply be the picture I am looking at)
the alloy runnner has a fixing at the bottom to the door .
Q. how are you setting the door top hats in relation to new aperture you have (as such the float up/down of the door in relation your new nut heads) which will need to be measured (the shell opening in relation to the ends of both top hats sticking out up/down, (as the door is measured then the top hats can be dressed down or shimmed up to get this correct). With this correct the pivots are simply pivots and no washers are needed. (these are the previous persons addition as they have not understood the locking together). A@
my plan was to insert door , fit hinges , and then space under the hinge plates ,or space under the top hats, to get correct height .yes , that's what i thought re the repaired before , and also repaired in the wrong place , hence the rear edge of the door being v tight to the body . with regard to the bolts , on the last one i did i seem to remember th bolt heads being a good 10mm above the plate bush when installed , whereas on this car the bolts were packed out with washers and tight to the bush , on both top and bottom hinges .
The thread length on the bolts was short , so that looked correct , however the plastic bush was siezed on the bolt , so any door action simply span the bobbin in the car body , which then eats its way out gradually .having the top bush in the path of water running down the door frame makes it very prone to siezing i would guess .
This is a repair I have done many times and worked with the late Norman Farmer to help draw up the hinge drawings on PH. (yours are an early version of the S2 hinge plate (mixed with later) as the later versions have the bush up-stands offset to the side of the plate allowing an installer to also rotate the assembly giving more offset than the bush up-stand being central).
thats a good idea , i can remake these offset if i need to ,but looking at the nuts i may be ok .
The method of alignment I used was two pieces of M10 studding and a M10 tube/sleeve with two nuts, screwing into the top and bottom bobbins and spinning the up and down on to the sleeving.
that's much better than a bit of string ,time will tell if i have it close enough .
I 'think' from memory that the alloy runner is missing an eyelet at the very bottom (I might be wrong as it may simply be the picture I am looking at)
the alloy runnner has a fixing at the bottom to the door .
Q. how are you setting the door top hats in relation to new aperture you have (as such the float up/down of the door in relation your new nut heads) which will need to be measured (the shell opening in relation to the ends of both top hats sticking out up/down, (as the door is measured then the top hats can be dressed down or shimmed up to get this correct). With this correct the pivots are simply pivots and no washers are needed. (these are the previous persons addition as they have not understood the locking together). A@
Edited by Adrian@ on Tuesday 11th June 22:15
Adrian ,what do you do to replace the bobbins torn out of the body , do you use plates as i have done ?
regards
robert
Edited by ivanhoew on Wednesday 12th June 08:46
Edited by ivanhoew on Wednesday 12th June 08:53
phillpot said:
A grand job! I've posts on here, all be it some years ago, where owners used a length of threaded rod to align the top and bottom bobbins.
Thank you phill , yes i had considered it , but had no rod to hand so gave it a go with the string and it seems to all line up , fingers crossed .Thanks Adrian, that sounds a good way to do it !
Well things went well with the hanging of the door .
I spoodged a load of p40 in the top plate to body interface to take up any missmatch with the plate to body contouring , and screwed it in , then the bottom one , where i filled the gap with silicone to prevent water ingress around the bush .
the bottom bolt screwed in finger tight , the top one was slightly tighter, but not bad , and it all went together well , i then packed the door into position with cardboard wedges , and tightened down the adjusters .
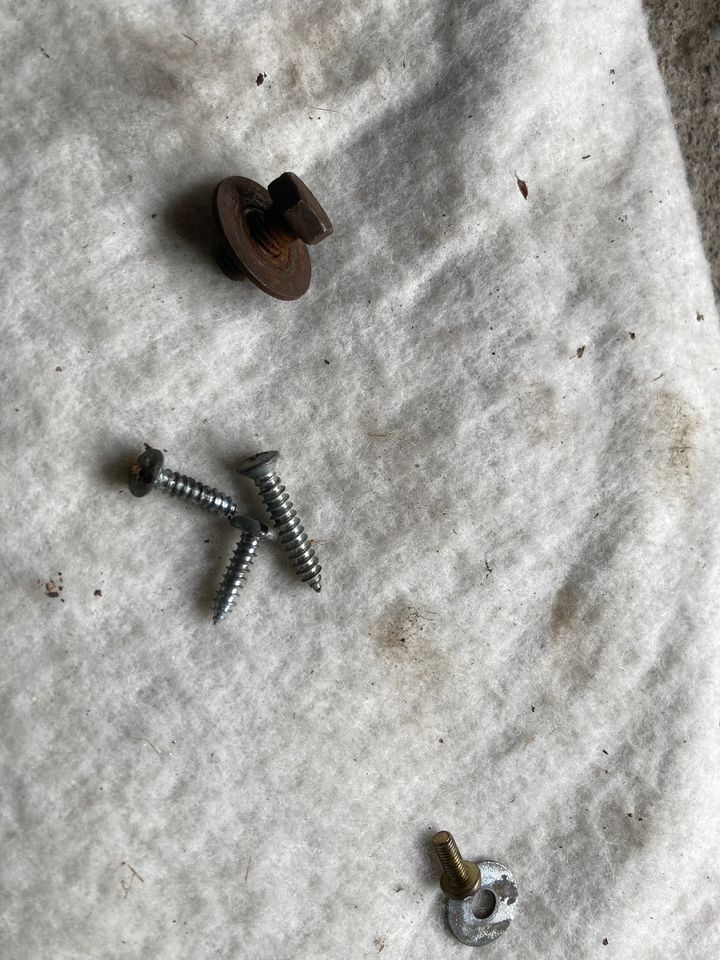
Then onto the window frame . I fitted my new fluffy gutter strip , and faffed about getting the frame as good as i could ,changed three self tappers for nicer s/s bolts and nuts on the mounting plate ..
put the bottom spar bolt in ..
interestingly with the new hinges the ally window frame now sits much better against the rubber door strip .
Now onto wiring up the power window and speakers .
the car had 4 seperate joints in the power window feed ..
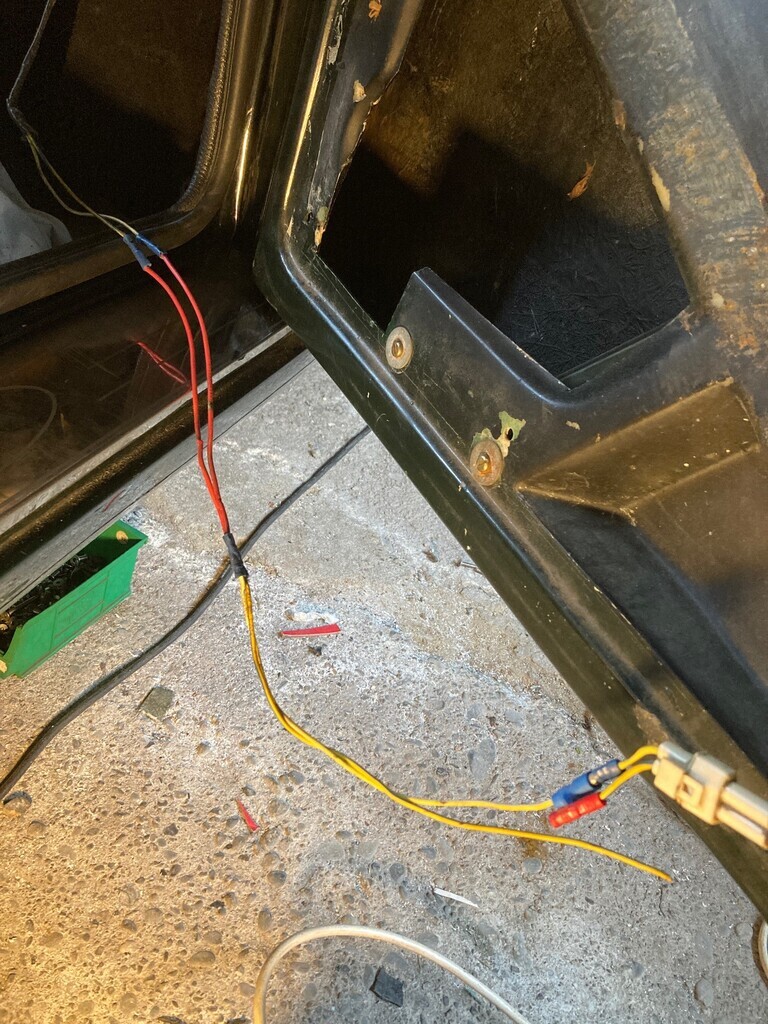
so i cut all that out and put in some heavier guage wires , and now there's two joints in total ,i also put some conduit on it so i could zip it to the brace safely ..
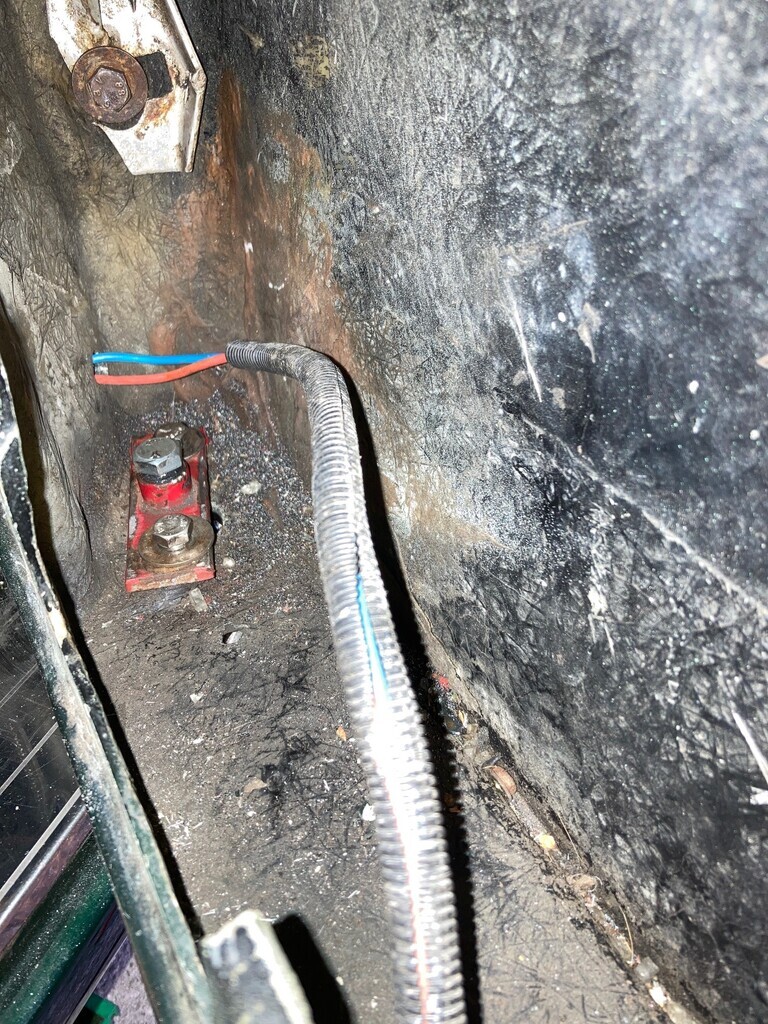
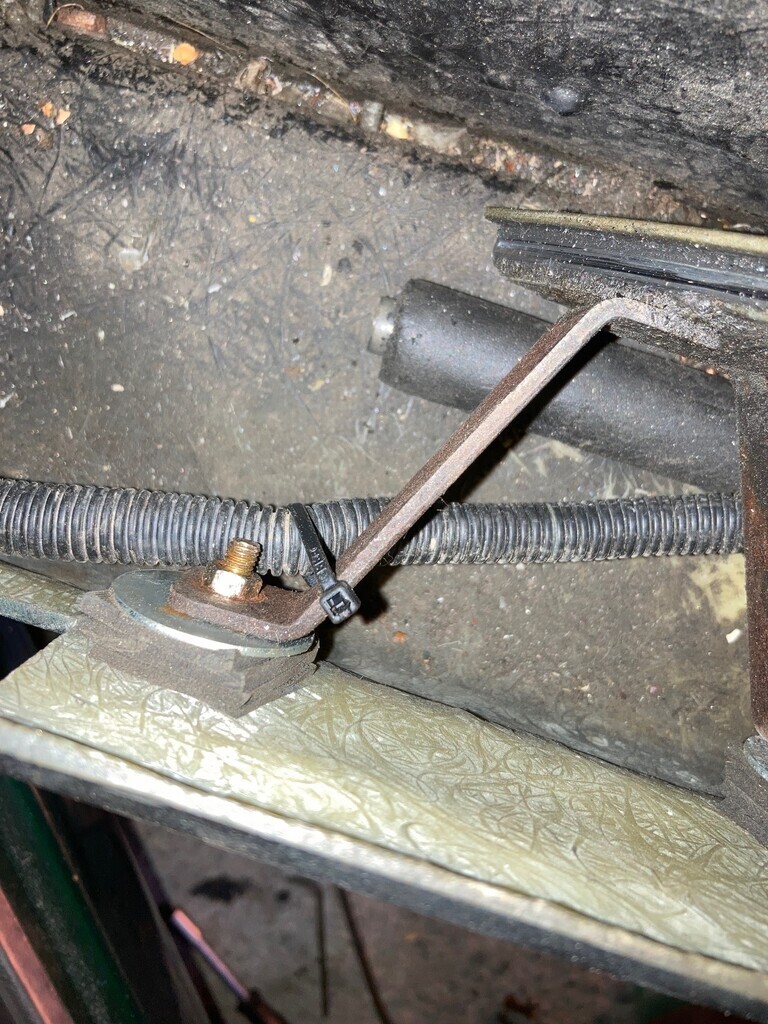
Now i could connect the battery, and wizz the window up and down, to see what compination of spacers and alignment of the frame would help the window work best , in the end i finished with this spacer in the top of the rearward frame part ..
this helped a lot in stopping the glass going diagonal and digging into the sliders , which i sprayed wurth hss 2000 into .
then everyones favourite job, the cable for the inner door pull ..
i found the best way to do this was lay the door card flat under the door on my knees , and hook it into palce , then put a zip tie in the hole it hooks into and use that to retain it .
now i could put the cleaned door card on , fun getting all th plastic rawlpluggy things in the right holes and not doubled over !
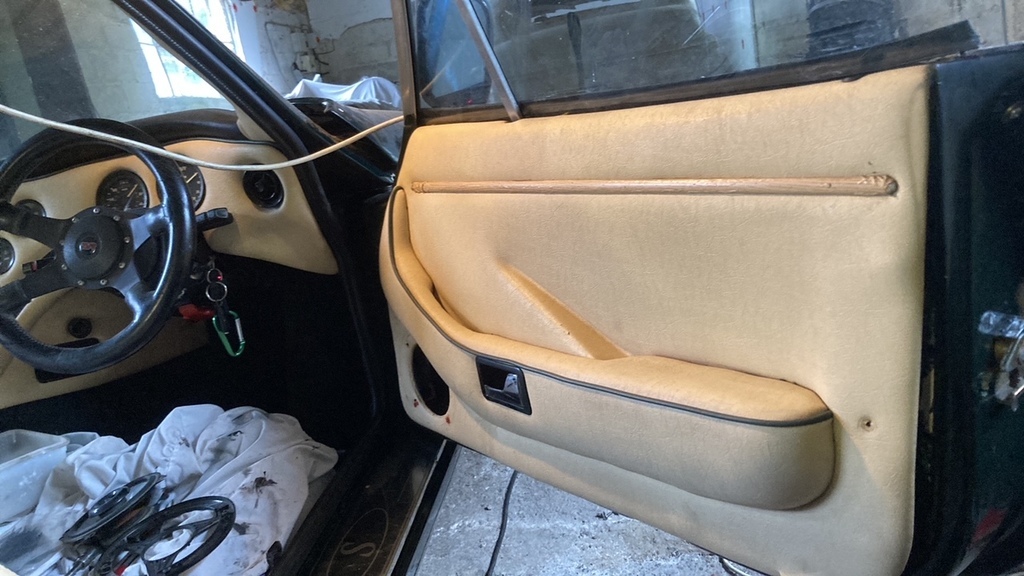
nice to see it complete ..
Next.... body repair .
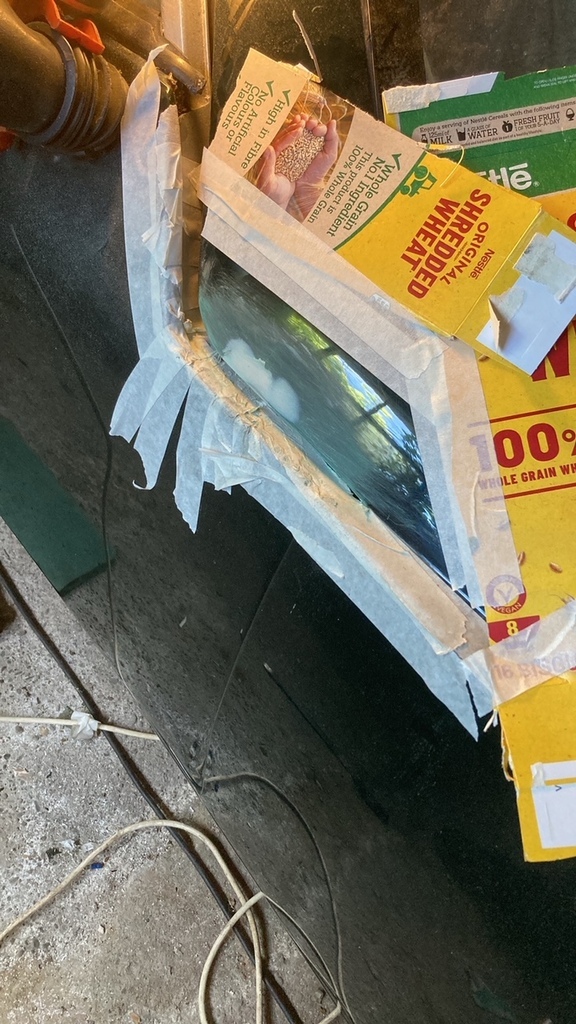
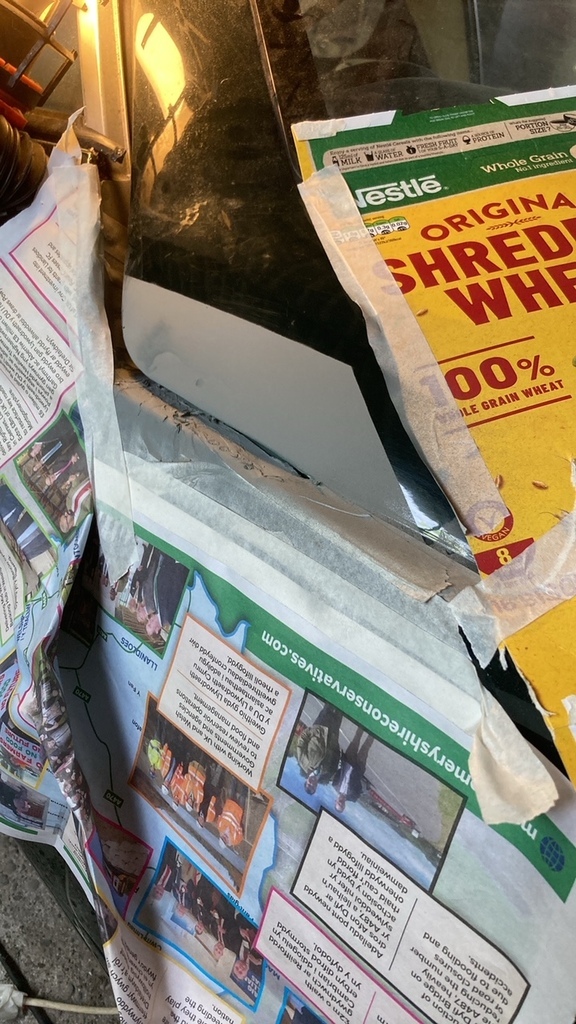
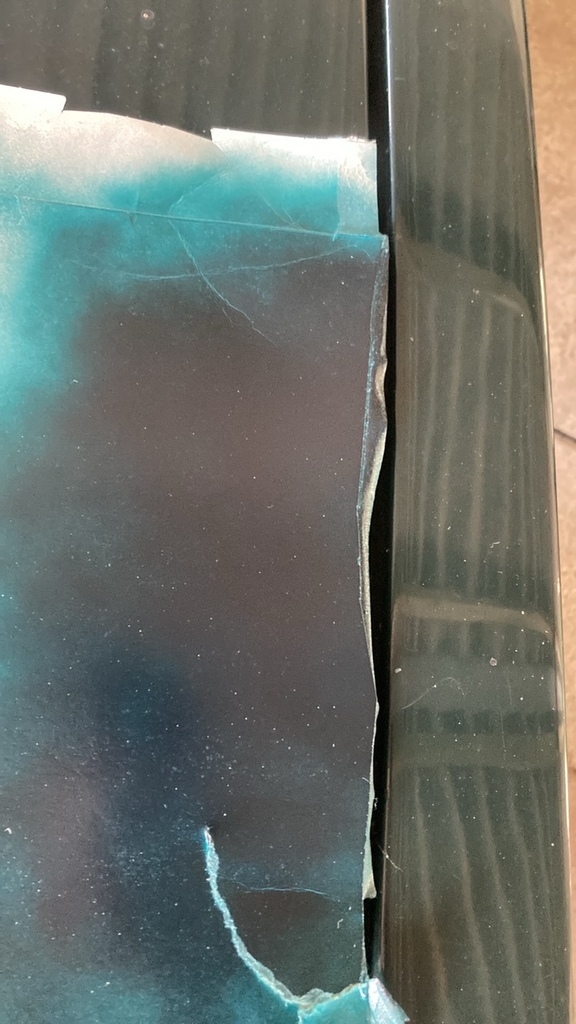
taped up the door ,
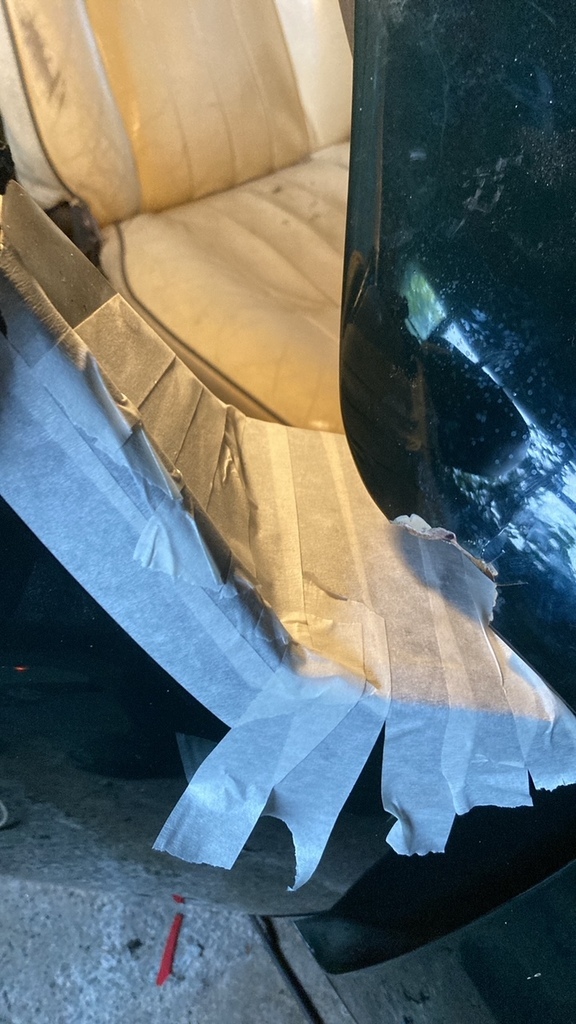
mixed some p40 and filled the hole up with some supports to keep it there while it went hard ..
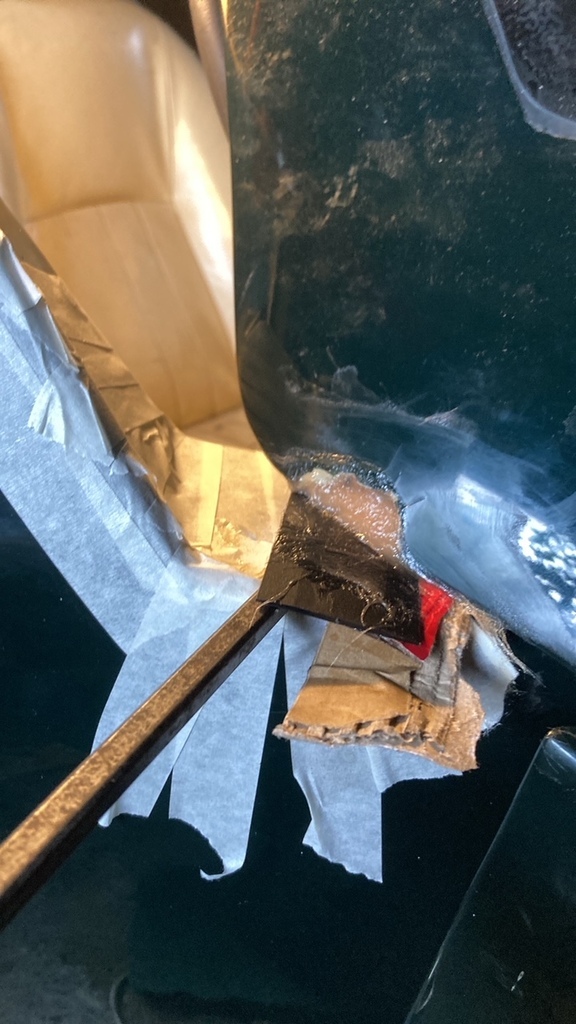
tomorrow i can sand it , a slight skim of filler, then sand , prime , sand ,and finally gloss paint .
regards
robert
Well things went well with the hanging of the door .
I spoodged a load of p40 in the top plate to body interface to take up any missmatch with the plate to body contouring , and screwed it in , then the bottom one , where i filled the gap with silicone to prevent water ingress around the bush .
the bottom bolt screwed in finger tight , the top one was slightly tighter, but not bad , and it all went together well , i then packed the door into position with cardboard wedges , and tightened down the adjusters .
Then onto the window frame . I fitted my new fluffy gutter strip , and faffed about getting the frame as good as i could ,changed three self tappers for nicer s/s bolts and nuts on the mounting plate ..
put the bottom spar bolt in ..
interestingly with the new hinges the ally window frame now sits much better against the rubber door strip .
Now onto wiring up the power window and speakers .
the car had 4 seperate joints in the power window feed ..
so i cut all that out and put in some heavier guage wires , and now there's two joints in total ,i also put some conduit on it so i could zip it to the brace safely ..
Now i could connect the battery, and wizz the window up and down, to see what compination of spacers and alignment of the frame would help the window work best , in the end i finished with this spacer in the top of the rearward frame part ..
this helped a lot in stopping the glass going diagonal and digging into the sliders , which i sprayed wurth hss 2000 into .
then everyones favourite job, the cable for the inner door pull ..
i found the best way to do this was lay the door card flat under the door on my knees , and hook it into palce , then put a zip tie in the hole it hooks into and use that to retain it .
now i could put the cleaned door card on , fun getting all th plastic rawlpluggy things in the right holes and not doubled over !
nice to see it complete ..
Next.... body repair .
taped up the door ,
mixed some p40 and filled the hole up with some supports to keep it there while it went hard ..
tomorrow i can sand it , a slight skim of filler, then sand , prime , sand ,and finally gloss paint .
regards
robert
Well , time for a bit of fillin and paintin ..
filled and flatted and masked ..
primered..
i then featherd that edge back with 2000 grit , and applied my specially ordered , brooklands green ,
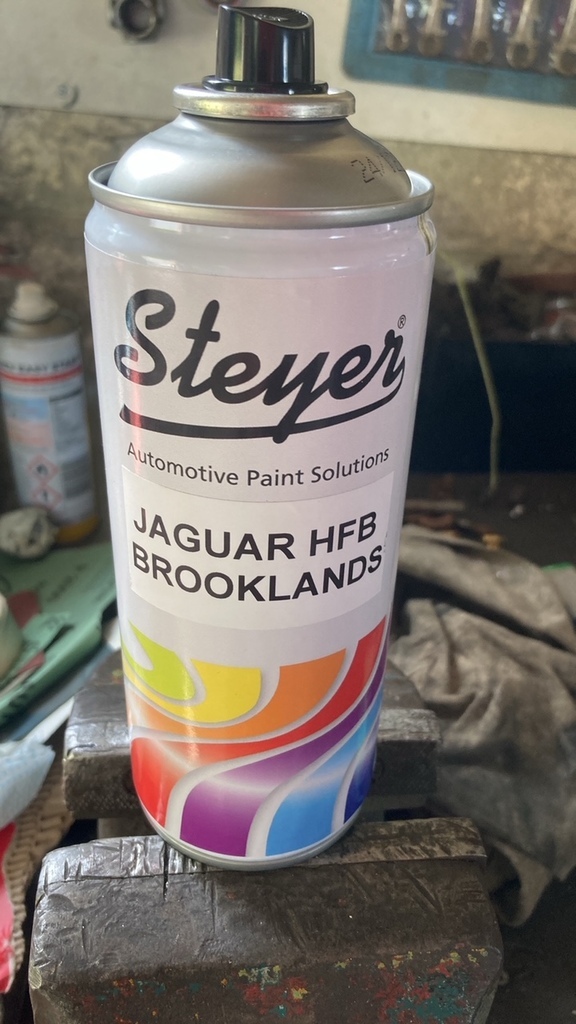
which should be a perfect match ..
oh pox .
less brooklands green more depressing grey with a touch of gloomy black !
oh well , at least its sealed and weather proof , i cut it back and polished anyway ..
In case the primer was too dark ,i painted a bit of white card to see if it would make it match better , here it is next to the boot lid ..
Well, that's a perfect match isn't it .........NOPE .
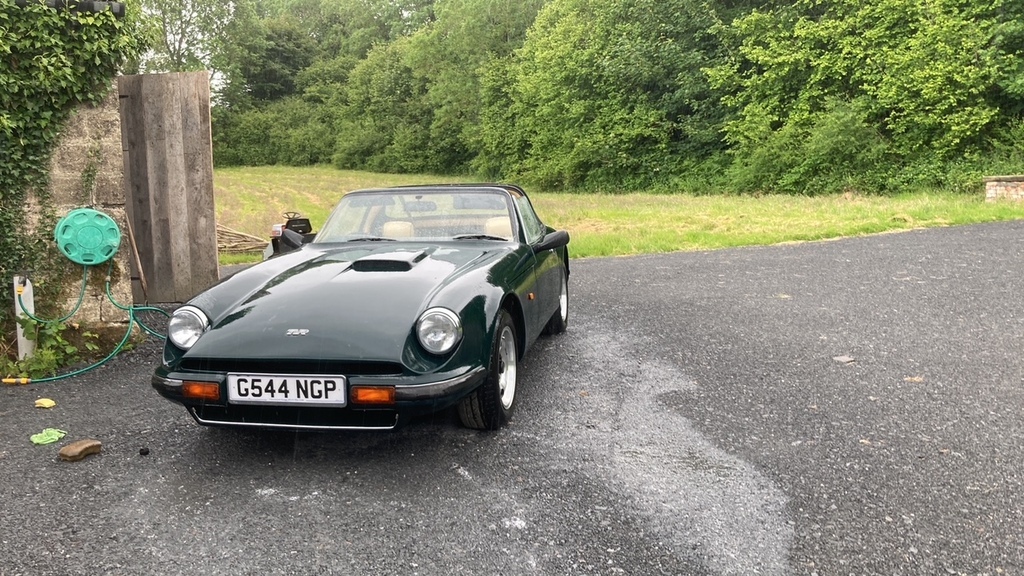
to cheer myself up i started her up ,first time in 1 1/2 years , backed out of the barn and washed the saucy monkey ..
of course , halfway through this , it started biblically tipping it down , and a frantic rush back into the barn ensued , slighly hindered by that poxy alarm system where you have to put a little wand in a hole to make the red led go out ,that needs taking off and no mistake !
once back in the barn , i then rolled the v wet lawn mower in too , and wiped them both down a bit ..
looks much better for a wash .
regards
robert
filled and flatted and masked ..
primered..
i then featherd that edge back with 2000 grit , and applied my specially ordered , brooklands green ,
which should be a perfect match ..
oh pox .
less brooklands green more depressing grey with a touch of gloomy black !
oh well , at least its sealed and weather proof , i cut it back and polished anyway ..
In case the primer was too dark ,i painted a bit of white card to see if it would make it match better , here it is next to the boot lid ..
Well, that's a perfect match isn't it .........NOPE .
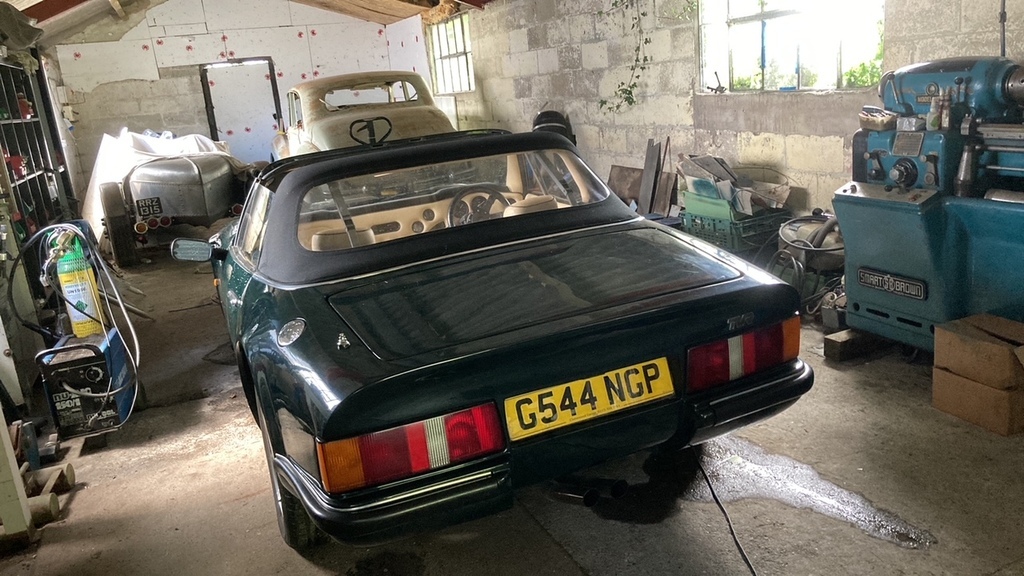
to cheer myself up i started her up ,first time in 1 1/2 years , backed out of the barn and washed the saucy monkey ..
of course , halfway through this , it started biblically tipping it down , and a frantic rush back into the barn ensued , slighly hindered by that poxy alarm system where you have to put a little wand in a hole to make the red led go out ,that needs taking off and no mistake !
once back in the barn , i then rolled the v wet lawn mower in too , and wiped them both down a bit ..
looks much better for a wash .
regards
robert
v8s4me said:
Nice job Robert! Now that lathe is a serious bit of kit 
I wish I had a workshop like yours.
Have you got an automotive paint supplier near you? They should have a spectro thingy which will scan the paint and give them the formula for a good match. Failing that, if your local "Chips Away" man is any good he would be able to tidy that up for you.
thank you v8s , im not sure , i'm fairly new to the area , so i will have a hunt around .I wish I had a workshop like yours.
Have you got an automotive paint supplier near you? They should have a spectro thingy which will scan the paint and give them the formula for a good match. Failing that, if your local "Chips Away" man is any good he would be able to tidy that up for you.
Edited by v8s4me on Tuesday 18th June 08:31
re that lathe ,yes , you can imagine the fun i had towing that 2600 lb lathe and a 1800 lb mill up here 140 miles from oxon , on a borrowed from local farmer L200 and small flat bed agricultural trailer .having never towed in my life before my hs move .
On the two i have repaired ,
This car, a s2 G reg , had the brass bobbins mounted in a 5mm thick fibreglass surface , and glassed in with a bubble of fibreglass over the top of them .
However, on the previous car , i fixed in 1992 , whih was a F reg s2 tvr prototype with cats and air con , bought crash repairable from the breakers , the fibreglss was much much thicker , and the bobbins were open ended like phils.
regards
robert
Gassing Station | S Series | Top of Page | What's New | My Stuff