Discussion


Okay, so I bought an S1 a few months ago, it needs everything doing to it, and I mean everything, I have posted pictures before but thought I’d start a new thread to catalogue my progress. So here are a few photos of the car when bought. It looks better in the photos than actually is. Thank you to all the people who have given me advice and helped me so far, really appreciate it and has made me believe I will be able to do this.
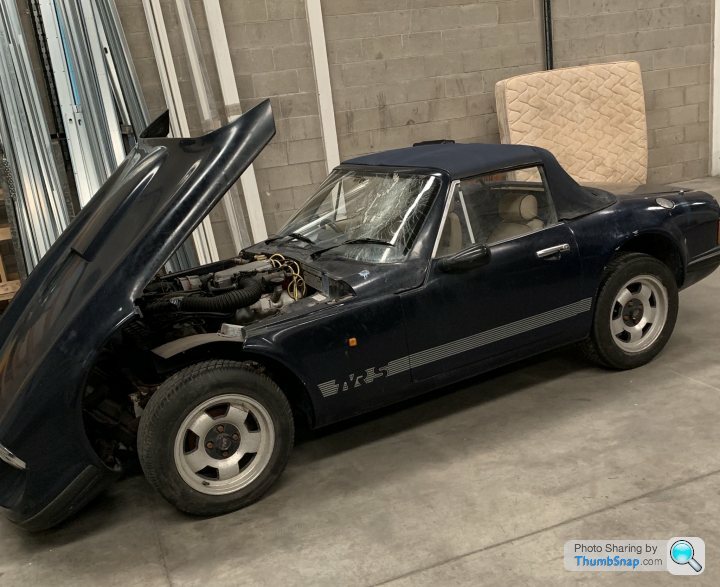
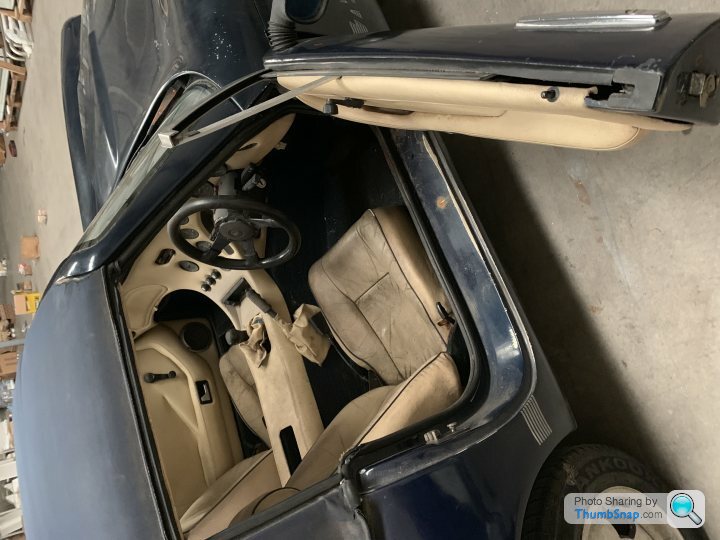
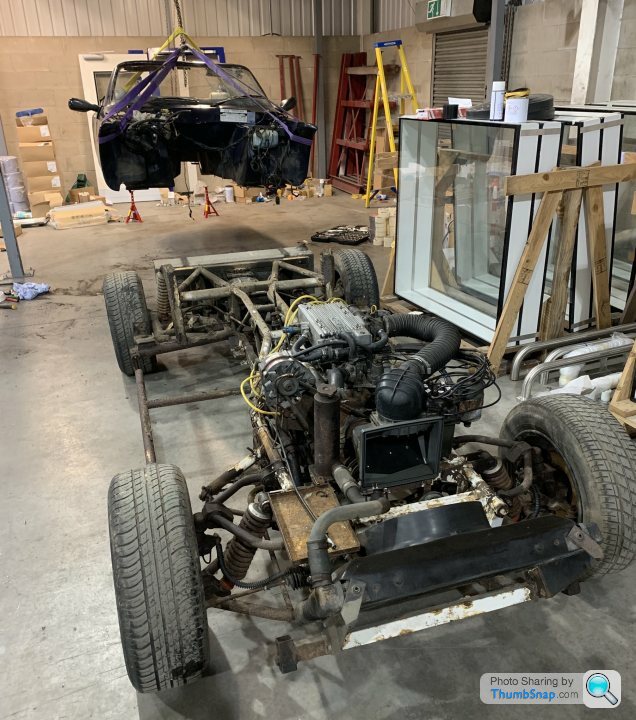
So been doing few hours every week on it getting ready to lift the body off, every bolt underneath heavily corroded so lots of grinding and cutting done, bonnet off and all pipes and electrics, handbrake and seat belts disconnected etc.
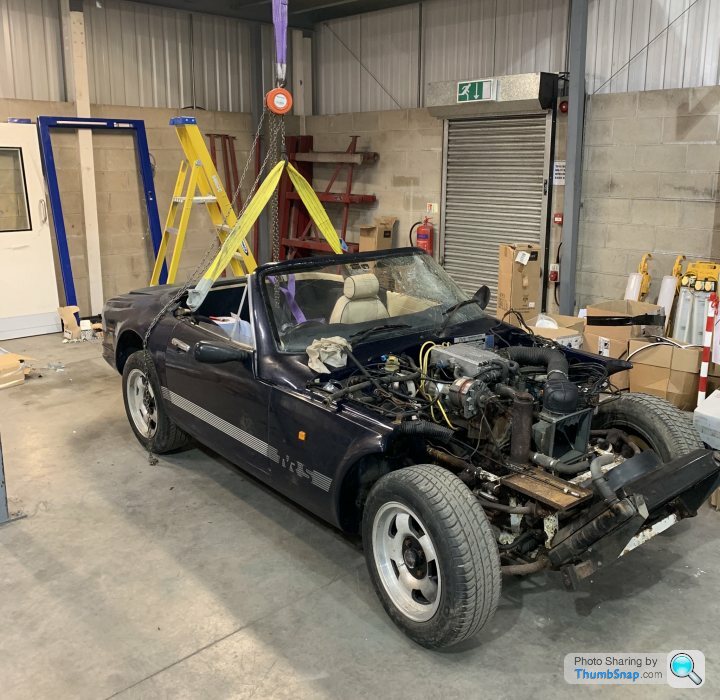
Tonight put a temp lift on the back to see if the 30 years of corrosion’ and gunk would give easily enough, used the top seatbelt mounts to connect the slings, but will connect a beam between them and strap the rear of the car to the beam to be on the safe side (don’t want the body in two halves). Connection points seemed ok, no creaking or bending, but body and chassis were not parting company, another check over and then realised I hadn’t removed the seat belts stalks on the tunnel (numbnuts), of course they are solid and wont undo and need cutting out like everything else has done, but typical TVR there’s a bracket in the way so awkwardly hacksawing by hand.
Junior hacksaw blade not up to the job, so give up for the night, but I am slowly getting there and soon the house of horrors will be revealed.
To be continued........
So been doing few hours every week on it getting ready to lift the body off, every bolt underneath heavily corroded so lots of grinding and cutting done, bonnet off and all pipes and electrics, handbrake and seat belts disconnected etc.
Tonight put a temp lift on the back to see if the 30 years of corrosion’ and gunk would give easily enough, used the top seatbelt mounts to connect the slings, but will connect a beam between them and strap the rear of the car to the beam to be on the safe side (don’t want the body in two halves). Connection points seemed ok, no creaking or bending, but body and chassis were not parting company, another check over and then realised I hadn’t removed the seat belts stalks on the tunnel (numbnuts), of course they are solid and wont undo and need cutting out like everything else has done, but typical TVR there’s a bracket in the way so awkwardly hacksawing by hand.
Junior hacksaw blade not up to the job, so give up for the night, but I am slowly getting there and soon the house of horrors will be revealed.
To be continued........
Edited by 88S1 on Thursday 27th June 22:51
v8s4me said:
good luck with the project. I envy you having all that space to work in. Havre you tried using one of THESE?
Yes it’s in the warehouse where I work, so can work late at night after work with great light and without disturbing the neighbours. Have one of those blades at home, will be in the back of the car in the morning.
glenrobbo said:
Worth mentioning, OP.
When you have removed all the body to chassis attachments
Good luck.
Thanks, I definitely need it. What outriggers, they have decided to be ECO friendly and recycled themselves. Main chassis looks very solid, just outriggers shot and trailing arms need a bit of attention. When you have removed all the body to chassis attachments
Good luck.
Full strip down and nut and bolt rebuild.
Edited by 88S1 on Friday 28th June 00:43
greymrj said:
Keep it up, we S1 owners are a special breed of stubborn people! Those radius arms have a known problem.
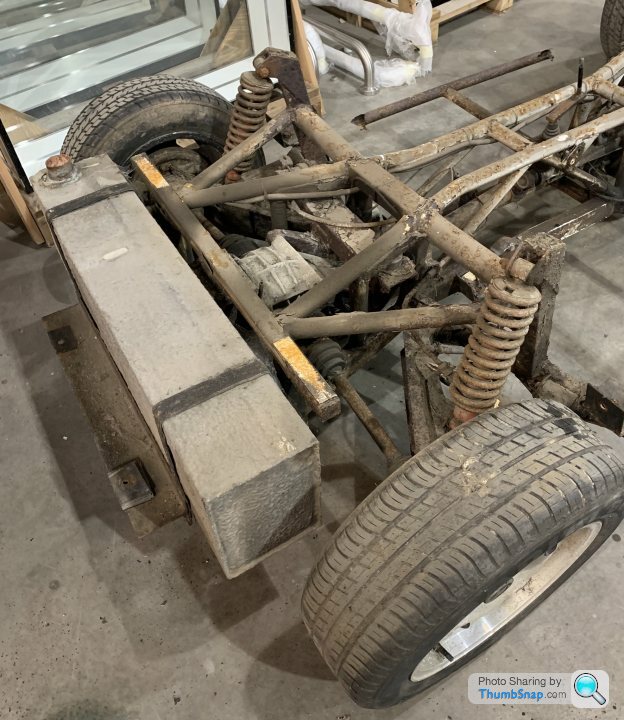
Thanks for the info/advice, big tube on trailing arms look suspect, so they will probably need work, and have taken a lot of dimensions of the outrigger locations. Will have a very close look at everything once it’s been shot lasted. Tank cradle looks okay from what I’ve seen so far, was told by the original finder that he thought this had already been replaced, time will tell. It’s fair to say I’ve got a few hours work in front of me. And a lot of bits and bobs to acquire.
Blue 30 said:
If you're near Staffordshire (ws7) to collect. I have some surplus tubing from my resto. That includes the big tubing.
TerryB
TerryTerryB
That would be brilliant, many thanks, would love to see your restoration too. Im up and down the motorway regular(ish), will message you next time I am to see if we can meet up.
Was reading through your Resto post from the beginning on Saturday, looks amazing, hope mine looks that good when it’s done.
Lee
Edited by 88S1 on Sunday 30th June 23:18
shaunodude1 said:
Hi your in for a lot of fun !!! I'm doing a full body off rebuild
Good luck with yours. Just got the body off, so can start the strip down. Taking photos of everything so far and also writing in a pad everything I do so I can just reverse the order with the build up, think I’ll do some sketches too just to be sure. I’ll look out for your photos. 


Blue 30 said:
Tip...
Make note of the body/chassis rubber spacer pads.
That's how many and where they sit.
It'll be your starting reference point, once you're ready to refit the body.
TerryB.
All noted in my little black book and bagged and labelled per location. They are all consistent, so thats a plus, but perished so need replacing.Make note of the body/chassis rubber spacer pads.
That's how many and where they sit.
It'll be your starting reference point, once you're ready to refit the body.
TerryB.
Ceejay73 said:
Good stuff Lee, now the body is out the way it's gonna be quite easy and enjoyable for a while. If I may suggest, try to get it on some reasonably high stands. Think I had mine at around 20" from the ground, much easier on the back as you are working.
Carl.
Sounds like a plan, we have some Unistrut channel in the warehouse, will build a support frame to waist height, this can also be used jig up the outriggers etc for welding, might make it mobile too so can wheel it around and pretend its back on the road - brum brum Carl.

JohnGBUK said:
I am new to the TVR scene, and will be following your progress. Good up the good work.
Hi John, welcome on board, as you’ve seen I’mpretty new too. PH is a great place for info and advice and there’s some very knowledgeable people on the forum. Do you have a car already yourself? Lee
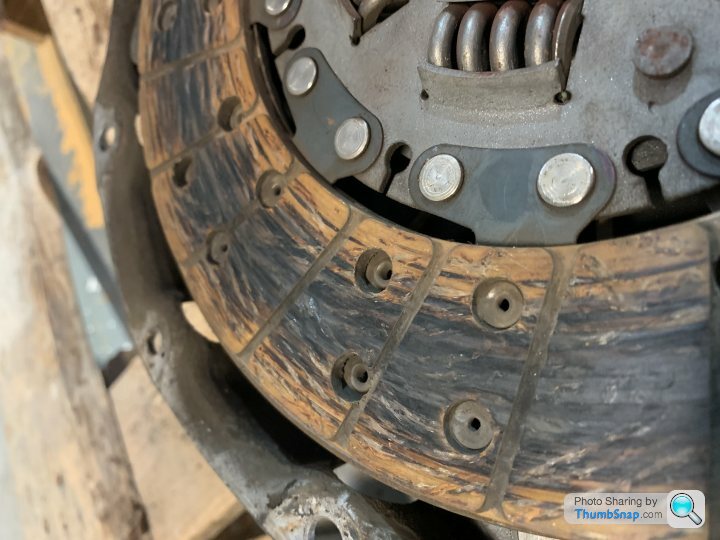
I’ll have another look, but don’t recall seeing anything on the flywheel, it’s not scored or blued, but I’ll have a look and make sure I check the clearance when I get the replacement. The back side is the same, Not quite as black which I suppose makes sense as the flywheel is the rotating component. The 1st picture was the flywheel side.
Never changed a clutch before, so don’t know what’s normal or not. But changing it anyway, don’t fancy taking it all out again for the cost of a few kebabs.
Appreciate your advice.
Never changed a clutch before, so don’t know what’s normal or not. But changing it anyway, don’t fancy taking it all out again for the cost of a few kebabs.
Appreciate your advice.
Edited by 88S1 on Friday 19th July 18:58
Edited by 88S1 on Friday 19th July 19:00
GreenV8S said:
88S1 said:
Not quite as black which I suppose makes sense as the flywheel is the rotating component. The 1st picture was the flywheel side.
The pressure and speed difference should be equal on both sides of the clutch plate. Or I have I got something completely wrong there and need to go on Utube and educate myself.
greymrj said:
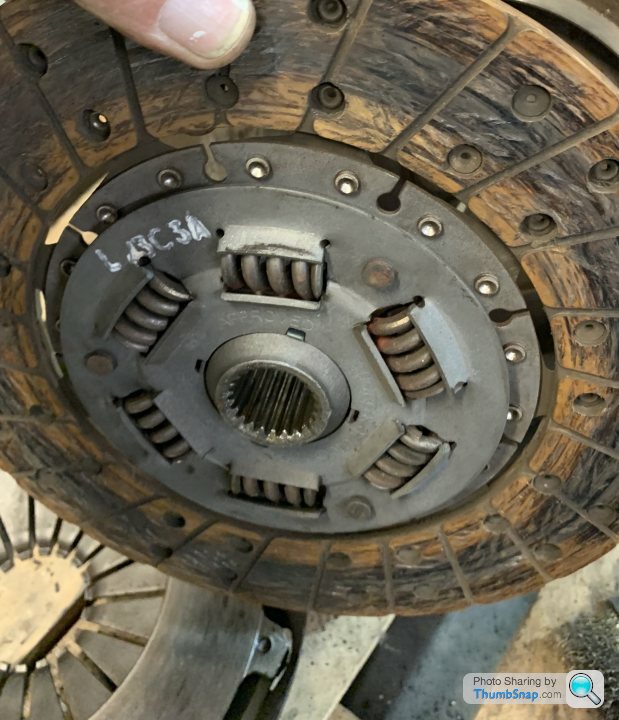
That isnt bad at all Lee. Clutch plates frequently come out !
New Luk clutch kit ordered, will replace the bearing and seal too whilst I’m there. Splines look good, and I will clean everything before re-assembly as you suggest. Have removed the slave cylinder, not sure that’s even working as pedal was solid and wouldn’t move, probably re-new that too, so tieing the lever back should be simple. Im a while off doing this yet though, rest of the engine to pull apart, check everything, clean, paint etc etc. Going to check the engines okay, then move onto the chassis strip down and come back to the engine after.


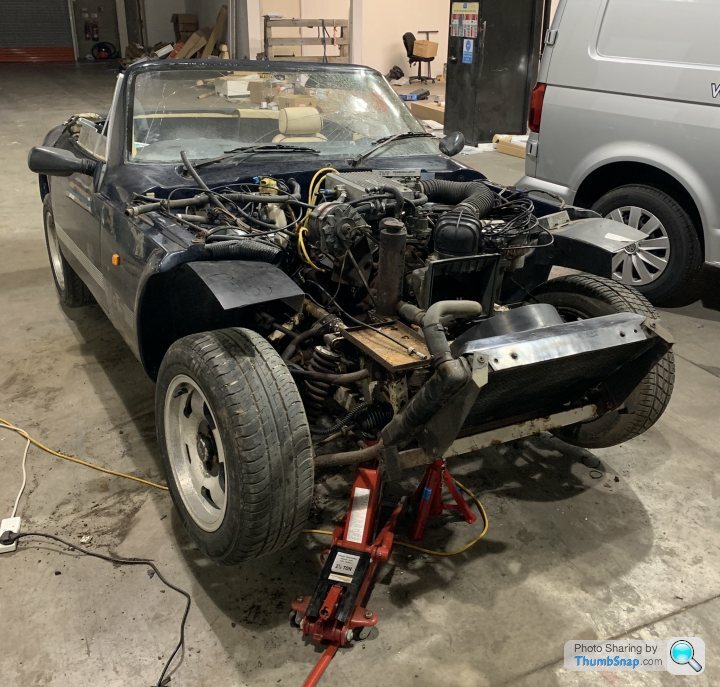
Rad, fuel tank, tank cradle (in good condition) fuel lines and a few other bits off tonight. Running gear to go. Nothing found that I didn’t already know, no sheared bolts or skin removed from knuckles, it’s playing nice at the moment, but I do keep applying the acetone/transmission fluid mix on the bolts well in advance to give them a fighting chance. Everything bagged and labelled and notes/photos taken at every step.
I’m getting there slowly but surely, loving every minute, and it’s easy (so far). Could do with a good clean though, where’s Barry Scott when you need him.
Be off to the shot blasters soon hopefully.

I’m getting there slowly but surely, loving every minute, and it’s easy (so far). Could do with a good clean though, where’s Barry Scott when you need him.
Be off to the shot blasters soon hopefully.
Edited by 88S1 on Wednesday 31st July 08:06
Gassing Station | S Series | Top of Page | What's New | My Stuff