A body off in pictures, LOTS of pictures.
Discussion


Well we all like a good piccy so I thought I would post some.
This job started such a long time ago, for various reasons it has taken far too long.
I have made mistakes and learned some lessons along the way but can now see the light at the end of the tunnel.
When I say lots of pics I mean lots. 32 only takes me to being ready to reassemble and I have really left a lot out.
Please feel free to comment, critique or just call me names and if you get sick of seeing the pics tell me to stop.
But I hope you don't.
Okay, here we go.
It Begins.

2 Yorkshire lads and 1 Engine hoist and it's almost off.
And Breathe!

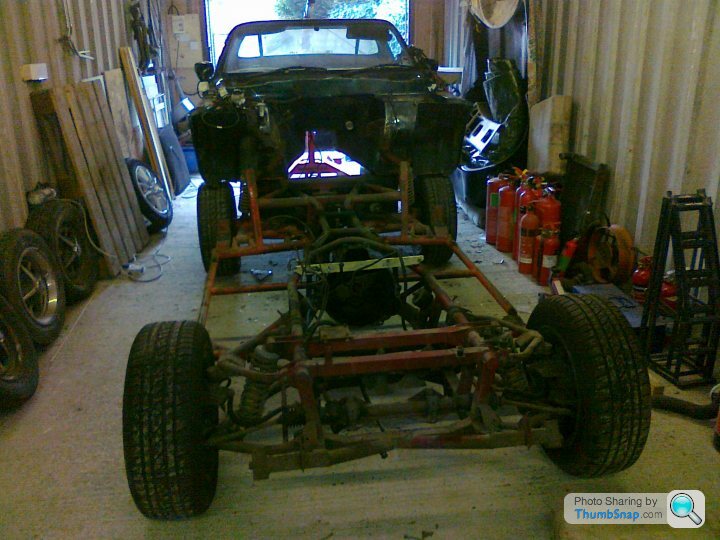
Here's the reason why.
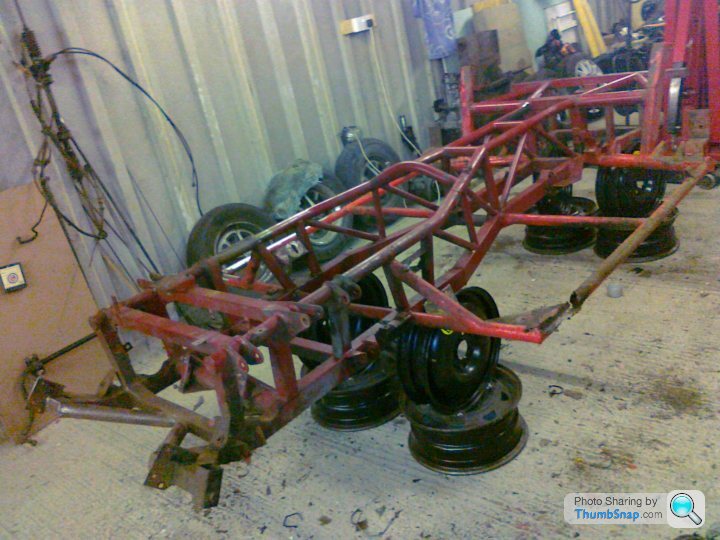
Fully stripped, on the stands and ready for work.
WOW! It seems so quick and easy when I see it as a post on here, if only that were the truth.
More to follow.
Carl.
This job started such a long time ago, for various reasons it has taken far too long.
I have made mistakes and learned some lessons along the way but can now see the light at the end of the tunnel.
When I say lots of pics I mean lots. 32 only takes me to being ready to reassemble and I have really left a lot out.
Please feel free to comment, critique or just call me names and if you get sick of seeing the pics tell me to stop.
But I hope you don't.
Okay, here we go.
It Begins.
2 Yorkshire lads and 1 Engine hoist and it's almost off.
And Breathe!
Here's the reason why.
Fully stripped, on the stands and ready for work.
WOW! It seems so quick and easy when I see it as a post on here, if only that were the truth.
More to follow.
Carl.
1st Lesson.
Initially I decided to clean and prep the chassis myself. MISTAKE!
It's horrible, time consuming and expensive.
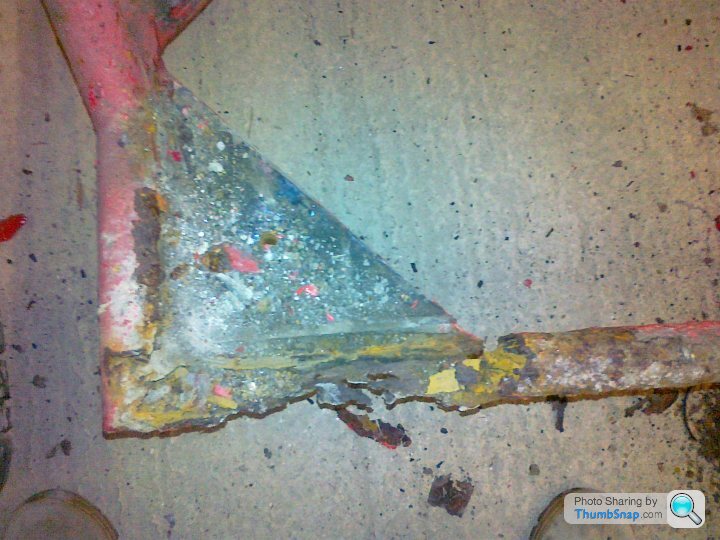
After cleaning all the dirt and grease from the numerous oil leaks, I spent many many hours and well over £100 on sanding discs and belts, wire wheels, wire brushes, rust inhibiter, zinc oxide primer etc.
This is where it got me.


At this point I decided I was wasting my time, lots of time and the result is never going to be as good as having it shot blasted. You just cannot get into all the crooks and nannies like blasting can, plus the blasting gives that lovely key for the new finish.
Fortunately due to all this wasted time I was now in a slightly better position financially so took the decision to cut my losses and have it done.
After a little haggling with a local blaster bloke I got the price for blasting the chassis to £200 which I didn't think was to bad considering how much of a bugger some of that powder coat is to shift.
So there it is, Lesson 1. DON'T WASTE YOUR TIME DIY-ING (word?) THIS STAGE. IT'S A FALSE ECONOMY.
Initially I decided to clean and prep the chassis myself. MISTAKE!
It's horrible, time consuming and expensive.
After cleaning all the dirt and grease from the numerous oil leaks, I spent many many hours and well over £100 on sanding discs and belts, wire wheels, wire brushes, rust inhibiter, zinc oxide primer etc.
This is where it got me.
At this point I decided I was wasting my time, lots of time and the result is never going to be as good as having it shot blasted. You just cannot get into all the crooks and nannies like blasting can, plus the blasting gives that lovely key for the new finish.
Fortunately due to all this wasted time I was now in a slightly better position financially so took the decision to cut my losses and have it done.
After a little haggling with a local blaster bloke I got the price for blasting the chassis to £200 which I didn't think was to bad considering how much of a bugger some of that powder coat is to shift.
So there it is, Lesson 1. DON'T WASTE YOUR TIME DIY-ING (word?) THIS STAGE. IT'S A FALSE ECONOMY.
Having made the decision to have the chassis blasted (as I should have in the first place), I then chose to do the obvious repairs prior to blasting so that the new parts got the same treatment.
Armed with a printout of this diagram, I believe courtesy of Norman (thanks and appologies if incorrect)
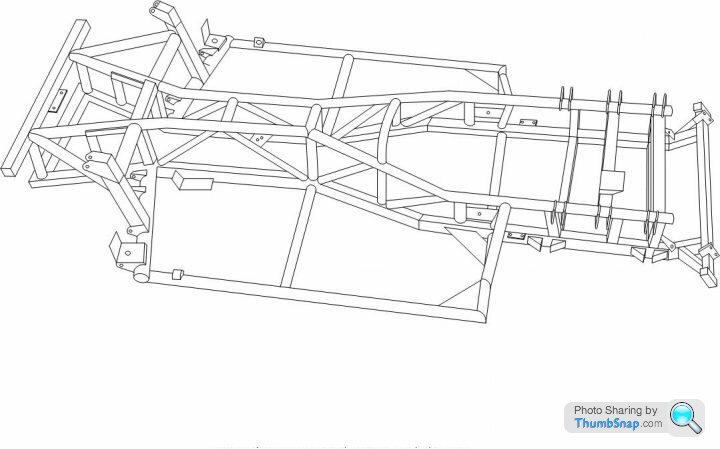
and a measuring tape, off I went to the garage again.
I chose some good datum points, carefully measured the positions of all the bits I was going to cut and marked up the diagram accordingly.
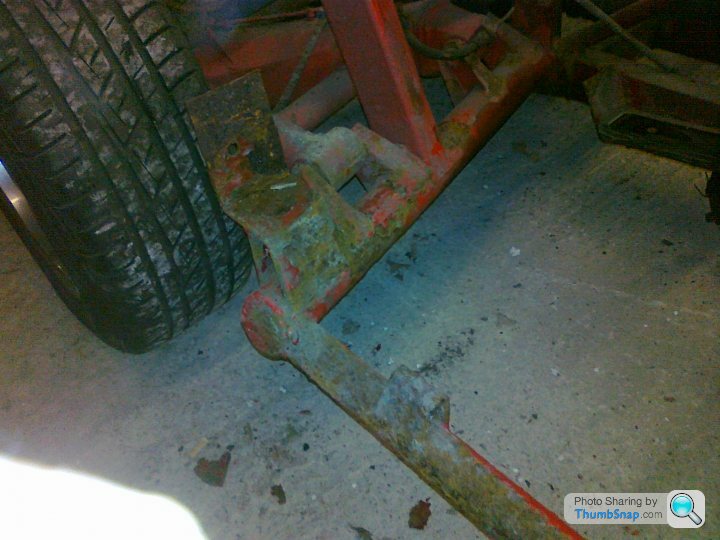
It was now time to begin cutting off all the old grot and rust.
Where tubes were going to be joined they were cut back to good material and drilled at 3 points around the circumference for plug welding the internal sleeves.

The internal sleeves were made from the same material as the outriggers will be. I cut some 6" lengths and then cut down the length with a slitting disc in the angle grinder. This allowed them to be squeezed with vice grips and inserted into the tubes, springing back to a nice tight fit when the grips were released.

These were then plug welded through the holes to ensure that they could not move when the new tubes were fitted.
Guess I had better make some outriggers now, they will be up next.
Carl.
Armed with a printout of this diagram, I believe courtesy of Norman (thanks and appologies if incorrect)
and a measuring tape, off I went to the garage again.
I chose some good datum points, carefully measured the positions of all the bits I was going to cut and marked up the diagram accordingly.
It was now time to begin cutting off all the old grot and rust.
Where tubes were going to be joined they were cut back to good material and drilled at 3 points around the circumference for plug welding the internal sleeves.
The internal sleeves were made from the same material as the outriggers will be. I cut some 6" lengths and then cut down the length with a slitting disc in the angle grinder. This allowed them to be squeezed with vice grips and inserted into the tubes, springing back to a nice tight fit when the grips were released.
These were then plug welded through the holes to ensure that they could not move when the new tubes were fitted.
Guess I had better make some outriggers now, they will be up next.
Carl.
Edited by Ceejay73 on Tuesday 8th September 22:25
Edited by Ceejay73 on Tuesday 8th September 22:30
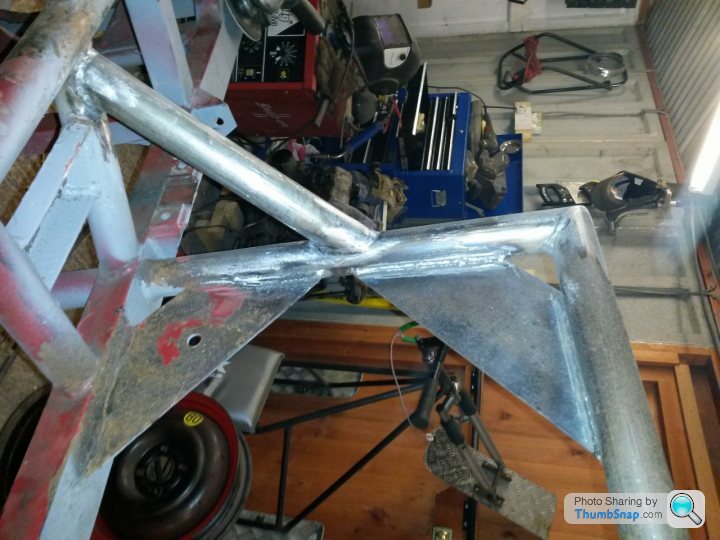
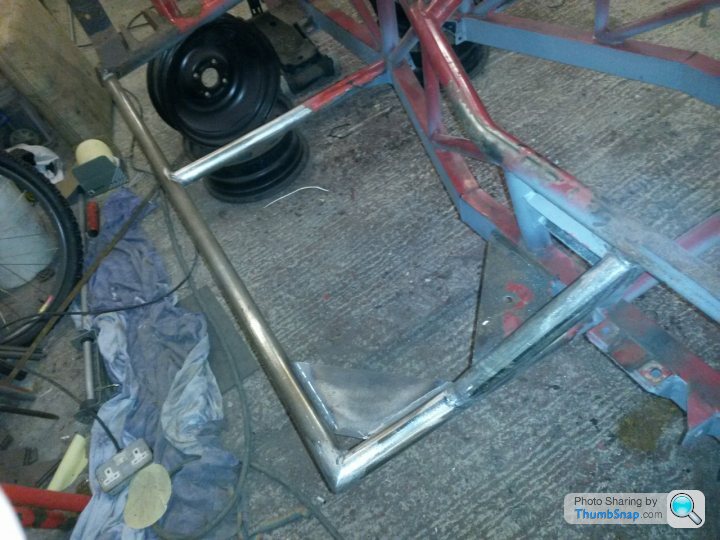
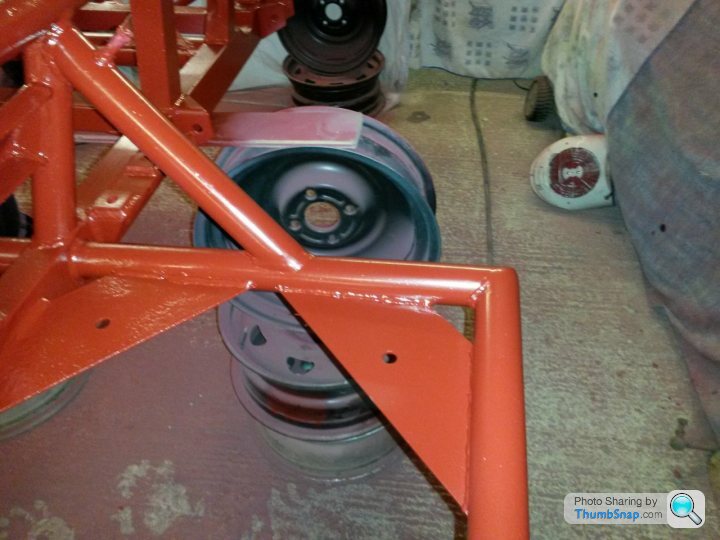
Here we are then, after much careful measuring and cutting, tacking, re-measuring and welding I finally have the bones of one new outrigger.
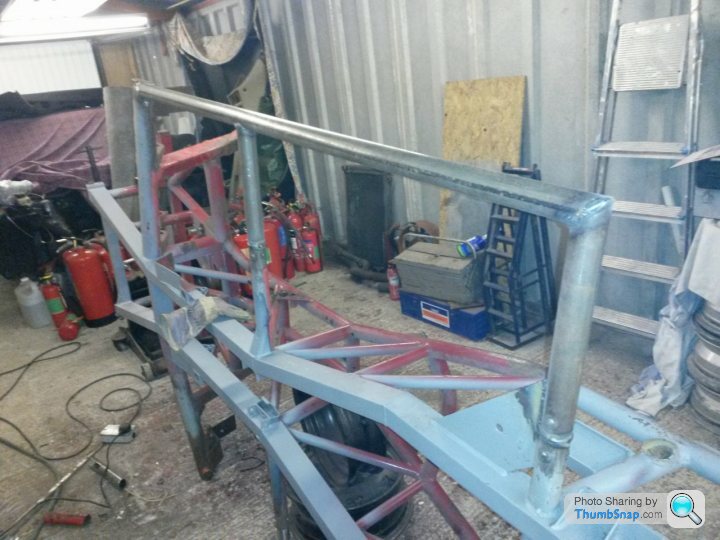
Add a new diagonal brace and body mount plate, fettle the welds and I am left with:
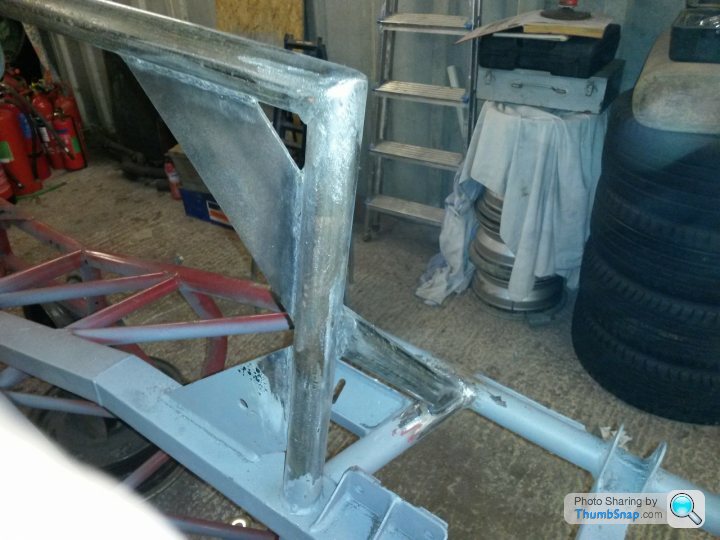
Just needs a seatbelt mount and that ones done! (no pic of that sorry)
Et Voila, here's one much the same but on the other side and with seatbelt mount.
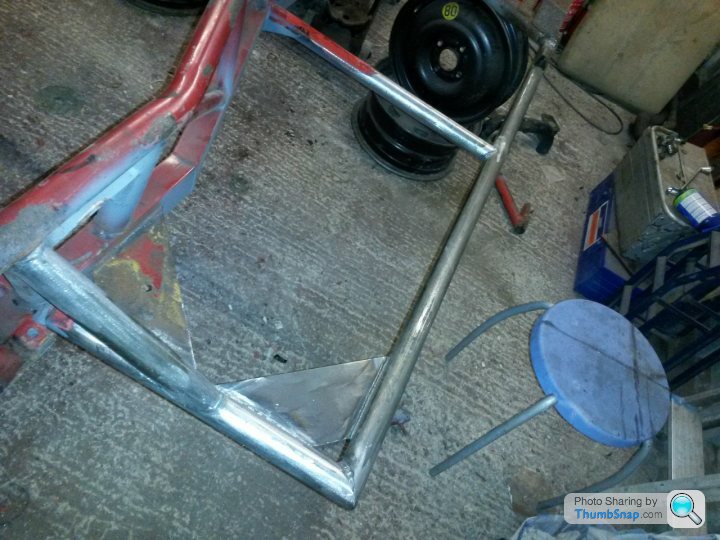
It really did not happen that quickly.
Drill 2 holes in those body mount plates and we are ready for the blaster.
Add a new diagonal brace and body mount plate, fettle the welds and I am left with:
Just needs a seatbelt mount and that ones done! (no pic of that sorry)
Et Voila, here's one much the same but on the other side and with seatbelt mount.
It really did not happen that quickly.
Drill 2 holes in those body mount plates and we are ready for the blaster.

Nice work! you do know you've saved yourself a good £4,000 there right?
I've been quoted by two different company's to lift body off shotblast chassis, recoat it etc (mines not rusting just wanted it with a nice new finish ) both came with a sum over 4k for the full works
I've been quoted by two different company's to lift body off shotblast chassis, recoat it etc (mines not rusting just wanted it with a nice new finish
) both came with a sum over 4k for the full works Edited by greyhulk on Wednesday 9th September 07:07
Thanks for the comments chaps.
On with the next installment.
Chassis is back from the blasters. No nasty surprises uncovered by that process thankfully. Whilst it has been gone I have had a much needed sweep around and sheeted the place up ready for some painting.

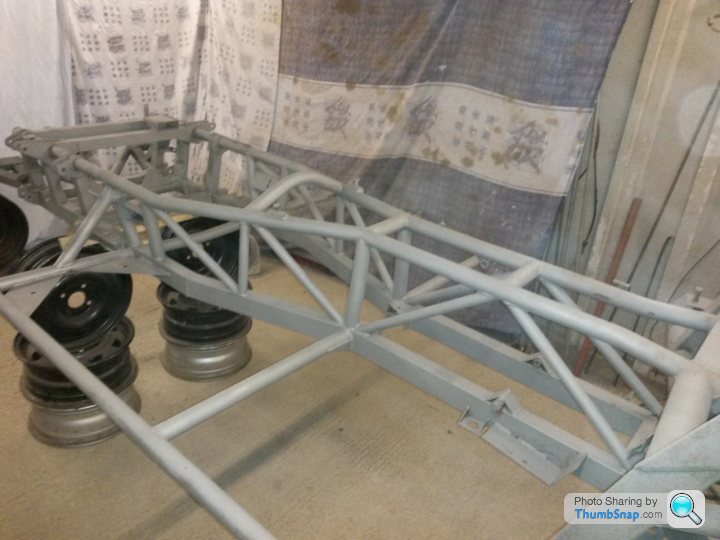
After a good wash down to remove dust from blasting and any residue from handling it's on with 3 coats of 2 pack epoxy primer in a lovely heated garage.
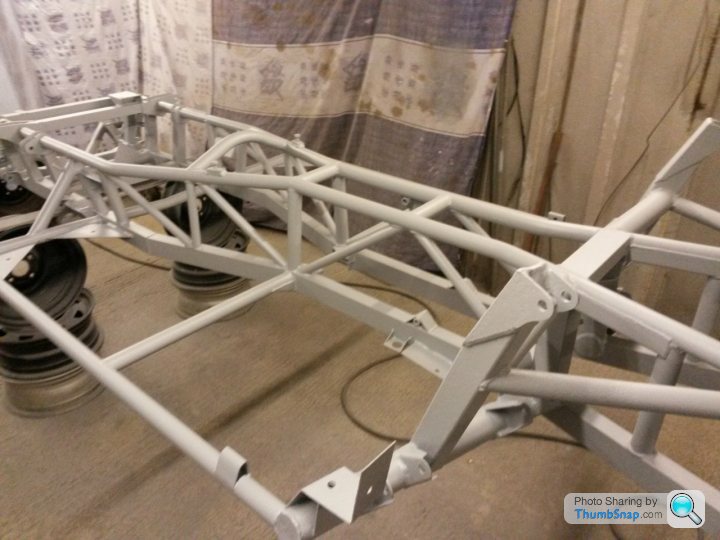
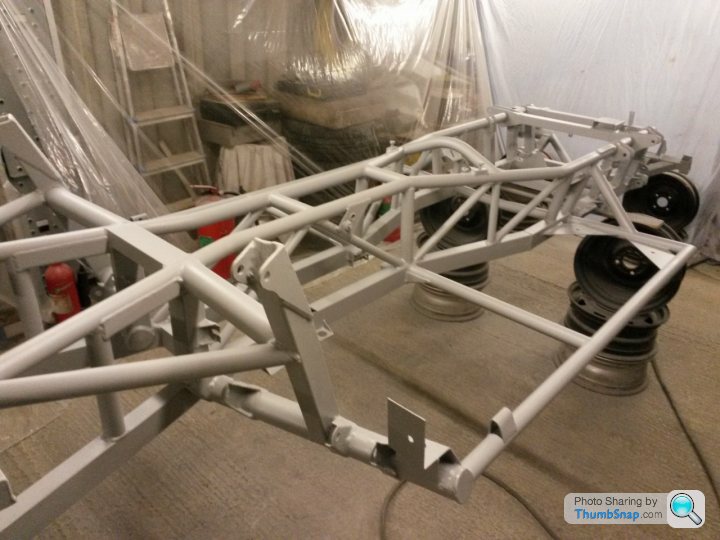
That was left to cure overnight and then it was time for some colour.

Once the air cleared and the paint had dried.
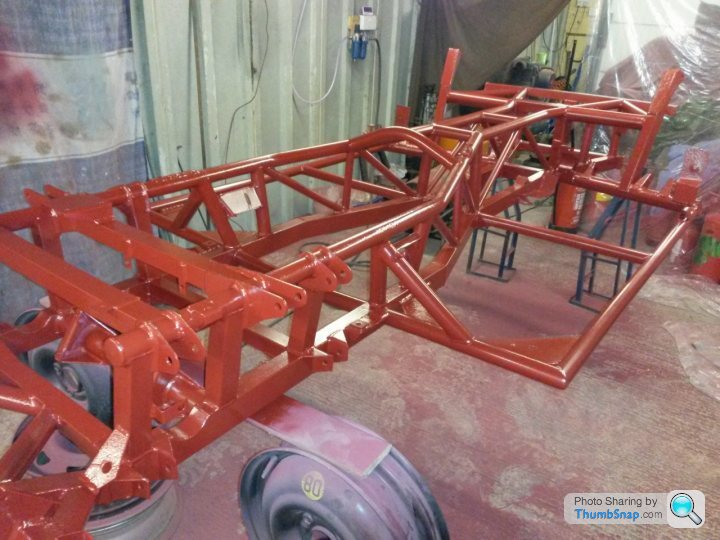
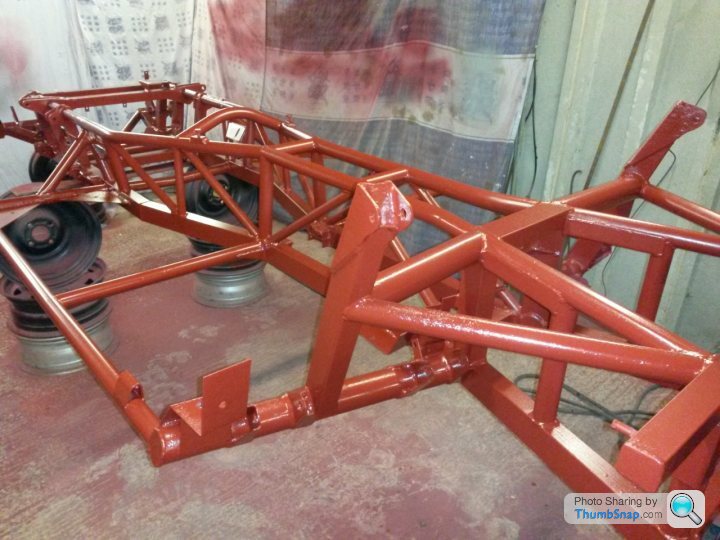
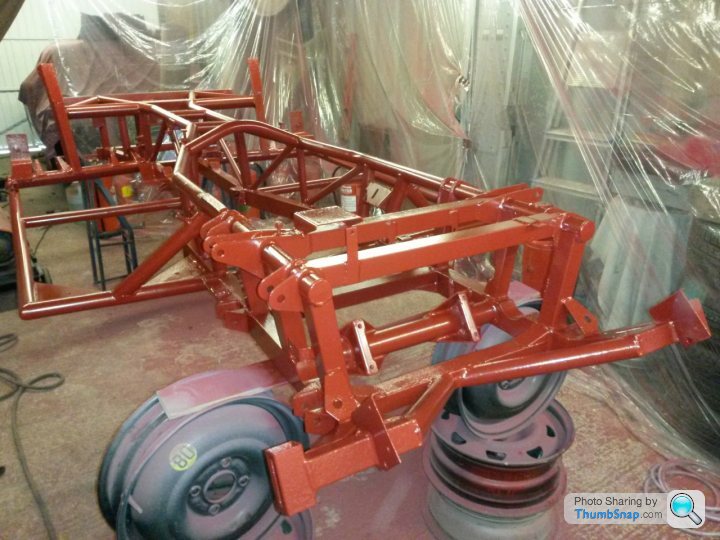
I learned another lesson whilst completing this stage, spray painting a tubular chassis is really not economical. Yes it gives the finish that I wanted but with so little area at which to aim the gun, half of the paint (as can be seen) ends up on the floor as over spray. A brush would have been far more economical but hey ho, live and learn.
On with the next installment.
Chassis is back from the blasters. No nasty surprises uncovered by that process thankfully. Whilst it has been gone I have had a much needed sweep around and sheeted the place up ready for some painting.
After a good wash down to remove dust from blasting and any residue from handling it's on with 3 coats of 2 pack epoxy primer in a lovely heated garage.
That was left to cure overnight and then it was time for some colour.
Once the air cleared and the paint had dried.
I learned another lesson whilst completing this stage, spray painting a tubular chassis is really not economical. Yes it gives the finish that I wanted but with so little area at which to aim the gun, half of the paint (as can be seen) ends up on the floor as over spray. A brush would have been far more economical but hey ho, live and learn.
Thanks for the comments Max but I am no writer. This thread is really here because I read the forum a lot but don't tend to contribute that much and to maybe help/inspire anyone else who is thinking about having a go at it.
To be honest doing one of these cars is far easier than chasing the rot out of an old monocoque steel bodied car.
Carl.
To be honest doing one of these cars is far easier than chasing the rot out of an old monocoque steel bodied car.
Carl.
 Just spent a half hour preparing the next installment, clicked submit, got an error and lost the lot! God damned computers!
Okay, next stage, attempt #2.
More red bits. These were shot blasted at home in a small bench top blasting cabinet, all except the trailing arms which were too large. I took those to an ex employer and used their Guyson blaster.
Unfortunately, by the time these were done, winter was fast approaching. Since cold,
damp conditions are not good for painting and as motivation is scientifically proven to be directly proportional to ambient temperature, nothing much else happened for a while. The freshly blasted parts were coated in oil and packed away for winter.
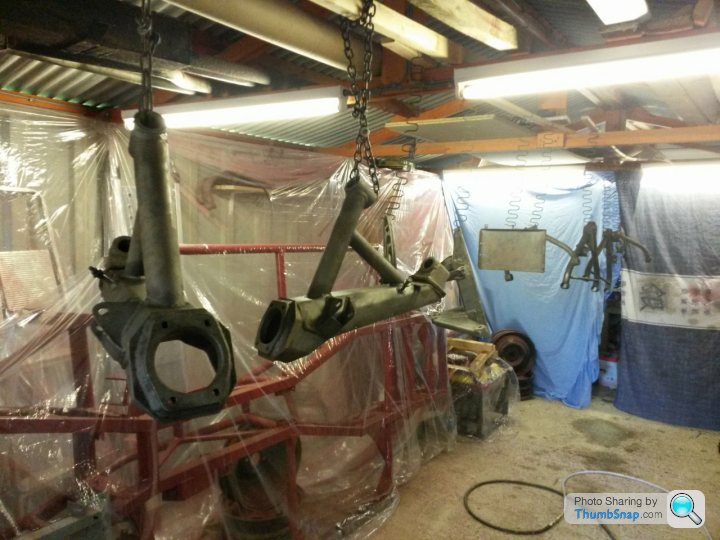
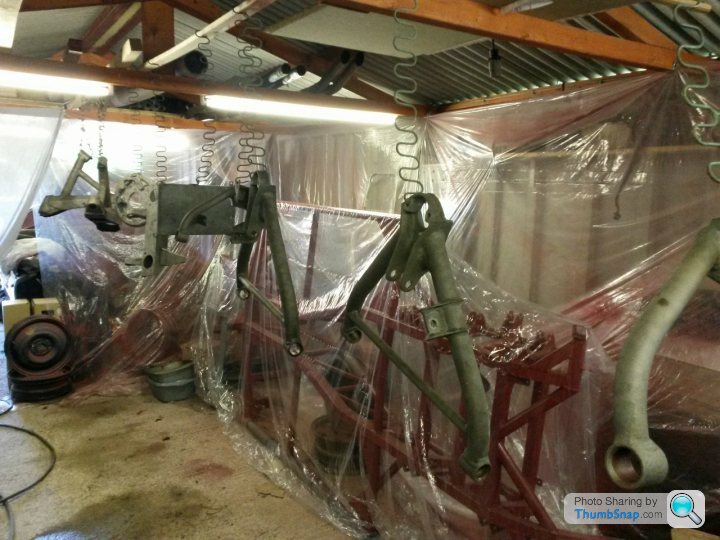
Spring rolls around once again, the chassis is moved out of the way and some parts are hung and washed off.
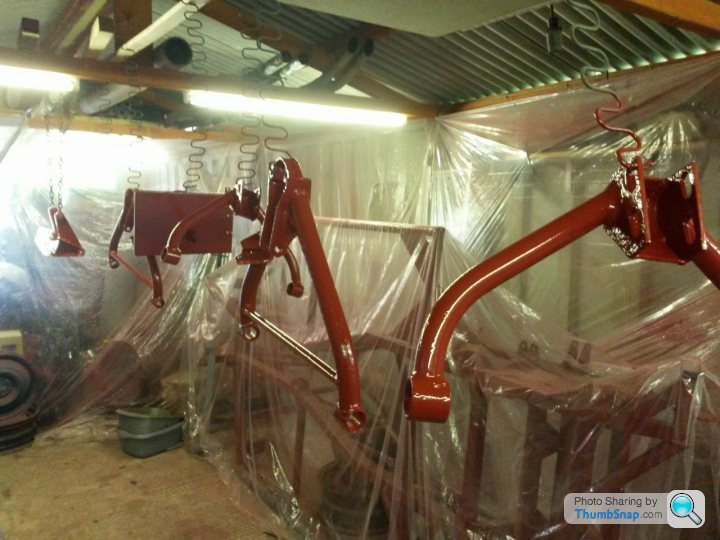
Then given the same treatment as the chassis.
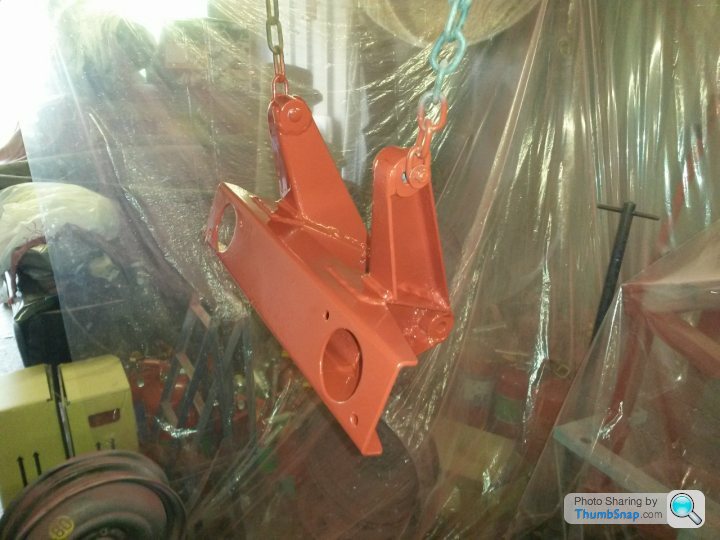
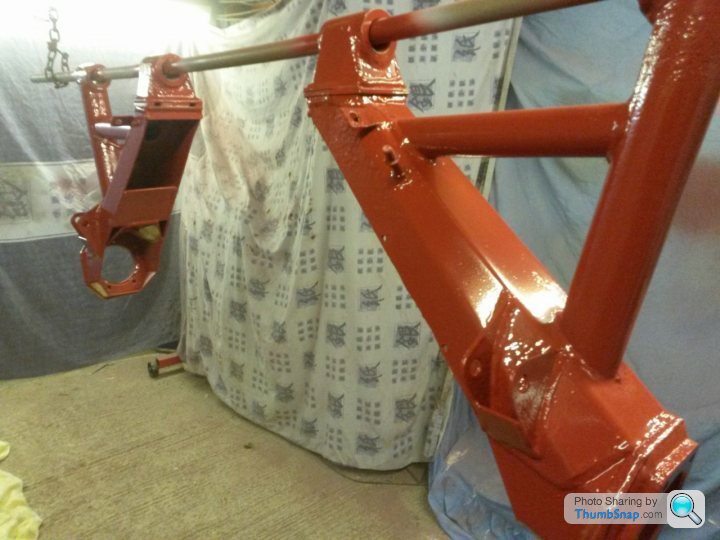
Then onto some black parts for a change, these were brush painted not sprayed. There are obviously more black parts but you get the idea.

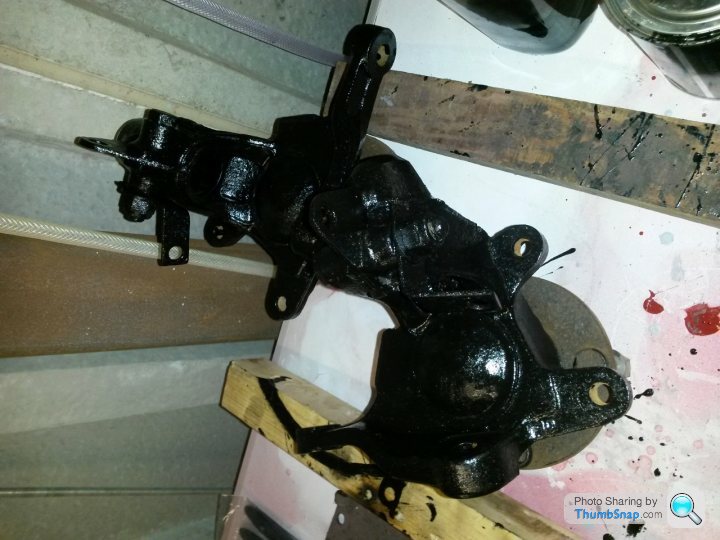
Woohoo! That's most of the painting done, not quite all but enough to be going on with.
More red bits. These were shot blasted at home in a small bench top blasting cabinet, all except the trailing arms which were too large. I took those to an ex employer and used their Guyson blaster.
Unfortunately, by the time these were done, winter was fast approaching. Since cold,
damp conditions are not good for painting and as motivation is scientifically proven to be directly proportional to ambient temperature, nothing much else happened for a while. The freshly blasted parts were coated in oil and packed away for winter.
Spring rolls around once again, the chassis is moved out of the way and some parts are hung and washed off.
Then given the same treatment as the chassis.
Then onto some black parts for a change, these were brush painted not sprayed. There are obviously more black parts but you get the idea.
Woohoo! That's most of the painting done, not quite all but enough to be going on with.
Edited by Ceejay73 on Monday 14th September 17:11
No pictures here but thought I would include the info anyway.
Once all the painted stuff had dried and was moved out of the way it was time to prep the engine for installation. There were some stuff I knew needed doing and plenty of things to check whilst it was out. I knew the engine was basically good with no real bad faults but some niggles i.e. oil leaks and noisy tappets. I may have missed something out but think this is basically the list of tasks carried out.
I started at the bottom, removing the sump to paint and fit a new gasket. Found some damage from previously saggy engine mounts and a crack. The sump was cleaned off and taken to my father to be gas welded, (thanks Dad). I could have MIG welded it but gas welding, if done correctly gives a much neater job, less build, without the need to grind back. Dad did the job as I have neither the equipment nor anywhere near the same skill level as he has. After welding he straightened a couple of dings and dye tested the weld for leaks (there were ofcourse none). When I got it back, all I had to do was paint and refit with a new gasket. Big ends and main bearings were checked for any play but found to be fine, as expected.
Next fitted were front and rear crankshaft oil seals.
All core plugs were replaced.
Valve clearances adjusted. I now KNOW that it has solid lifters after previously not being sure either way.
Rocker covers painted and new gaskets fitted.
Obviously new oil and filter.
Flywheel cleaned and deglased.
New spigot bearing fitted.
Complete new clutch kit fitted
Gearbox got a new tailshaft oil seal, a new clutch slave cylinder was fitted and the clutch actuator rod refurbished.
Once that little lot was done I could finally think about re-assembly.
Gassing Station | S Series | Top of Page | What's New | My Stuff