Discussion


The only thing left to do before lifting the body off the chassis is to undo the bolts, everything else has gone well except for snapping the end off one of the threaded bars that support the cooling fan assemble and - what in the name did TVR use to seal around the fuel tank neck – ended up having to cut the short length of hose into pieces to free the tank from the body so will be along later looking for info on a supplier for a replacement.
I digress, has anyone hoisted their body off instead of lifting it, I’ve seen a couple of bodies sling from straps for storage purposes but I would be interested to know if hoisting is an option as I’ve got good space and call on something to lift it off.
Cheers
Nigel
I digress, has anyone hoisted their body off instead of lifting it, I’ve seen a couple of bodies sling from straps for storage purposes but I would be interested to know if hoisting is an option as I’ve got good space and call on something to lift it off.
Cheers
Nigel
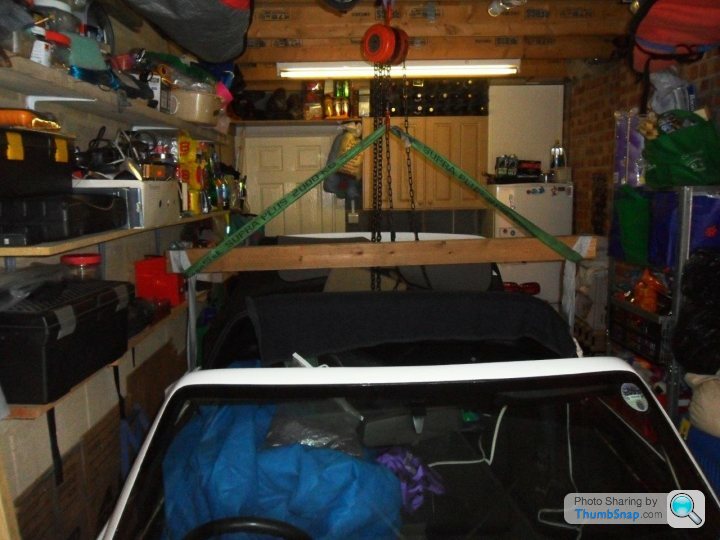
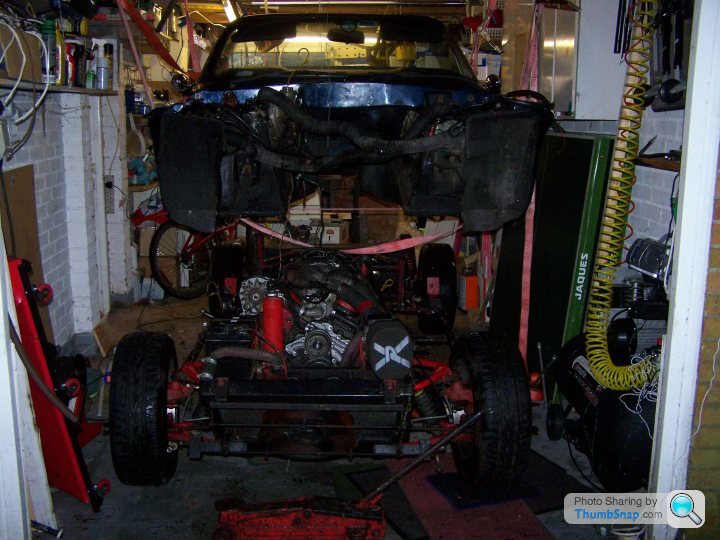
Yes I did this after seeing 'Barkychoc' do his the same way. I used 4 loops of chain bolted to the garage rafters as close to the walls as possible (single garage). I then used 4 heavy duty ratchet straps, 2 threaded under the body above the diff and 2 just behind the front wheels threaded across the chassis. You need 2 at each end to allow ease of movement. Body needs jacking to thread the straps through. Once in position I lifted (and replaced) the body single handedly in my own time with no stress at all (unlike a friends S3 where 4 of us lifted the body with much shouting and potentially pulled backs.Works really well, just carefully think it all out. I then rebuilt my chassis underneath the body which was slung up high in the garage roof. Alternatively chassis can be wheeled out for work if appropriate. I've got some pictures somewhere if interested. Andy
White S3 said:
Nigel,
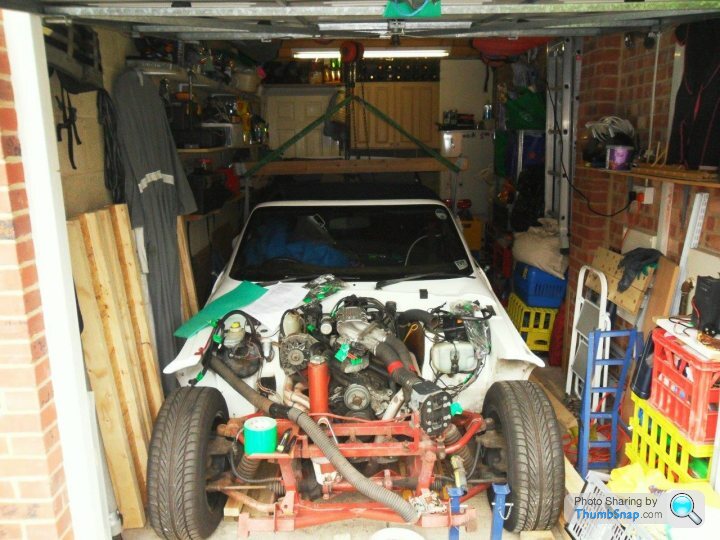
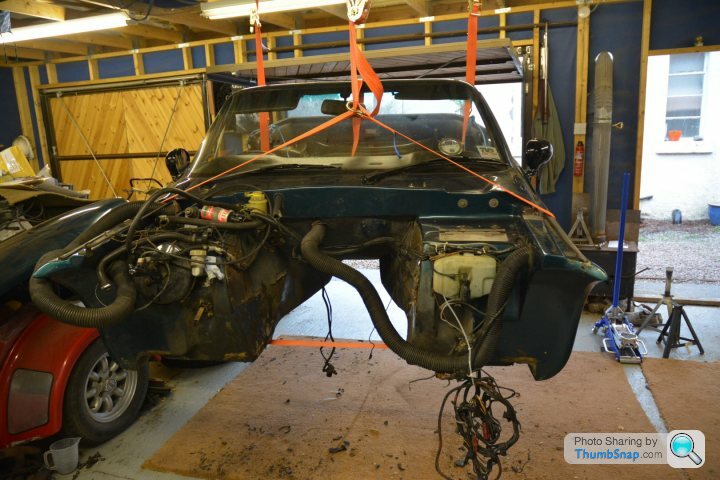
Yes, chain hoist to the garage rafter (beefed one of them up before doing it), round sling through the rear wheel arches having jacked the body off the subframe by approx 5cm to fix to a spreader bar above the car so as not to put too much pressure on the wheel arches and then second round sling to the chain hoist
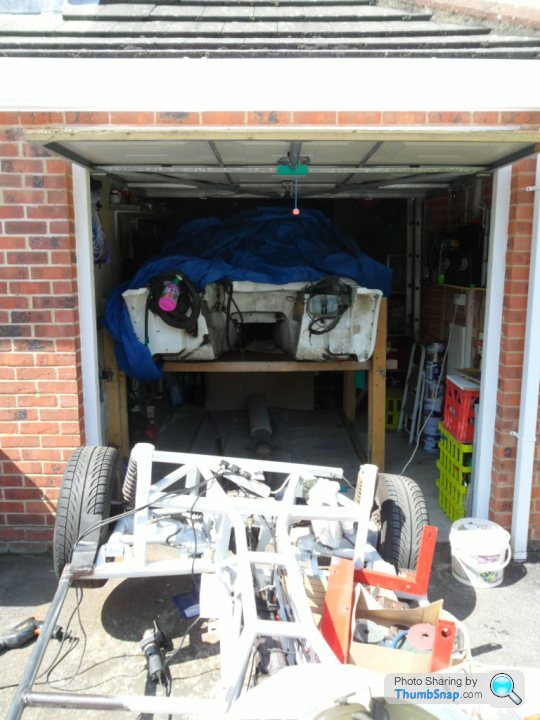
I then built a frame to lower the body onto to allow the chassis to be rolled out and into the garage while I rebuilt it.
I could have used slings looped over the front end to assist with the lift but the body needs to come off at quite an angle but I found that a little mechanics and brute force I could lift the front end and hoist on my own - it would have been easier with 2 people though. If I do it a second time I will change the garage door to allow a second chain hoist for the front end!
PM me if you want more info
MarkV
Yes, chain hoist to the garage rafter (beefed one of them up before doing it), round sling through the rear wheel arches having jacked the body off the subframe by approx 5cm to fix to a spreader bar above the car so as not to put too much pressure on the wheel arches and then second round sling to the chain hoist
I then built a frame to lower the body onto to allow the chassis to be rolled out and into the garage while I rebuilt it.
I could have used slings looped over the front end to assist with the lift but the body needs to come off at quite an angle but I found that a little mechanics and brute force I could lift the front end and hoist on my own - it would have been easier with 2 people though. If I do it a second time I will change the garage door to allow a second chain hoist for the front end!
PM me if you want more info
MarkV
Edited by White S3 on Tuesday 1st October 08:24
Andy, Mark
Thanks for the information, and pictures, very useful and a big hand to Mark, there wasn’t much space in the garage. Andy if you’ve any photos I’d like to see the setup you used to lift the front did you pass the straps from one side to the other or did you lift side independently and where are the safest points to jack-up the body to get the straps through.
Nigel
I (we) lifted mine by manpower, which has the advantage of being able to feel any resistance before anything gets broken - eg hidden mounting bolts not undone. On the V8 (not sure about V6) the rear of body has to be lifted and the chassis moved forward as the engine bay sits underneath the engine, preventing a vertical lift,sort of 'shoe in/out' affair.
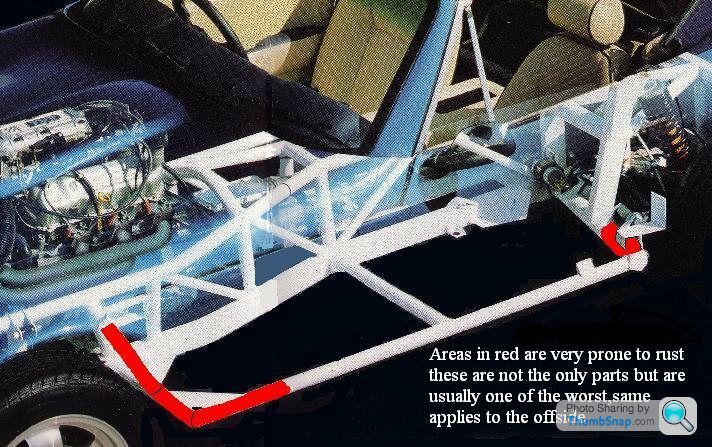
this thread (near the bottom) contains a diagram I made of the bolt locations
Steve
this thread (near the bottom) contains a diagram I made of the bolt locations
Steve
Edited by seb400 on Wednesday 2nd October 16:32
Edited by seb400 on Wednesday 2nd October 16:33
Being able to "feel" the resistance does help - I ended up ripping out the 2 vertical rear bolts that hide underneath the seat belt reels as I chain hoisted the body off. Fortunately the GRP is very thin there and other than a neat penny washer size hole to re-glass repair was easy.
The S3 body also has to come off at an angle of approx. 45deg rear end up to allow the front to clear the tubes around the engine. Enjoy.
The S3 body also has to come off at an angle of approx. 45deg rear end up to allow the front to clear the tubes around the engine. Enjoy.
Once everything is disconnected and all the body bolts are undone, I used 2 trolley jacks. I lifted the back end first a few inches very carefully whilst listening for cracking noises (the boot support strut mounting is often overlooked). I placed wooden bearers above the jacks and lifted the body using the floor. It lifts very easily. I then slipped the first 2 ratchet straps under the body above the diff and then ratcheted them up to take the weight off the jacks. I then moved the jacks to the front under the foot-wells and did the same. As others have mentioned you need to move the chassis forward a bit to clear the chassis rails as you jack. After a few inches the front ratchet straps can be put in place above the gear box. Again the straps are tightened and then the jacks can be removed, Its then a case of tightening the straps to raise the body bit by bit. The front straps were midway between the front of the doors and the back of the front wheel arch. The body needs to be lifted with the boot end highest until it is clear of the chassis rails. The angle is quite steep from memory (circa 30 degrees) I lifted the body right into the garage roof so I could work underneath it without too much head banging lol.
Work and family commitments have slow progress but managed to move things on over the weekend. All bolts have been removed, however having read a number of post and individual websites there’s mention of two additional bolts below the rear seatbelt tensioners [the ones bolted through to the rear wheel arch]. I can’t locate these nor see anything from below – what do these bold fix/secure into?
Nigel
Nigel
I also lifted the body off with strops, but one area that did have me puzzled for a while, the body doesn't lift straight off vertically, mine catches on the chassis in the tunnel, although it looks as thought it will.
You have to lift the back so high it will move forward a couple of inches to clear the front of the chassis tunnel then will lift straight up
Hope this helps
You have to lift the back so high it will move forward a couple of inches to clear the front of the chassis tunnel then will lift straight up
Hope this helps

Jonesy07 said:
there’s mention of two additional bolts below the rear seatbelt tensioners [the ones bolted through to the rear wheel arch]. I can’t locate these nor see anything from below – what do these bold fix/secure into?
Nigel
This is a nice drawing but I think it's a Nigel

there
But there are two in the boot

Edited by phillpot on Tuesday 6th May 21:07
Hi Phillpot,
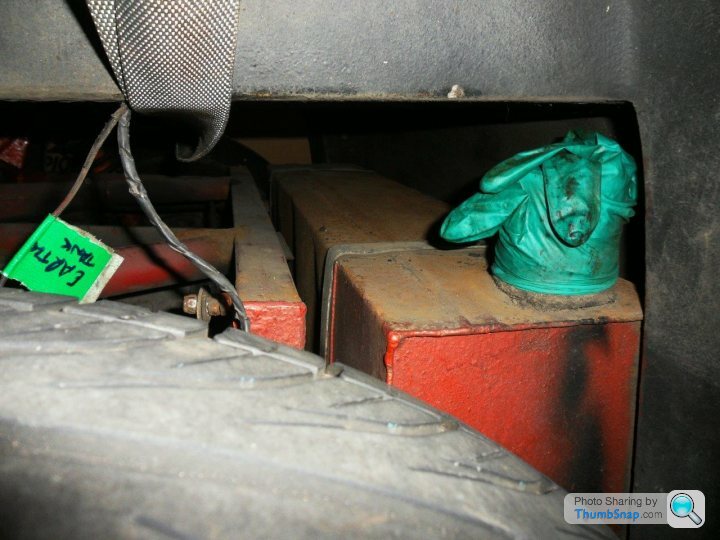
the drawing is accurate. That's where the bolts were when I removed them from my car (the only one I can vouch for), I suppose it would be a surprise if other cars weren't different! Just been out to check, it screws into a captive nut welded to bottom of seat-belt mounting bracket, in addition to the horizontal one that's visible inside wheel arch.
photo showing weld nut it goes into
Also checked the original chassis before the work started, exactly the same. Only one bolt in my boot!
Steve
Edited by seb400 on Tuesday 6th May 19:29
Edited by seb400 on Tuesday 6th May 19:31
Just to say - all this info is awesome, keep it coming!! I spent some time on the car this weekend (at long last). I've got the seats (what's left of them) out, hood removed, carpet removed and what's left of the boot carpet removed. Didn't get round to taking any pictures yet, but I will.
Next job is to get all the electrics disconnected and labelled up, then tackle the fixings - I have a feeling angle grinders and drills will be required for the seat belt bolts - worryingly there isn't much left apart from rust of the heads!!
I'm thinking of using a similar technique to lift the body from the car using the garage rafters and a system of pulleys (despite many very generous offers from people on here to come to a body lift party)!! I just need to check there is enough room to manoeuvre the bottom bit to lift the body off. What distance would you say the chassis needs to role forward during the lift? IE how much clearance to the garage bench to avoid me having to drop everything back down and re-position my winches…!!!
Andrew
Hi Andrew
the tricky bit is getting the rear of the body high enough to clear the rear suspension mounts, before lifting body backward (rolling chassis forward in your case I guess) and up to slip the body work out from under the engine. Motion like taking a shoe off.
We lifted the rear of body enough to get a 6ft length of 4x2" under the rear wheel arches, one person each side. I seem to remember the two people lifting the 4x2" had to raise it to about nose height 4 or 5ft to get clearance!
btw you can't see the bolts in question from below as they're hidden (see previous post for image of chassis). I've just been and lifted the carpet (little ear/flap glued horizontally underneath the inertia reel). I've got a photo of the head of the bolt in question if needed.
here's a short video of putting body back on, showing sort clearance height needed
Steve
Edited by seb400 on Tuesday 6th May 20:50
seb400 said:
Hi Phillpot,
the drawing is accurate.
My apologies for doubting you! (post edited) the drawing is accurate.
Maybe an improvement for the V8?
But surely two in the boot, apart from holding the body on they go through to also retain the "finishing trim" ?
Edited by phillpot on Tuesday 6th May 20:59
phillpot said:
My apologies for doubting you! (post edited)
Maybe an improvement for the V8?
But surely two in the boot, apart from holding the body on they go through to also retain the "finishing trim" ?
There are two bolts but only one through the floor of the boot. Maybe an improvement for the V8?
But surely two in the boot, apart from holding the body on they go through to also retain the "finishing trim" ?
Edited by phillpot on Tuesday 6th May 20:59
Gassing Station | S Series | Top of Page | What's New | My Stuff