
Post Production: your before, after, or in progresses
Discussion


Hello, after looking at the How is this done ?? thread, I thought it would be great to see some of the PH members work to see how they go about things. We all could probably learn a thing or two, from tools used, to tricks in photoshop/processing software.
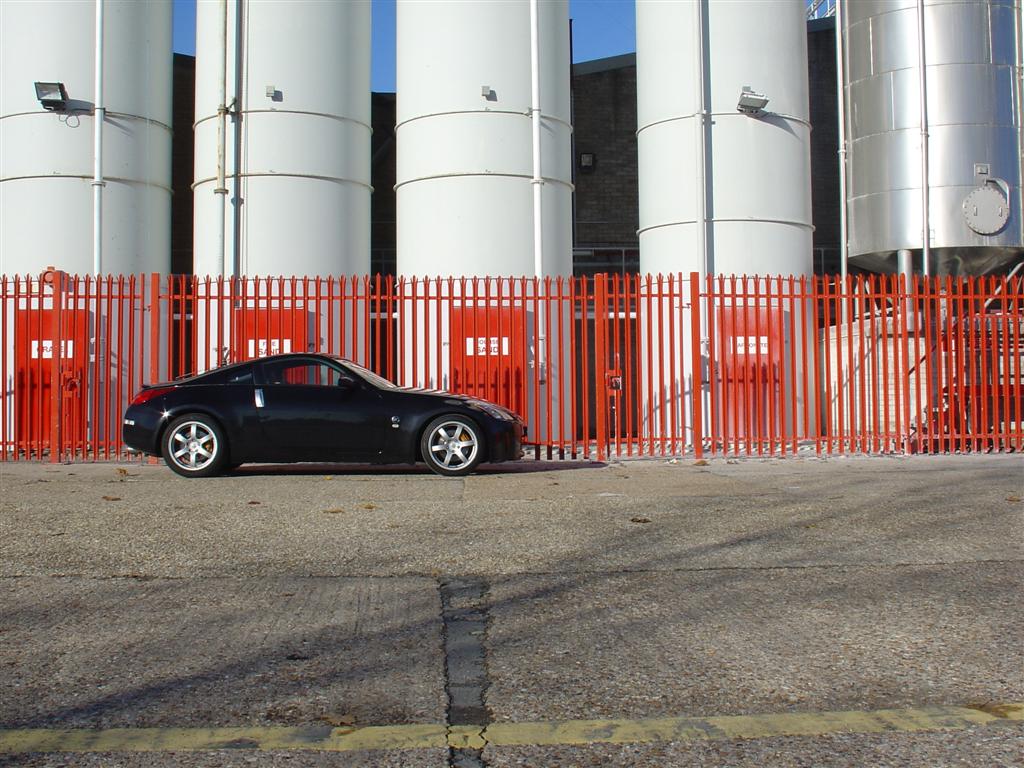
Anyhow, I thought I would start one of my shots from last night, still not finished as yet (mainly the ground, some body panels/reflections).
Original shot, no pp except removing number plate:

And after 1 hour work:

Mainly used the Clone Stamp, Smudge, and Selective Color tools in photoshop CS4. Also use a Wacom which helps a lot.
Looking forward to seeing your work!
Neil.
Anyhow, I thought I would start one of my shots from last night, still not finished as yet (mainly the ground, some body panels/reflections).
Original shot, no pp except removing number plate:
And after 1 hour work:
Mainly used the Clone Stamp, Smudge, and Selective Color tools in photoshop CS4. Also use a Wacom which helps a lot.
Looking forward to seeing your work!
Neil.


This is about as extreme as I could find. A pretty rubbish photo (taken at full stretch on a 300mm), improved considerably (IMHO) by PP.

Crop, add lots of highlight / shadow (not brightness / contrast), clone out foreground, add a bit of saturation, unsharp mask.

eta they are 970 wide so click through to unsquish
Crop, add lots of highlight / shadow (not brightness / contrast), clone out foreground, add a bit of saturation, unsharp mask.
eta they are 970 wide so click through to unsquish
Edited by GetCarter on Saturday 16th May 08:58
Fairly simple on this...
Remove post
Desaturate ground, black parts of car & wheels
Lighten up car
Darken sky using multiple adjustment layers

Another, but slightly more complicated including the layers so you can see what's done.
I turned the exposure down a fair bit when importing the photo into PS, this is to reduce the reflections and why it looks really dark here:

I'll try and explain what I did another time but I'm off now for the weekend (stag do).
Remove post
Desaturate ground, black parts of car & wheels
Lighten up car
Darken sky using multiple adjustment layers
Another, but slightly more complicated including the layers so you can see what's done.
I turned the exposure down a fair bit when importing the photo into PS, this is to reduce the reflections and why it looks really dark here:
I'll try and explain what I did another time but I'm off now for the weekend (stag do).
4hero said:
This is a humour-free post John, your photoshop talents are crap 
Oh dear, everybody needs room for humour you know. I have no photoshopped photos of cars, and for a reason.Edited to remove retaliatory insult due to realising this is only a forum and he's not worth it.
Edited by Simpo Two on Saturday 16th May 10:05
Edited by Simpo Two on Saturday 16th May 10:06
Simpo Two said:
4hero said:
This is a humour-free post John, your photoshop talents are crap
Oh dear, everybody needs room for humour you know. I have no photoshopped photos of cars, and for a reason.Edited to remove retaliatory insult due to realising this is only a forum and he's not worth it.
Edited by Simpo Two on Saturday 16th May 10:05
Edited by Simpo Two on Saturday 16th May 10:06
I'd like to see some of your before and afters though. Unless you get it right in the shot, in which case I don't as its bad enough not being that good with the camera without someone reminding you of it with their awesomeness!!
Here is a portrait one if thats ok
This is the start. Happy enough with the lighting as there is a good range, light was provided from the right of shot by a single flash aimed at 90 degrees but about a foot or so in front of where the model stood. On the left of shot is a mirror we found which provided a little bounce back:

Next was to adjust the hue to a setting I prefer. I find canon shift to the red too much for all shots and tend to find moving to between 8 and 14 (in DPP) gets a nicer balance. I also increased the exposure buy +0.33 and the contrast by 2

Now I have the image balanced as I want it, next is to attack the curves to increas the dark and highlight range contrast

Which leaves me with this:

As I personally prefer monochrome the next step was to convert to monochrome. Its important to use the monchrome settings rather than just desaturate as its a different process that is applied. The colour profile was changed to Monochrome

then used the following settings:

This will give a traditional bw, you can see that the filter effect was set to green. When shooting bw on film you can use filters in front of the lense that when shooting film block out or adjust the light hitting the film. Here I used a green filter which increases the dark tones and contrast. I set the effect to sepia to give a warmer feel

To reduce the effect of the Sepia I then adjusted the saturation to a level where it was still visible but more subtle for the final result:

eta this was all done using Digital Photo Professional 3.5 which ships free with all Canon cameras. The shot was taken in RAW which enables the flexibility to be explored. WB was set in camera to flash, flash was triggered with an ST-E2, flash was on manual at about 1/8. Shot was set in manual mode f8 and 1/30th - using manual enabled more control over lighting
eta2 - time taken about 5 minutes tops.
This is the start. Happy enough with the lighting as there is a good range, light was provided from the right of shot by a single flash aimed at 90 degrees but about a foot or so in front of where the model stood. On the left of shot is a mirror we found which provided a little bounce back:
Next was to adjust the hue to a setting I prefer. I find canon shift to the red too much for all shots and tend to find moving to between 8 and 14 (in DPP) gets a nicer balance. I also increased the exposure buy +0.33 and the contrast by 2
Now I have the image balanced as I want it, next is to attack the curves to increas the dark and highlight range contrast
Which leaves me with this:
As I personally prefer monochrome the next step was to convert to monochrome. Its important to use the monchrome settings rather than just desaturate as its a different process that is applied. The colour profile was changed to Monochrome
then used the following settings:
This will give a traditional bw, you can see that the filter effect was set to green. When shooting bw on film you can use filters in front of the lense that when shooting film block out or adjust the light hitting the film. Here I used a green filter which increases the dark tones and contrast. I set the effect to sepia to give a warmer feel
To reduce the effect of the Sepia I then adjusted the saturation to a level where it was still visible but more subtle for the final result:
eta this was all done using Digital Photo Professional 3.5 which ships free with all Canon cameras. The shot was taken in RAW which enables the flexibility to be explored. WB was set in camera to flash, flash was triggered with an ST-E2, flash was on manual at about 1/8. Shot was set in manual mode f8 and 1/30th - using manual enabled more control over lighting
eta2 - time taken about 5 minutes tops.
Edited by stigmundfreud on Saturday 16th May 11:34
Mr_annie_vxr said:
Simpo Two said:
4hero said:
This is a humour-free post John, your photoshop talents are crap
Oh dear, everybody needs room for humour you know. I have no photoshopped photos of cars, and for a reason.Edited to remove retaliatory insult due to realising this is only a forum and he's not worth it.
Edited by Simpo Two on Saturday 16th May 10:05
Edited by Simpo Two on Saturday 16th May 10:06
I'd like to see some of your before and afters though. Unless you get it right in the shot, in which case I don't as its bad enough not being that good with the camera without someone reminding you of it with their awesomeness!!

Nice work so far Steve and Dean. Steve, looking at the first shot of yours, it's an ok shot, but what a difference a few tweaks make!
I only have the one shot I've worked on really as I've not taken any WOW shots I've wanted to work on (other than levels and curves). The shot I did was a few years ago and I went a little OTT 
The original shot was pretty poor, taken with a point and shoot.
which turned into

It seems you can polish a turd afterall...
If i can find the PSD i'll post it.
The original shot was pretty poor, taken with a point and shoot.
which turned into
It seems you can polish a turd afterall...
If i can find the PSD i'll post it.
Edited by jon- on Saturday 16th May 11:43
 )
)

stigmundfreud said:
btw the guy is a farrier (whever the spelling is) and his arms are through work but his abs were from the regular use of a slendertone... next on my purchase list 
I don't have anything against this guy, honest, but he doesn't have well developed abs. He has what pretty much anyone who does a manual job would have if their bodyfat was low enough.I'm afraid you're going to have to get down the gym to look like that. Save your money and put it towards a set of PT-01s

For anyone who's interested, here's the last couple of threads on this:
http://www.pistonheads.com/gassing/topic.asp?h=0&a...
http://www.pistonheads.com/gassing/topic.asp?h=0&a...
http://www.pistonheads.com/gassing/topic.asp?h=0&a...
http://www.pistonheads.com/gassing/topic.asp?h=0&a...
Gassing Station | Photography & Video | Top of Page | What's New | My Stuff